
Routes: provide driving routes for your clients
✅ For Travel Companies
Routes let your clients reach a destination (or several) when the exact path isn’t important, while still highlighting must-see stops along the way.
In this article:
Introduction to Routes
Best for reaching one or more destinations when the path being taken is not important.
We generally recommend GPX tracks for detailed navigation as Routes offer limited turn-by-turn instructions on shorter and more simple routes (up to 27 waypoints).
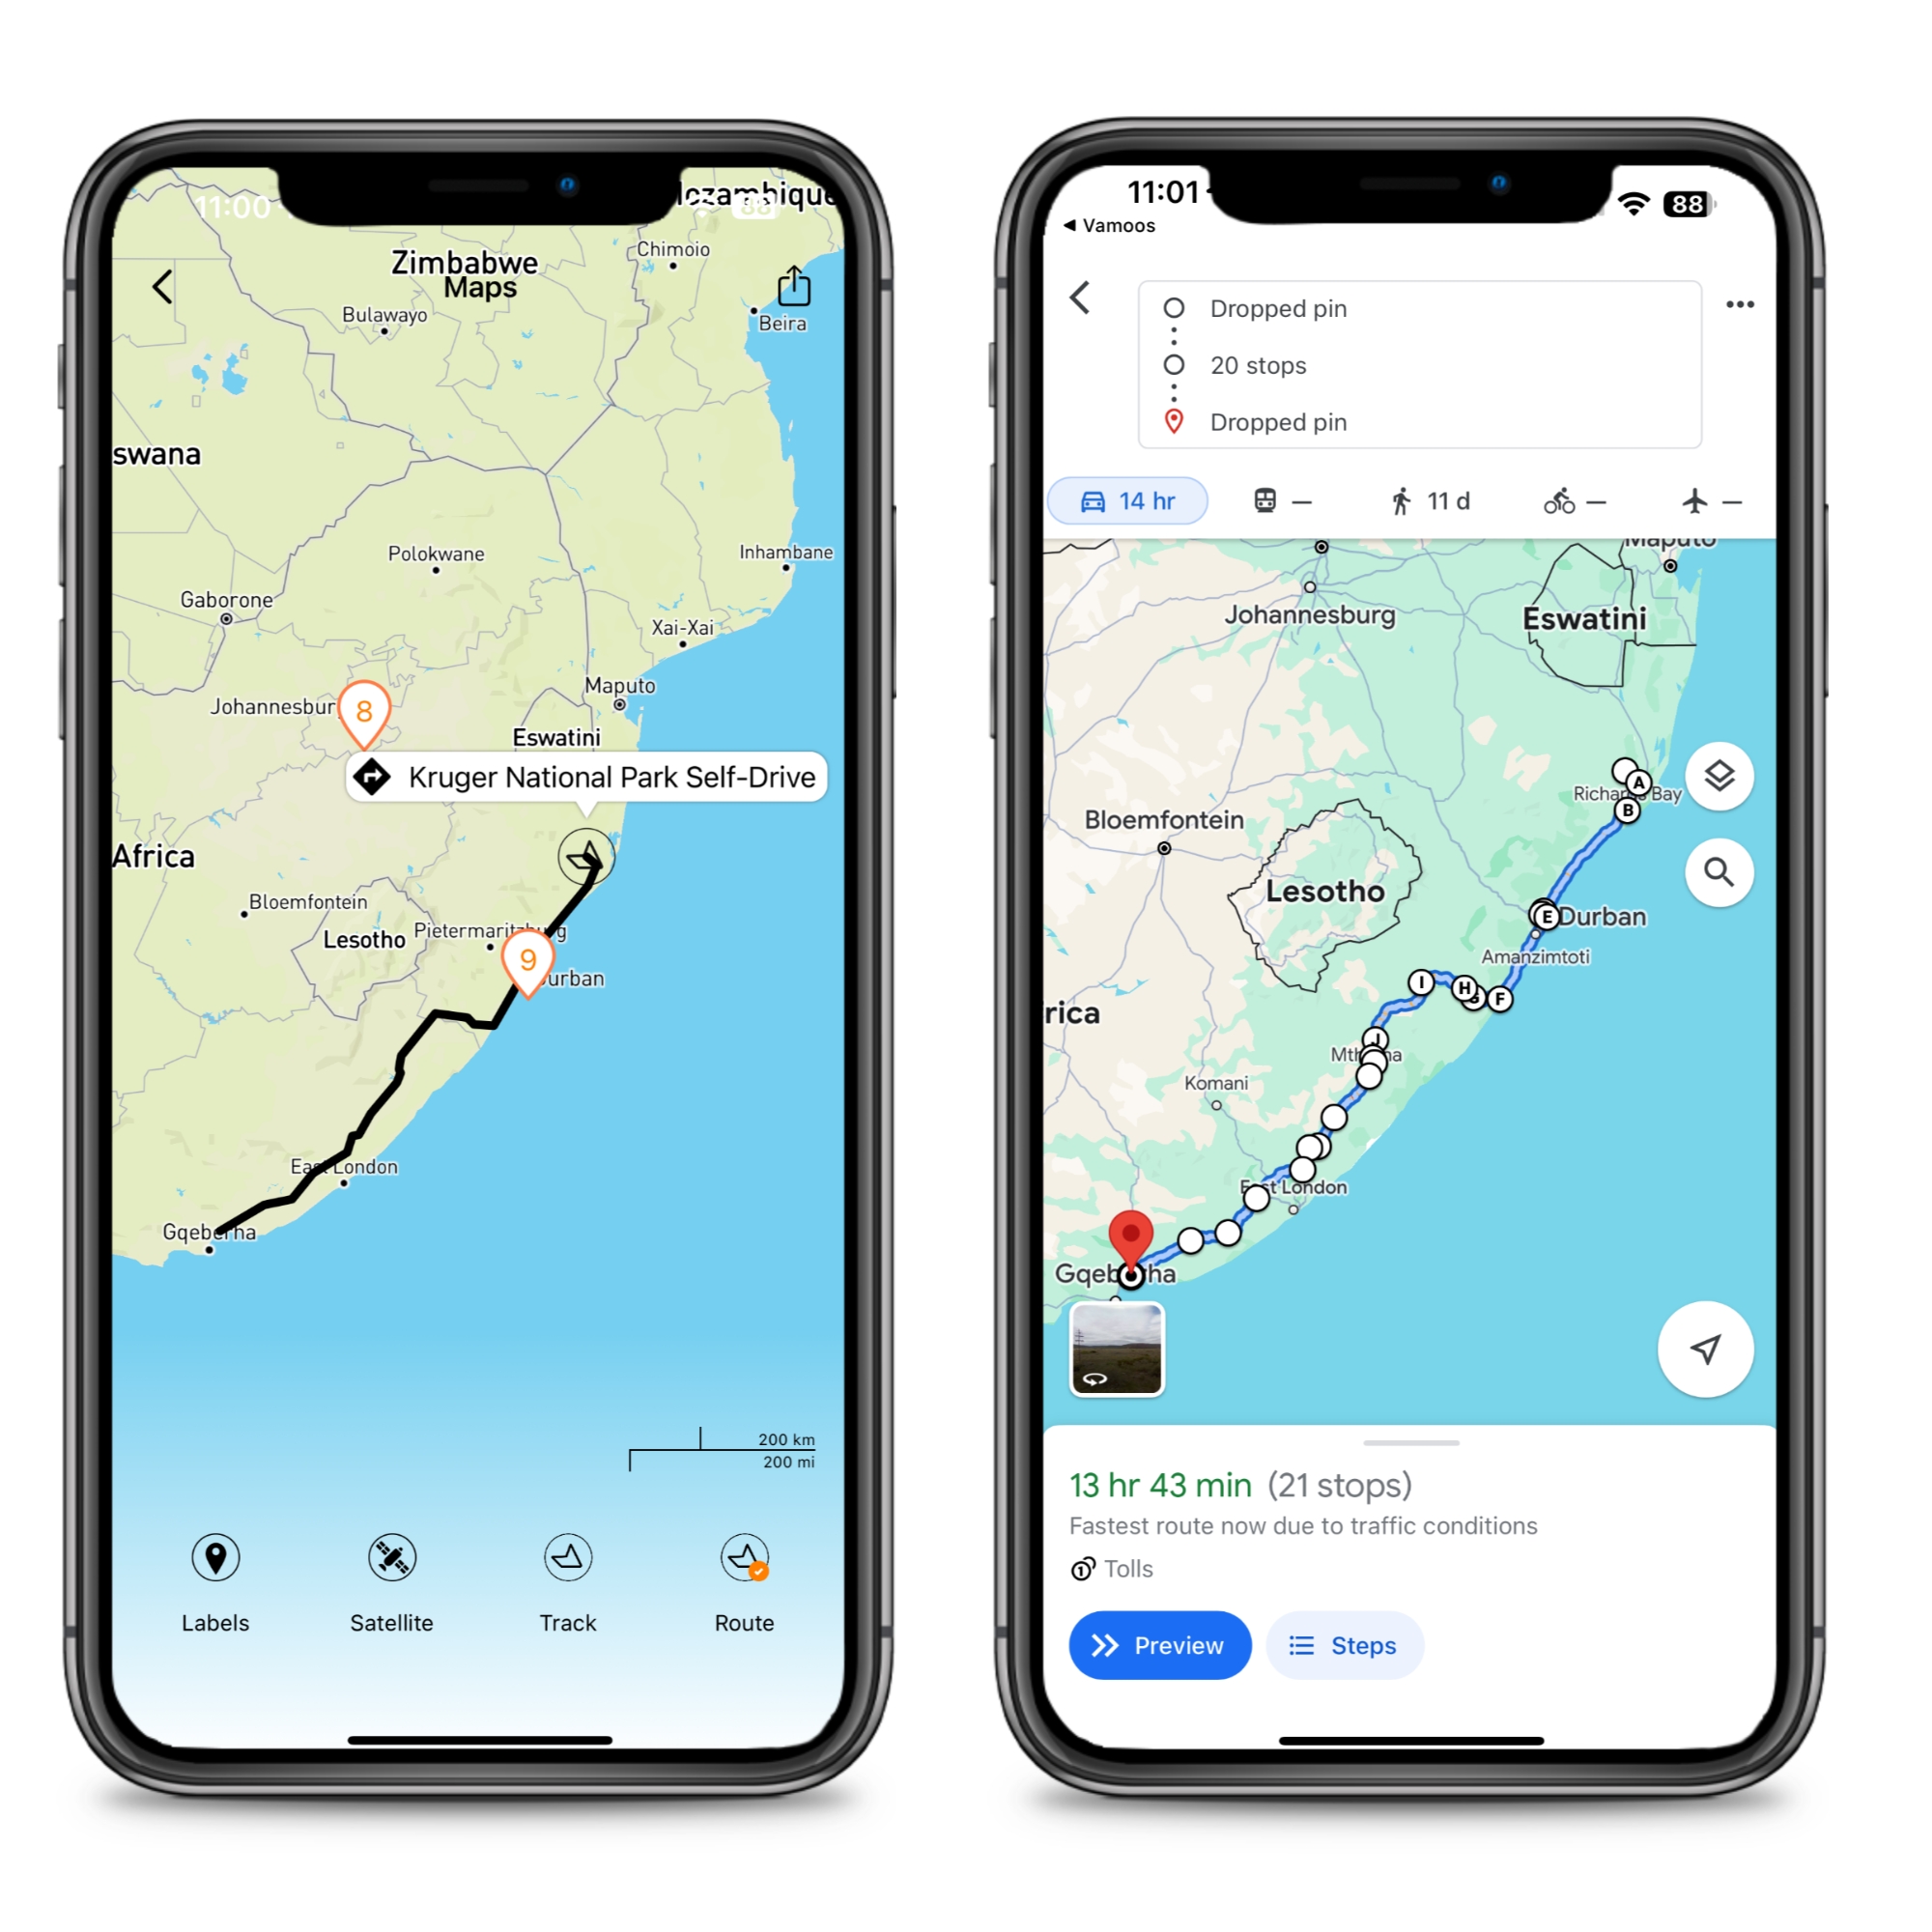
Waypoints are simply the stops along a journey.
Using an external navigation app (e.g., Google Maps), your clients can follow the stops you’ve set on the map.
How to create a GPX file
To add Routes to Vamoos, first create a GPX file that you’ll upload to the portal.
Below are two common ways to create that file.
Using Google Maps & MapsToGPX
In Google Maps, enter your starting point, destination, and any stops.
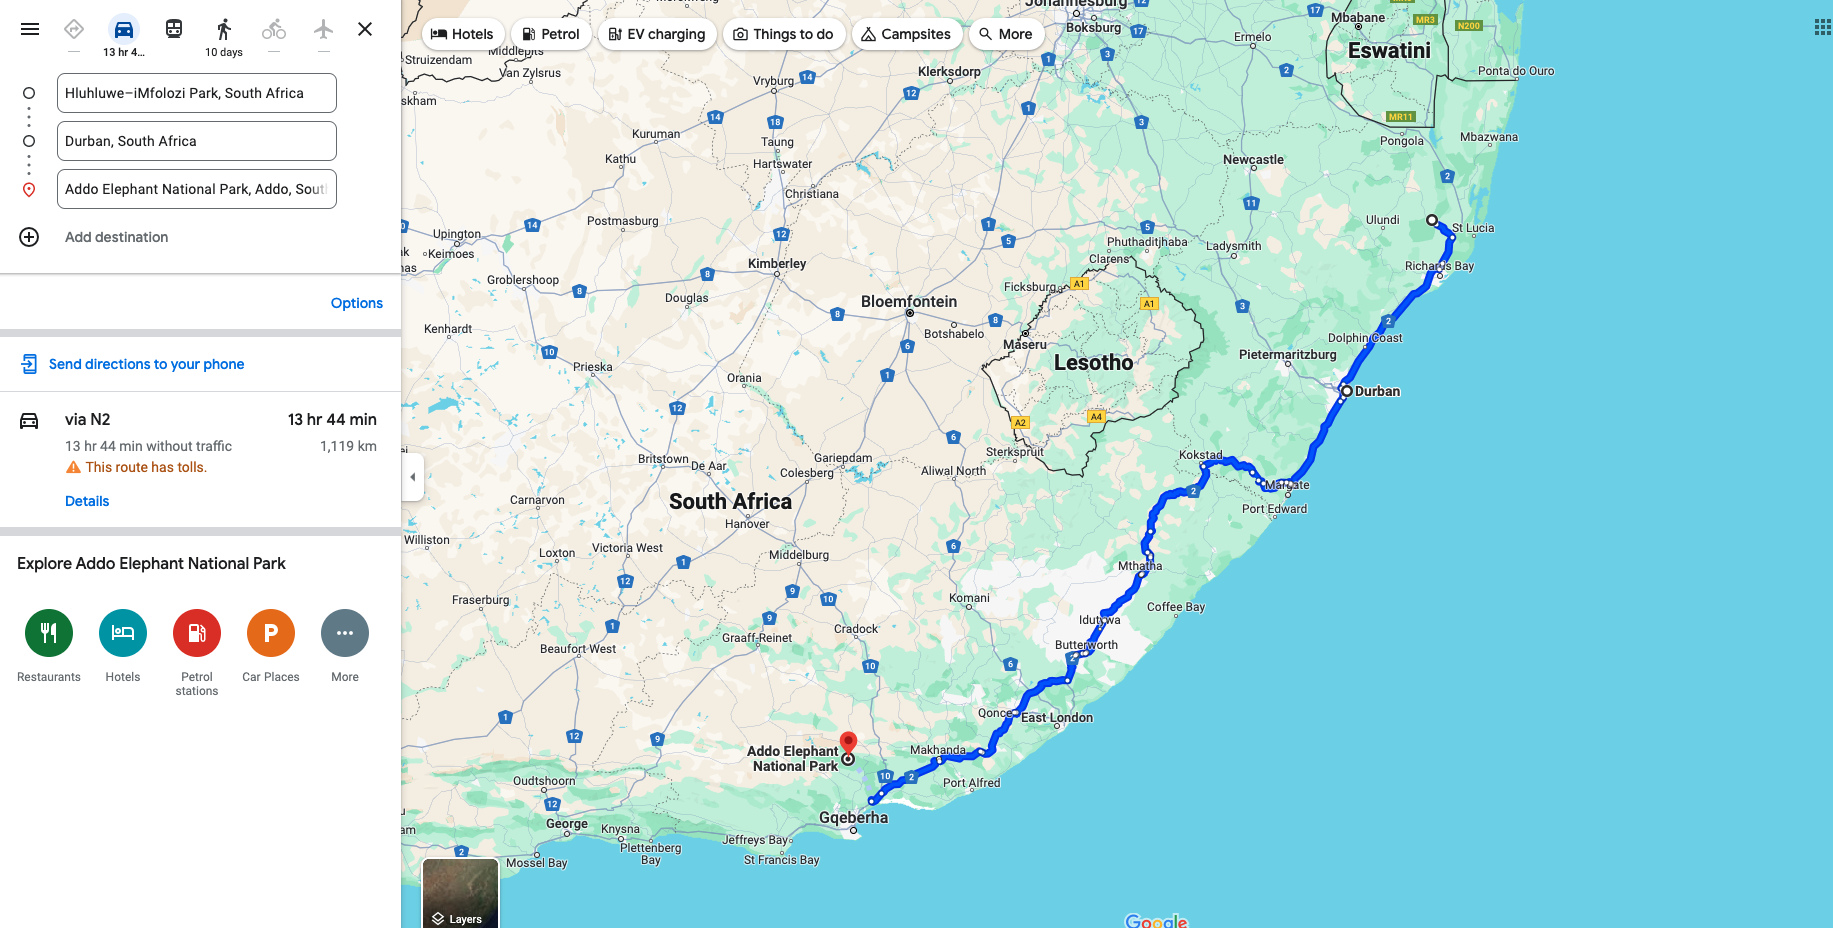
Select the transport mode (driving / cycling / walking) and your desired route.
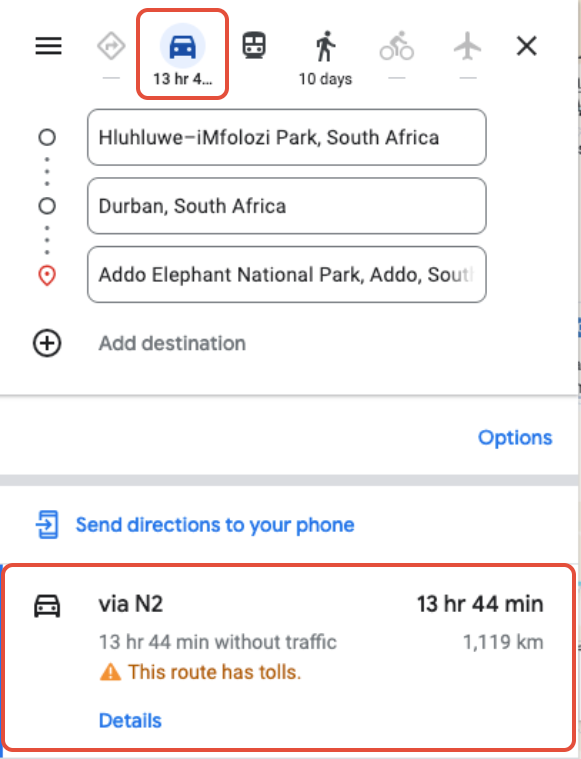
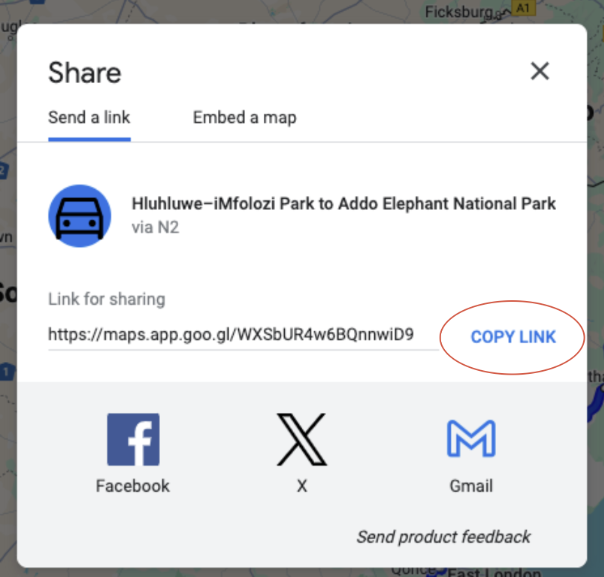
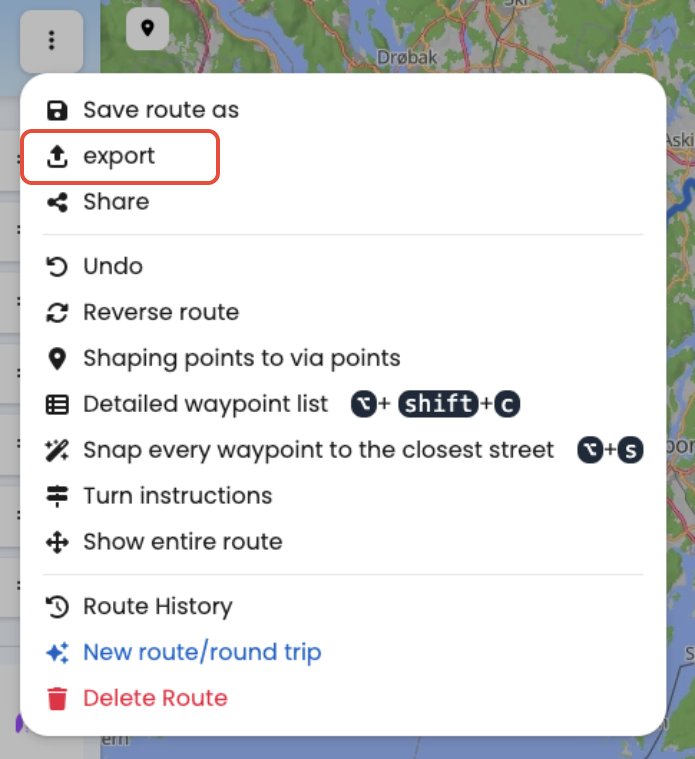
Once you have selected the route you like to use, click the three dots in Google Maps to generate the link for sharing.
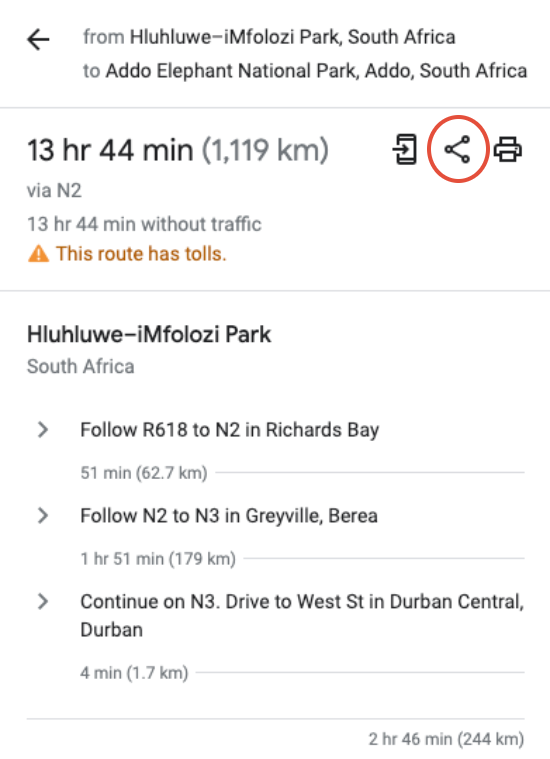
You then need to press Copy Link in order to copy the directions link.
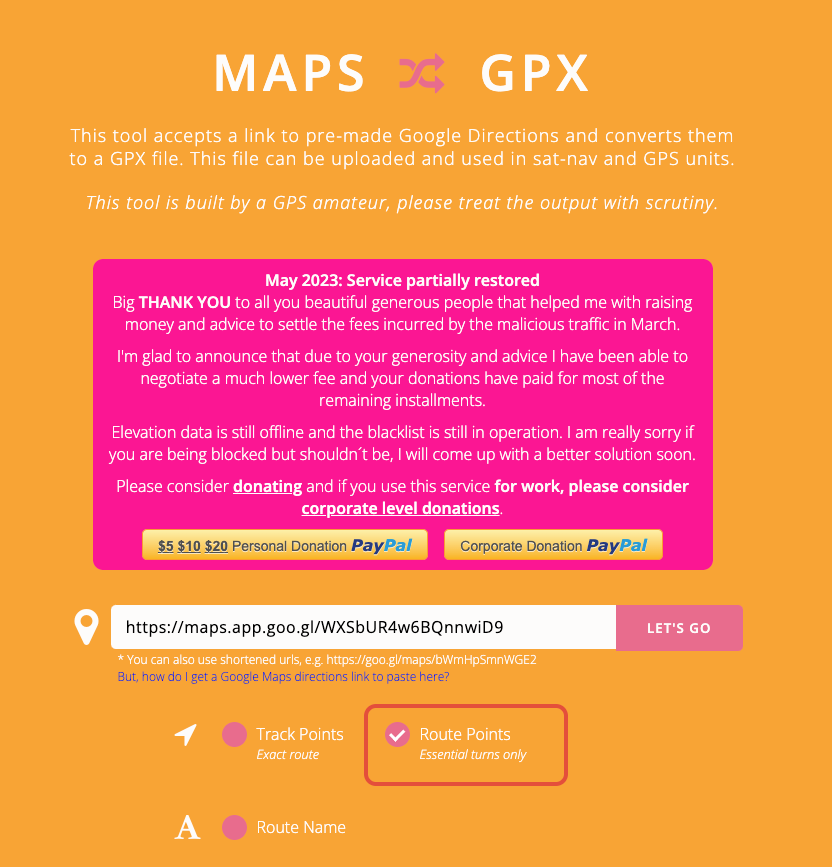
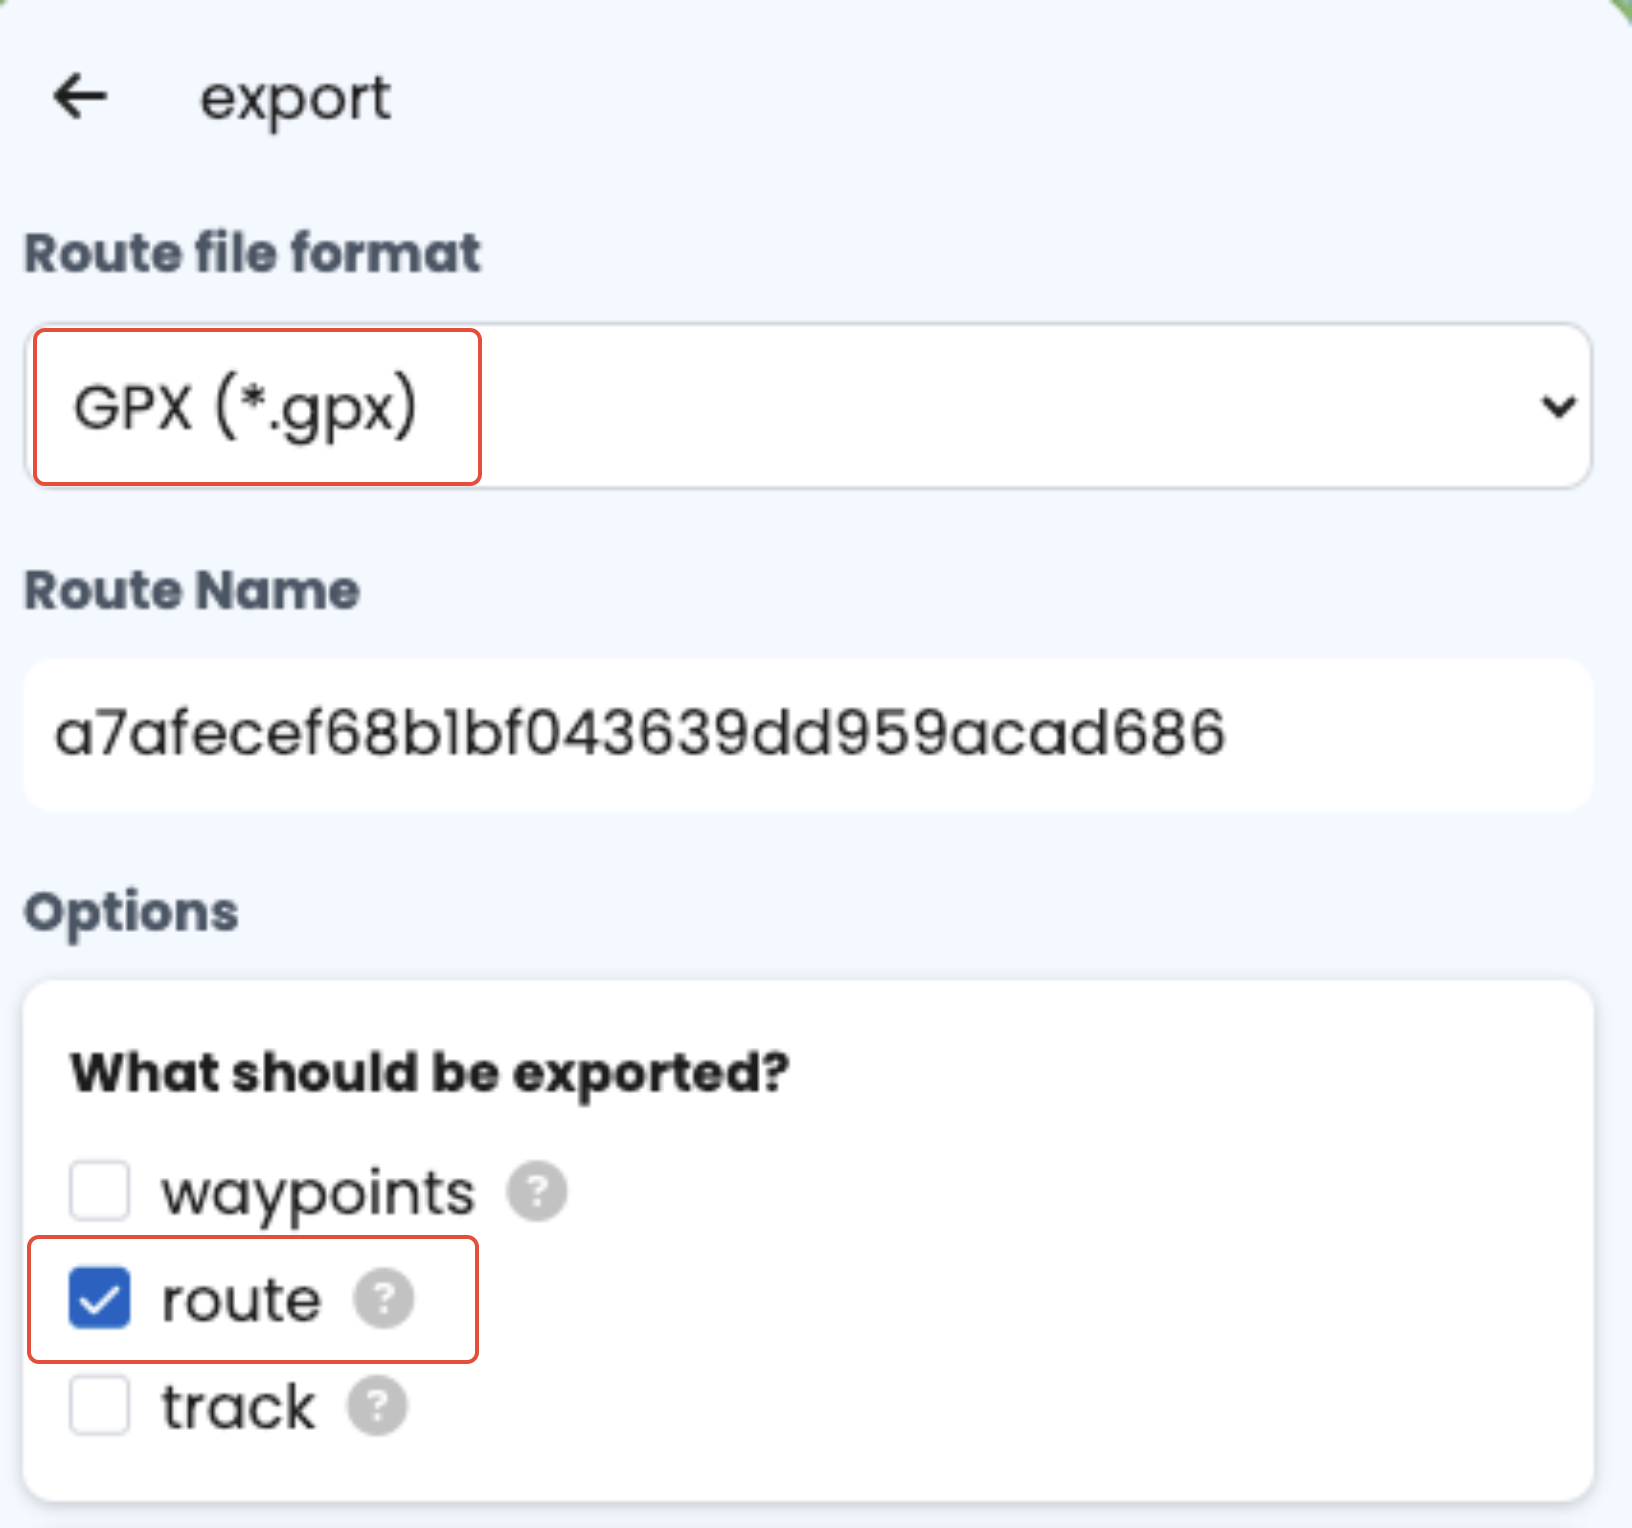
Open mapstogpx.com and paste the copied link.
Choose Route Points (to create a Route file, not a Track).
Paste the link you have copied into the search bar.
Click LET’S GO to download your GPX file.
Reducing your Route file to the 27-waypoint limit
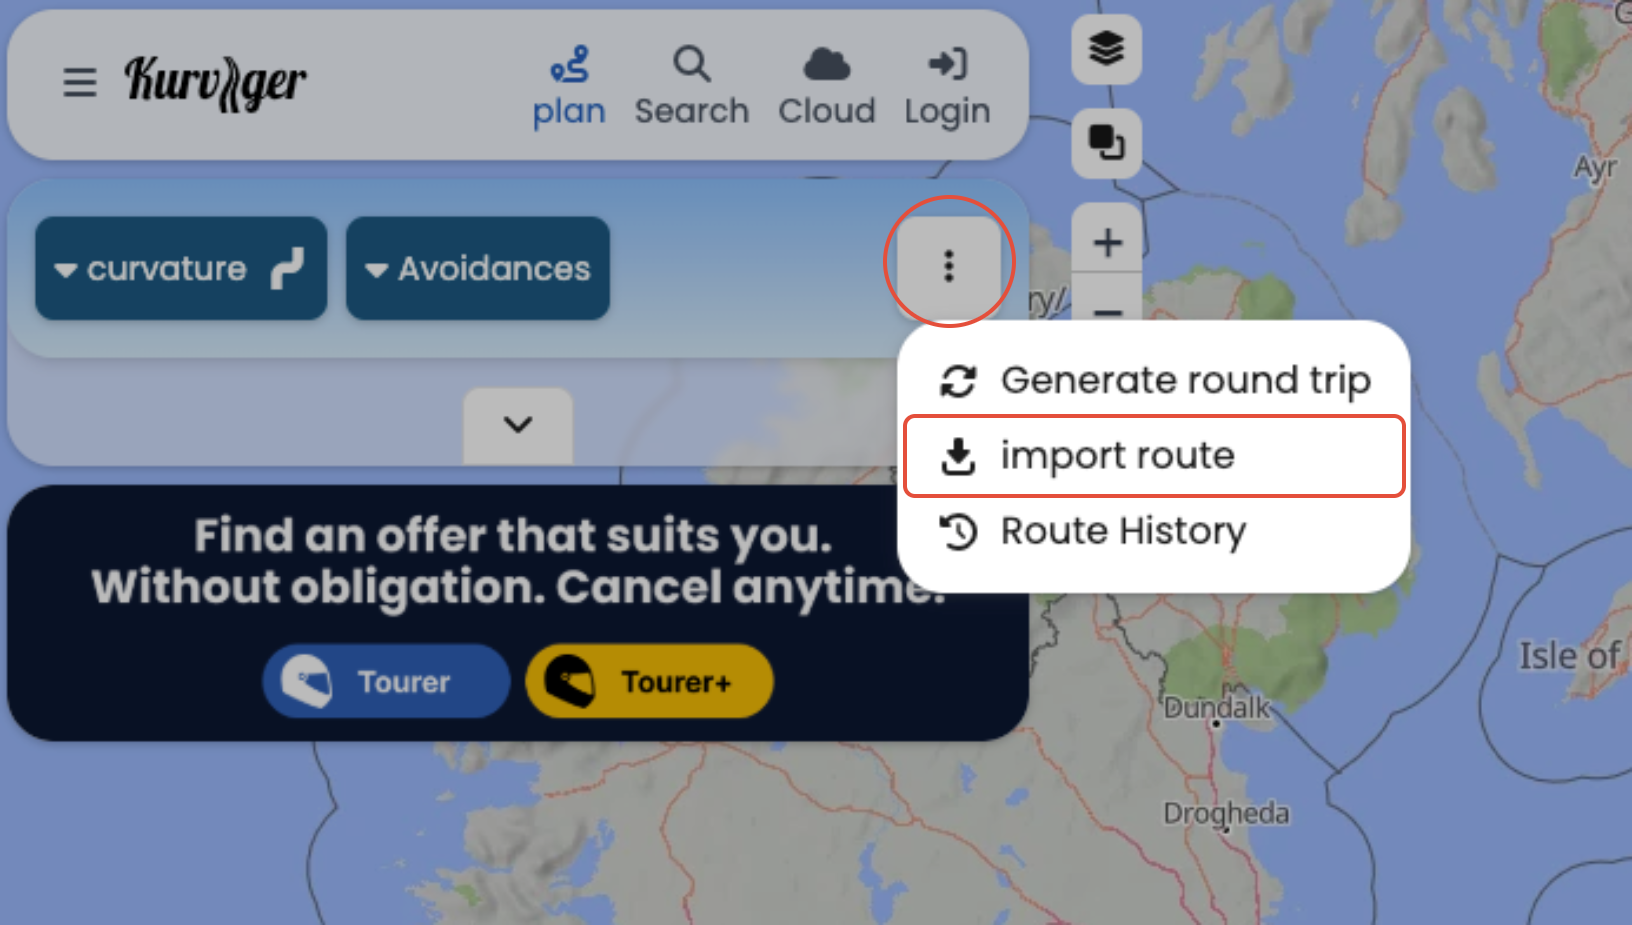
If your route has more than 27 waypoints, reduce it using a route editor such as Kurviger.de.
Click the three dots and choose Import route, then upload your GPX.
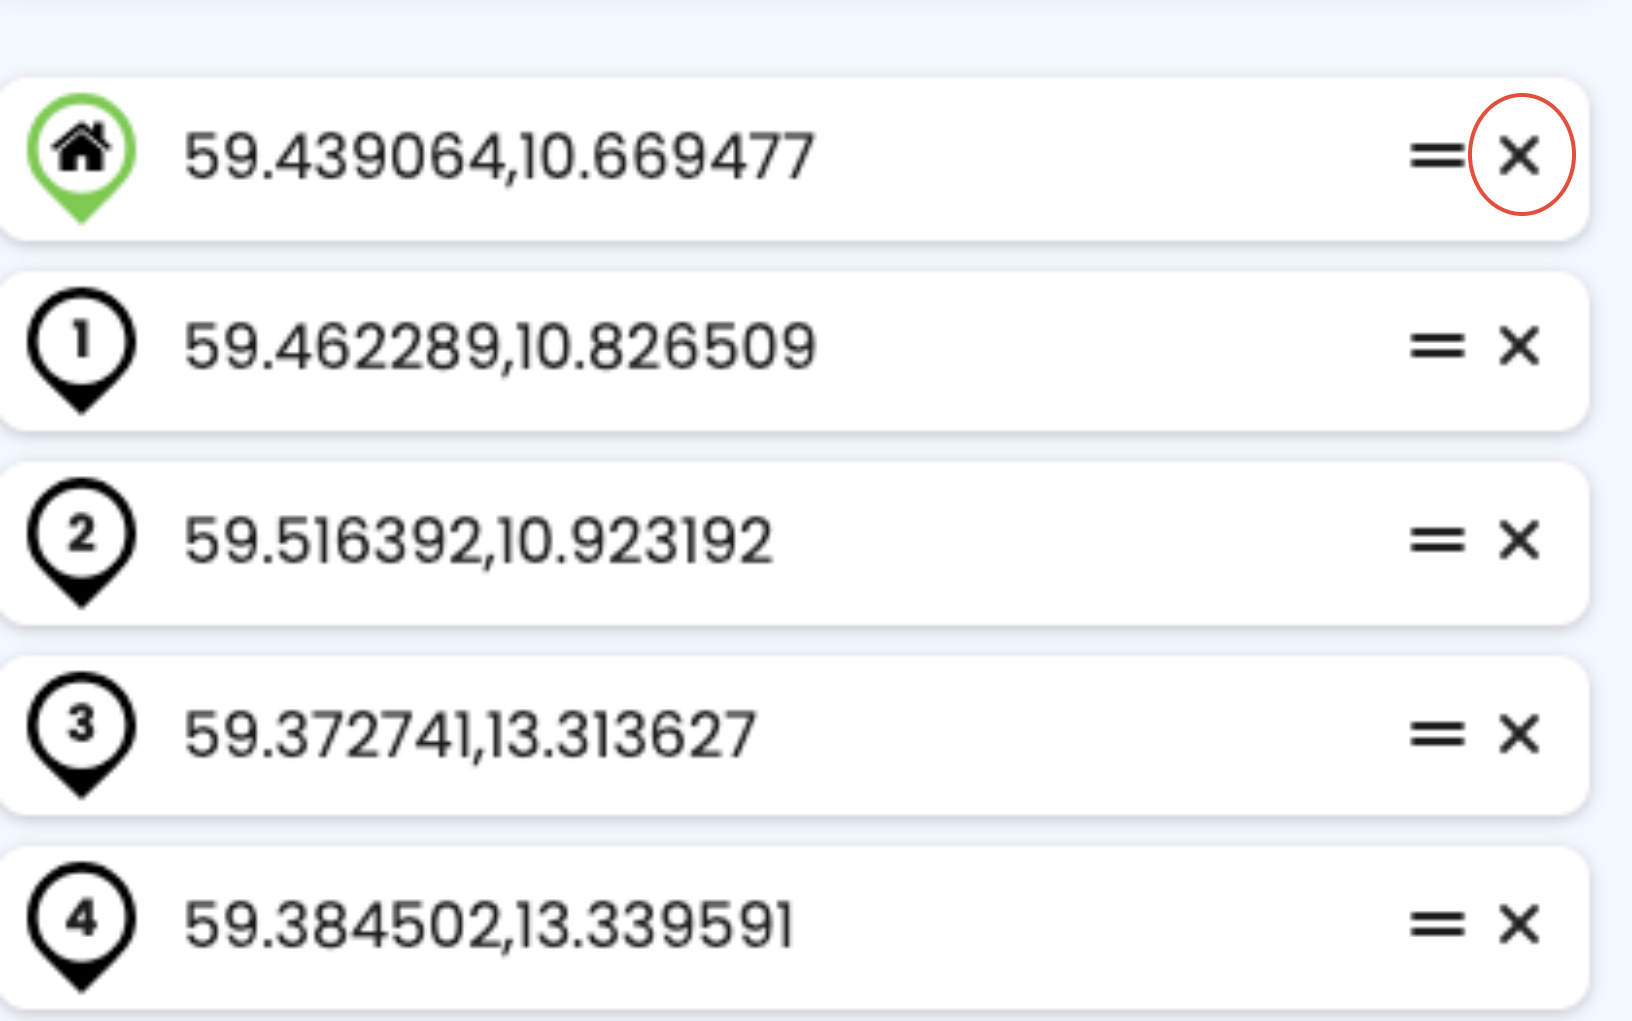
Remove excess waypoints by clicking the 'X' next to the numbered waypoint until you’re at 27 or fewer.
Export the file again by clicking three dots then Export.
Choose format GPX
Select Route
Press Export to download your route file.
You now have a Route GPX file ready to upload to Vamoos.
How to add a GPX file to Vamoos
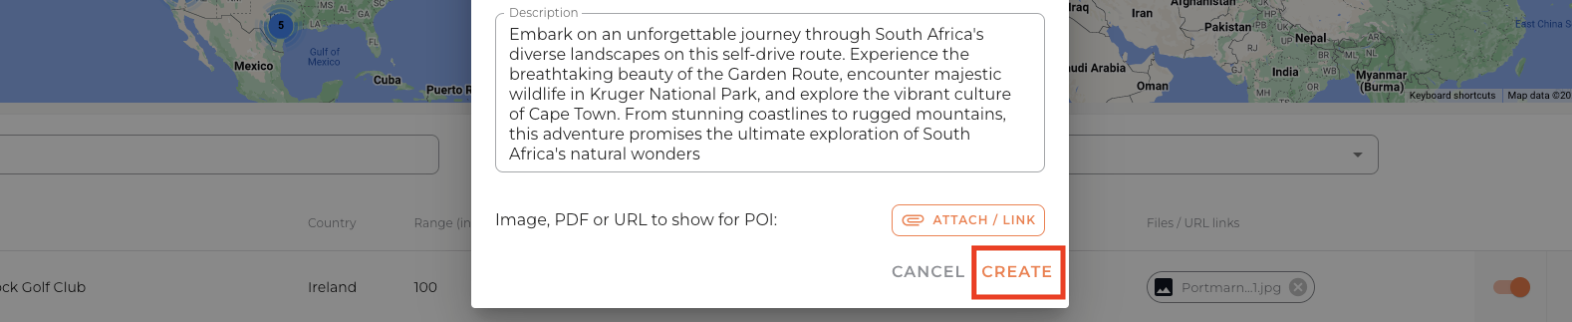
In the Operator Portal, go to Shared > POI and click + Create POI.

Change Type from “Point of Interest” to Route.
Fill in the details (Label, Description, Range in km, optional attachments).
Click ATTACH / LINK to upload your GPX file.
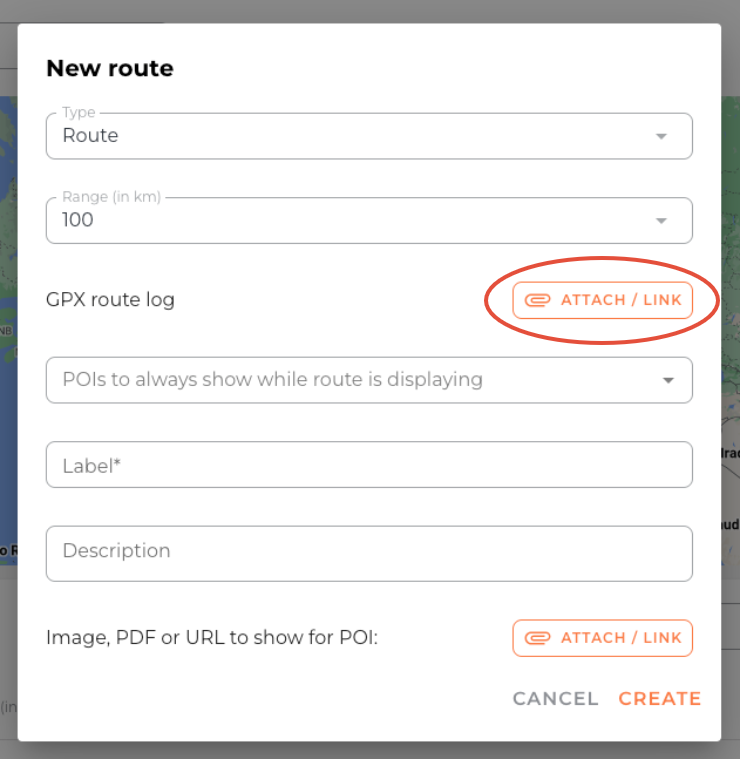
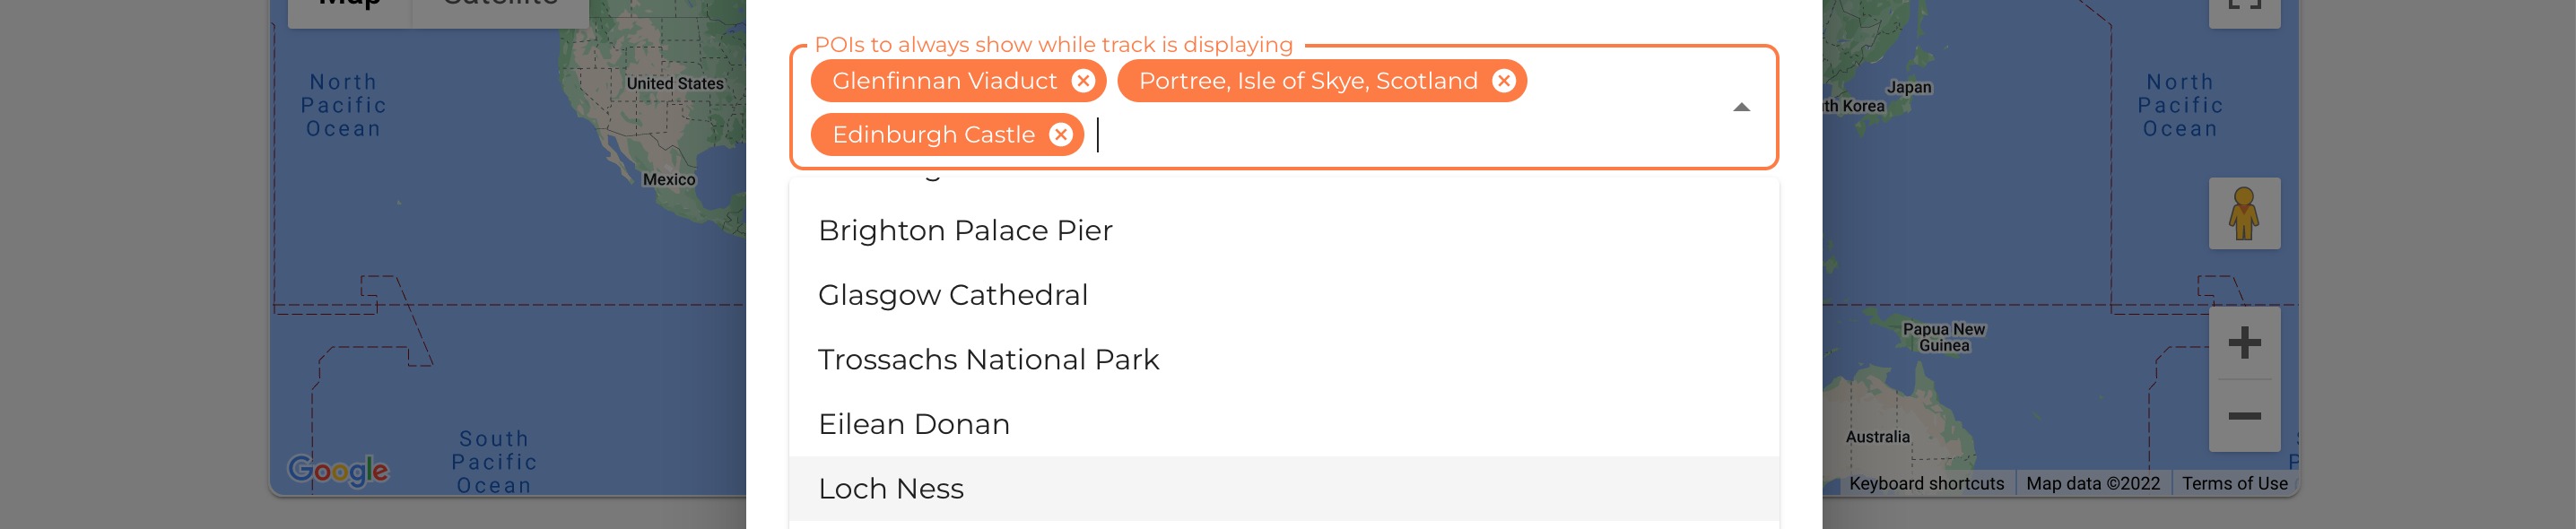
You can also select existing POIs to show along the route to highlight key attractions or stops to your clients.
When finished, click Create.
Enable Routes for specific trips
After adding Routes, you can choose to toggle them on/off for each trip.
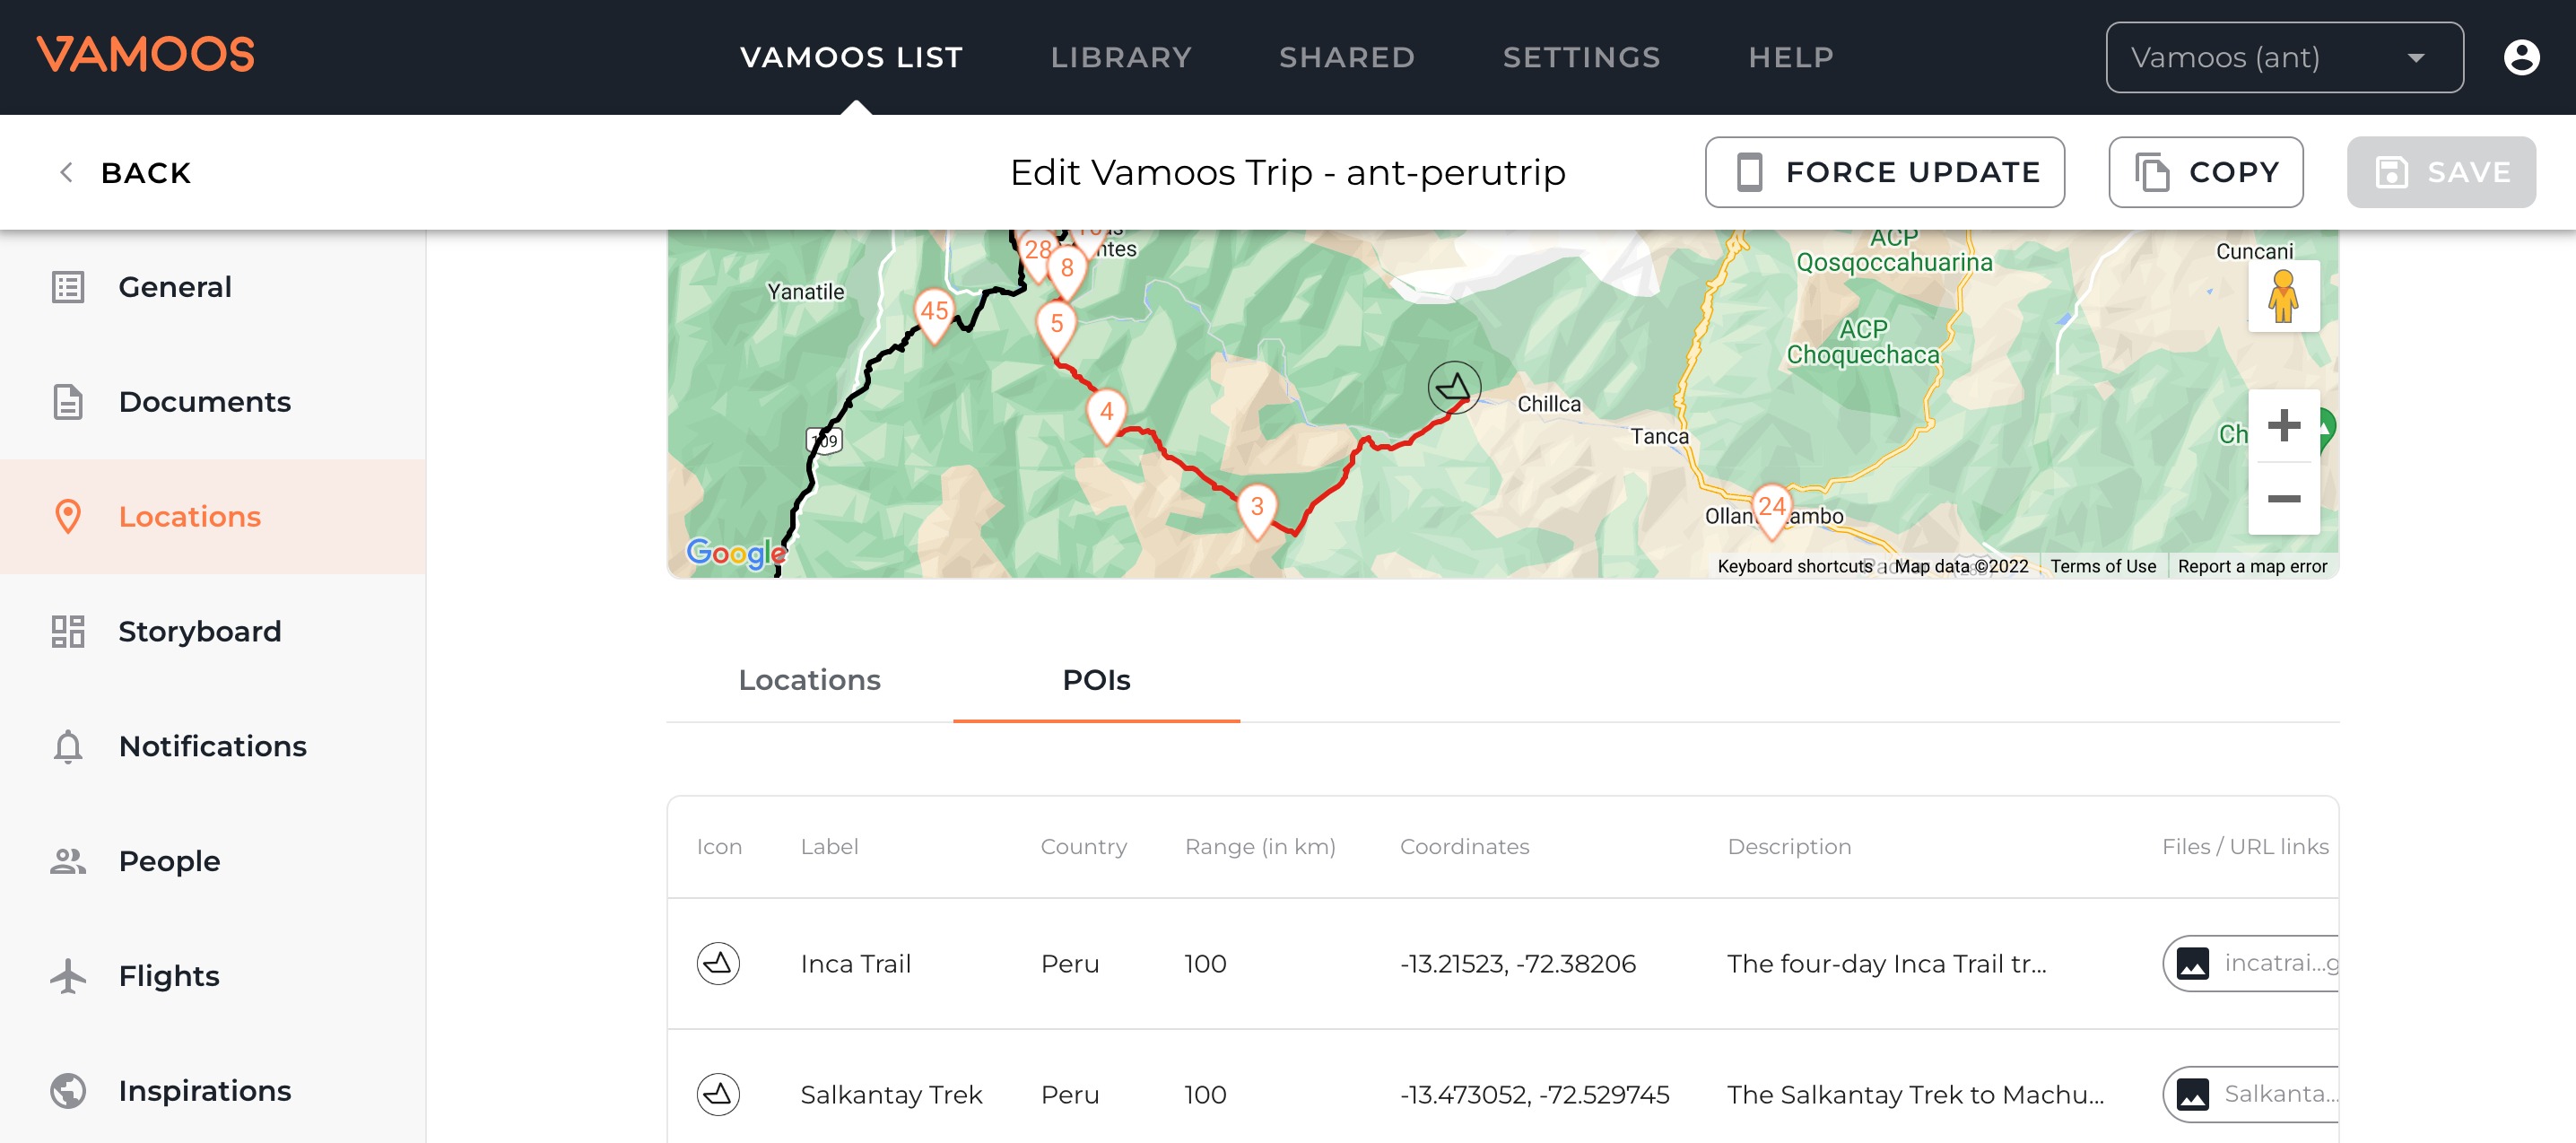
Go to your Vamoos List and open or create a trip.
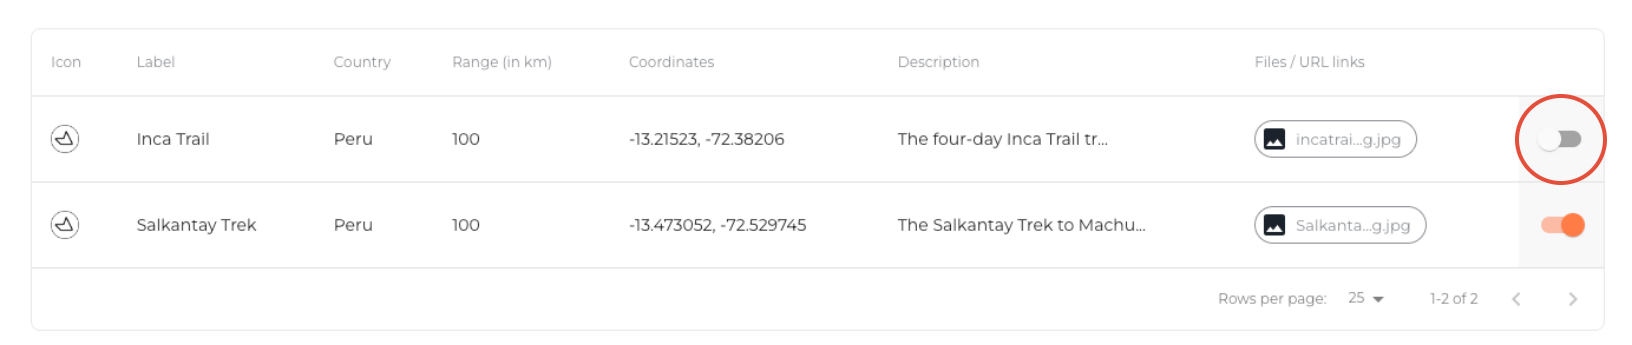
Go to Locations on left-hand side, select POIs. You’ll see Routes that are within range of the trip.
Use the on/off switches at the right to show/hide a Route for that trip.
Renaming the Routes icon
You can rename the Route icon to something that is more personalised to the type of route (e.g., “Driving Routes”, “Cycling Routes").
Go to Shared section at the top bar, press POI and select.

You will then see the Route icon and you can rename this to whatever you would like.

FAQs
Q: Are Routes available offline?
A: Yes. However, if guests open directions in external apps (e.g., Apple/Google Maps), those apps may require mobile data or Wi-Fi.
If you have any further questions or need help with this, contact us at support@vamoos.com.