
Studio Documents: create your own dynamic documents
✅ For Travel Companies
Create stunning, flexible, fully branded documents directly in Vamoos – no longer limited to PDFs. Vamoos Studio Documents feel native in the app, are easy to update, and beautifully present everything from tickets to travel guides.
In this article:
Creating Studio Document
How to Bulk Upload Studio Documents to Trips
Create Multiple Document Sections
Delete Document Sections
Uploading Videos
Document Folders
Moving Documents into Folders
Creating sub-folders
Removing Folders
Removing Files
Creating Studio Documents in the Library
FAQs
Creating a Studio Document
Step 1: Open the blank document
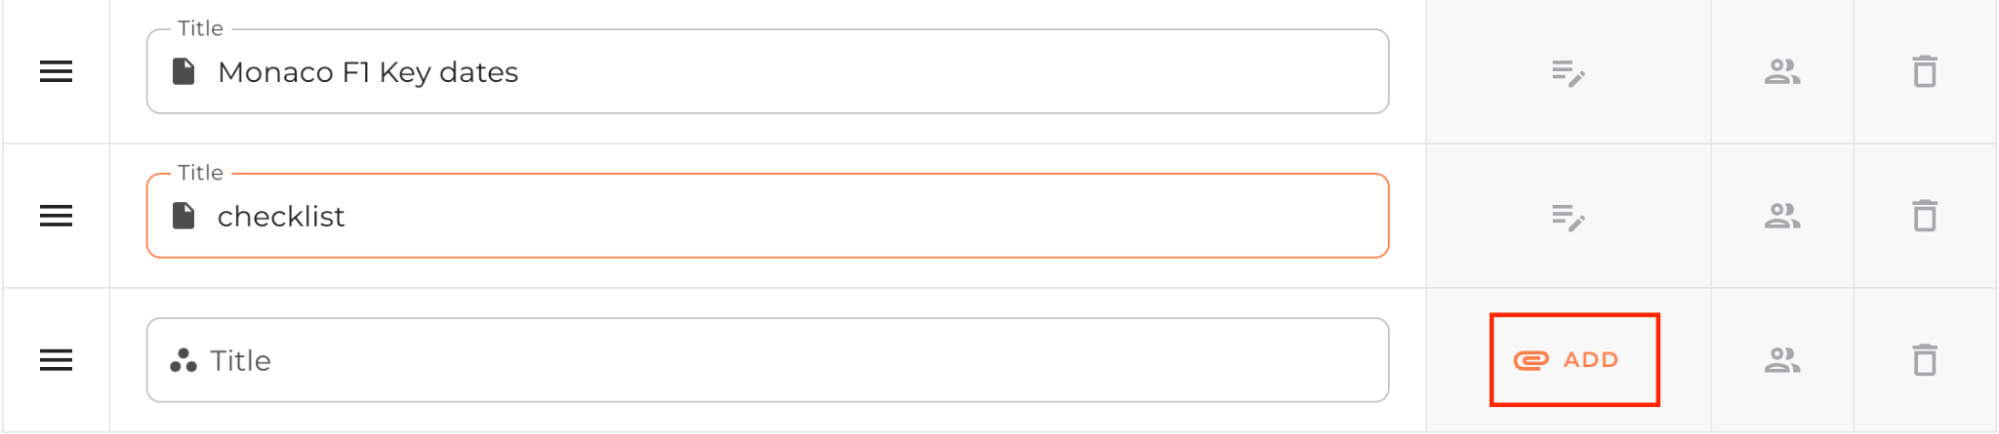
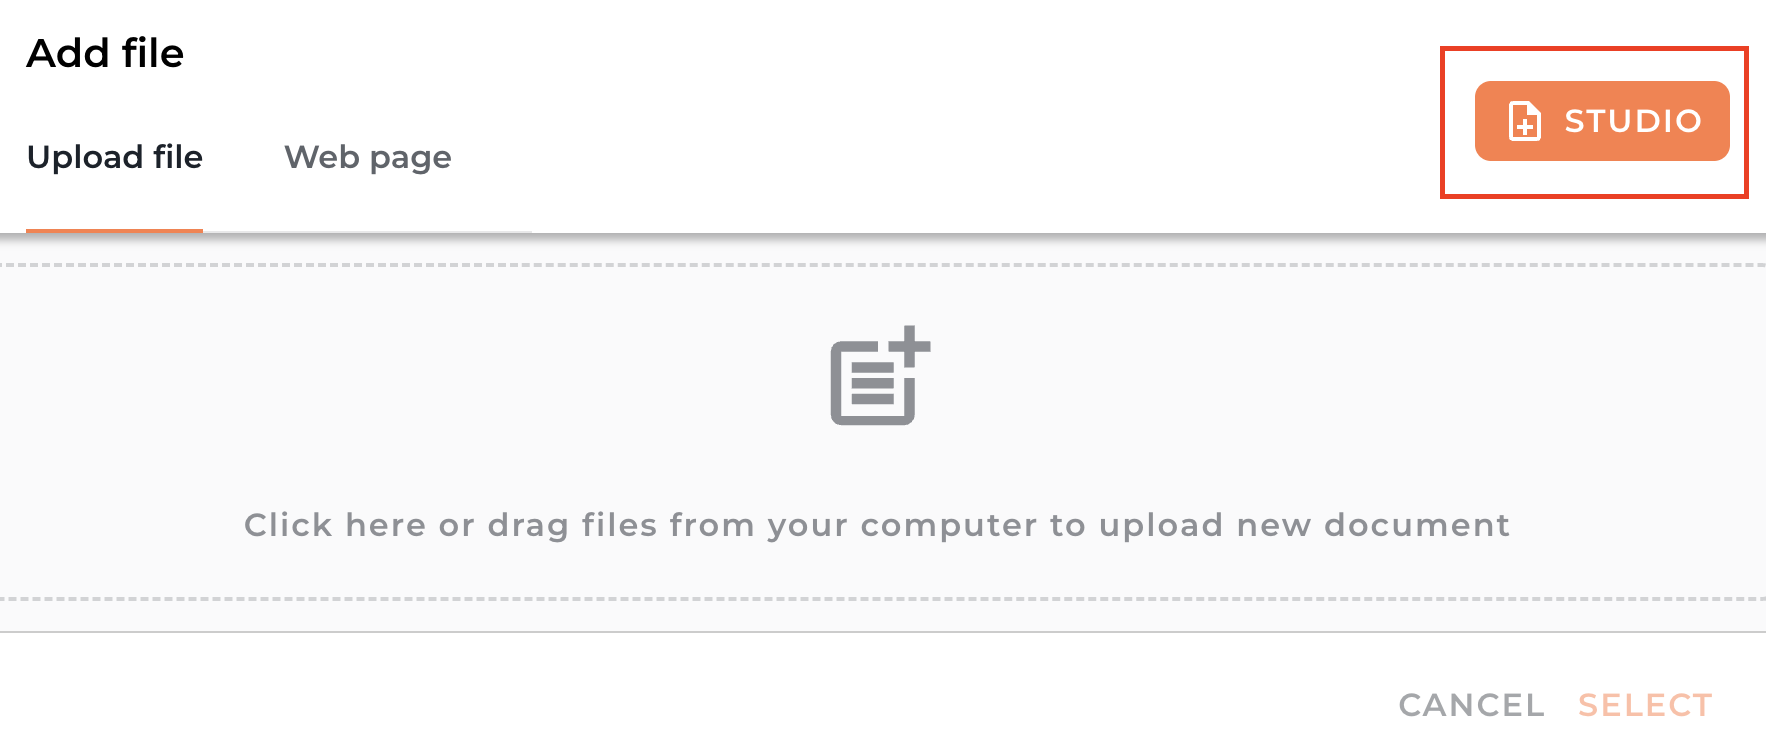
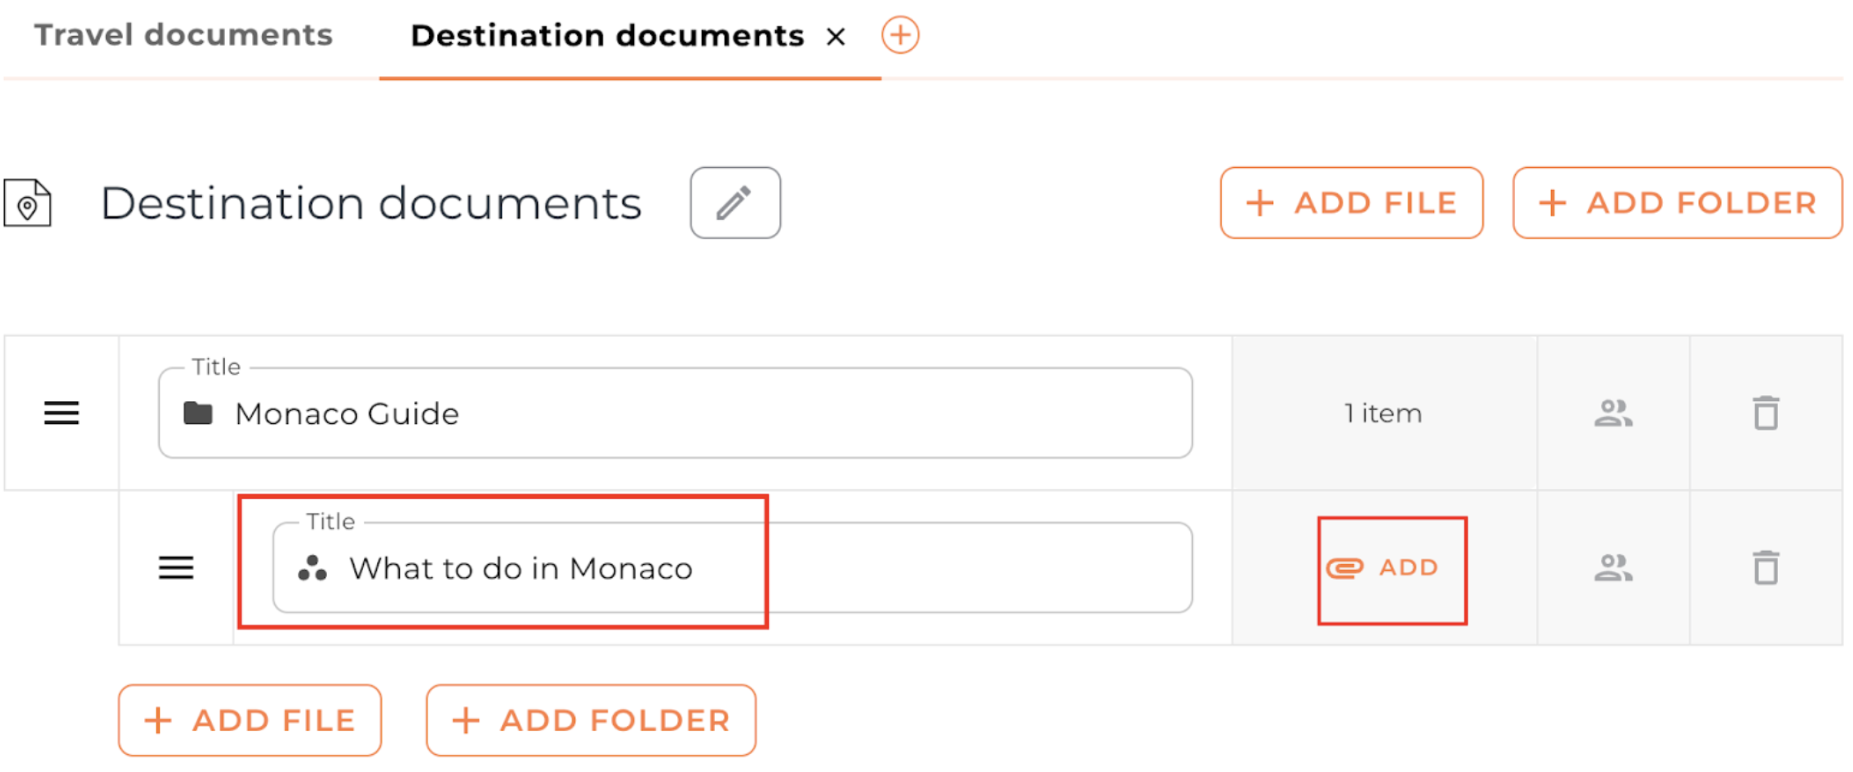
To create a Studio Document, go to Documents within any trip and select + ADD FILE under the document section of your choice.
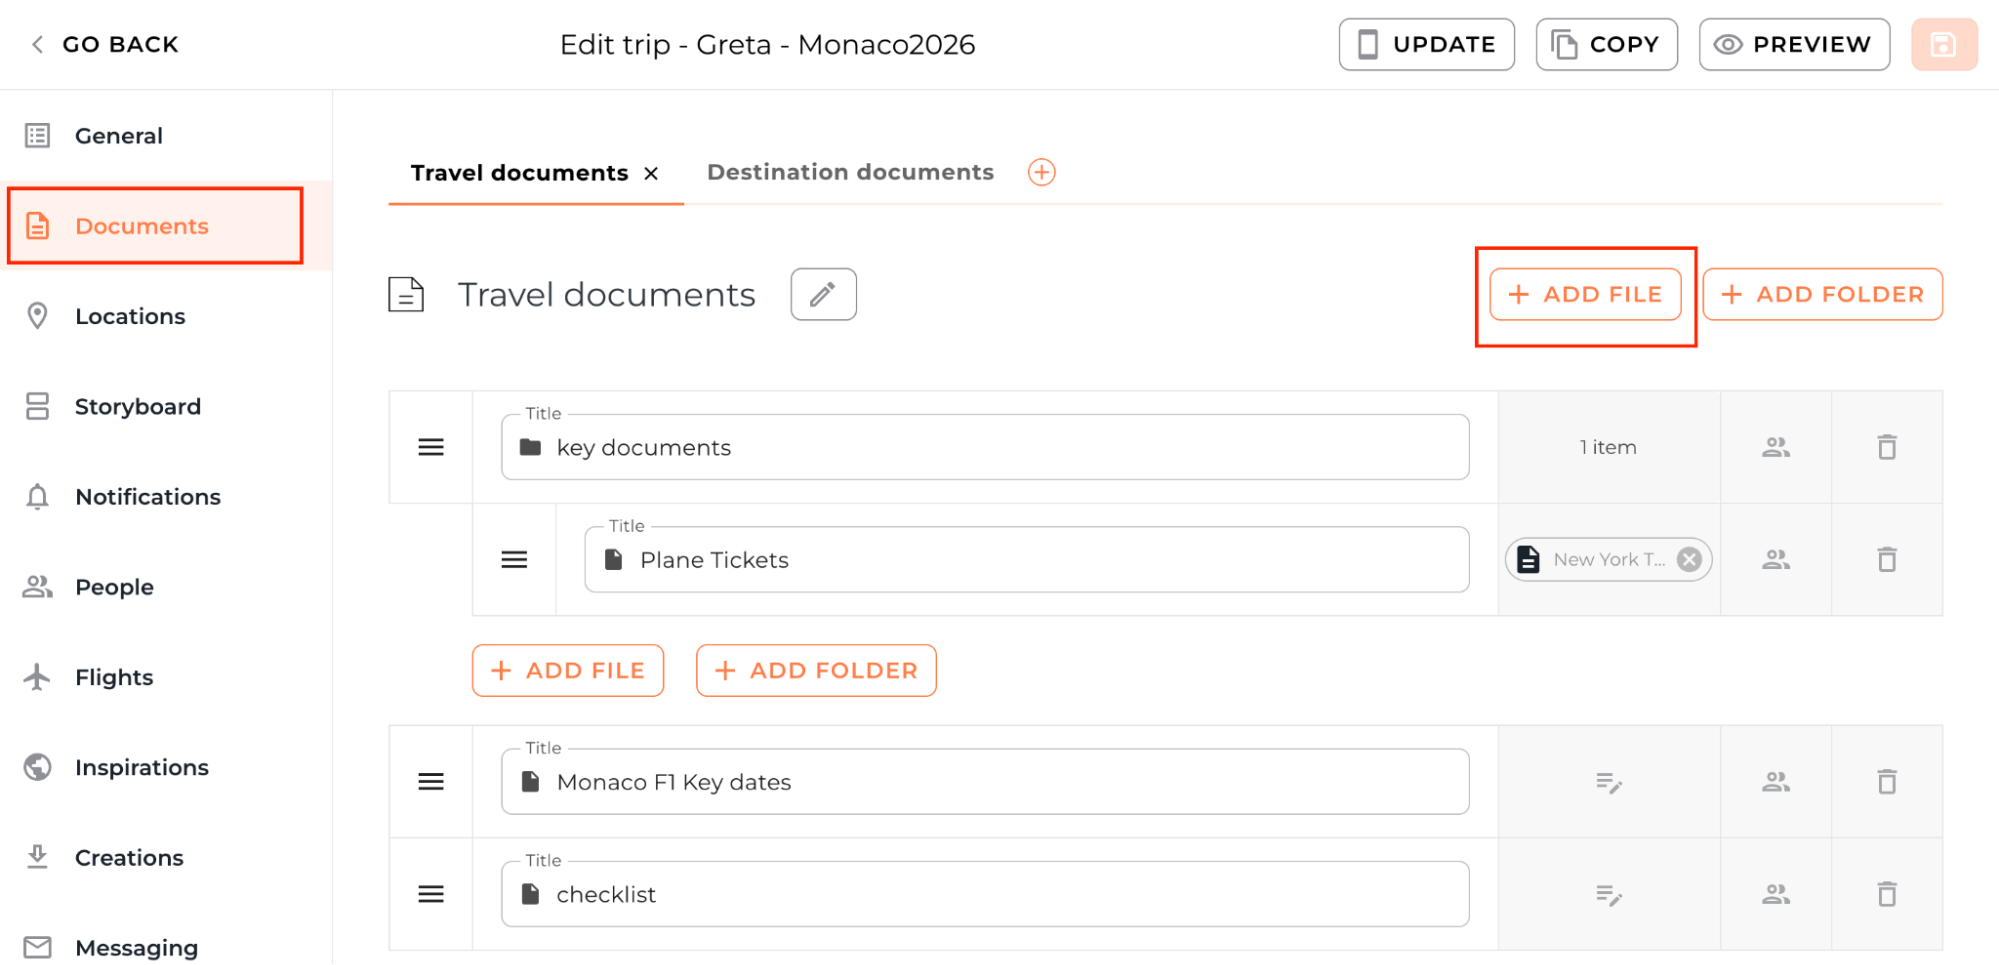
On the new document, press the ADD button, then select the +Studio option.
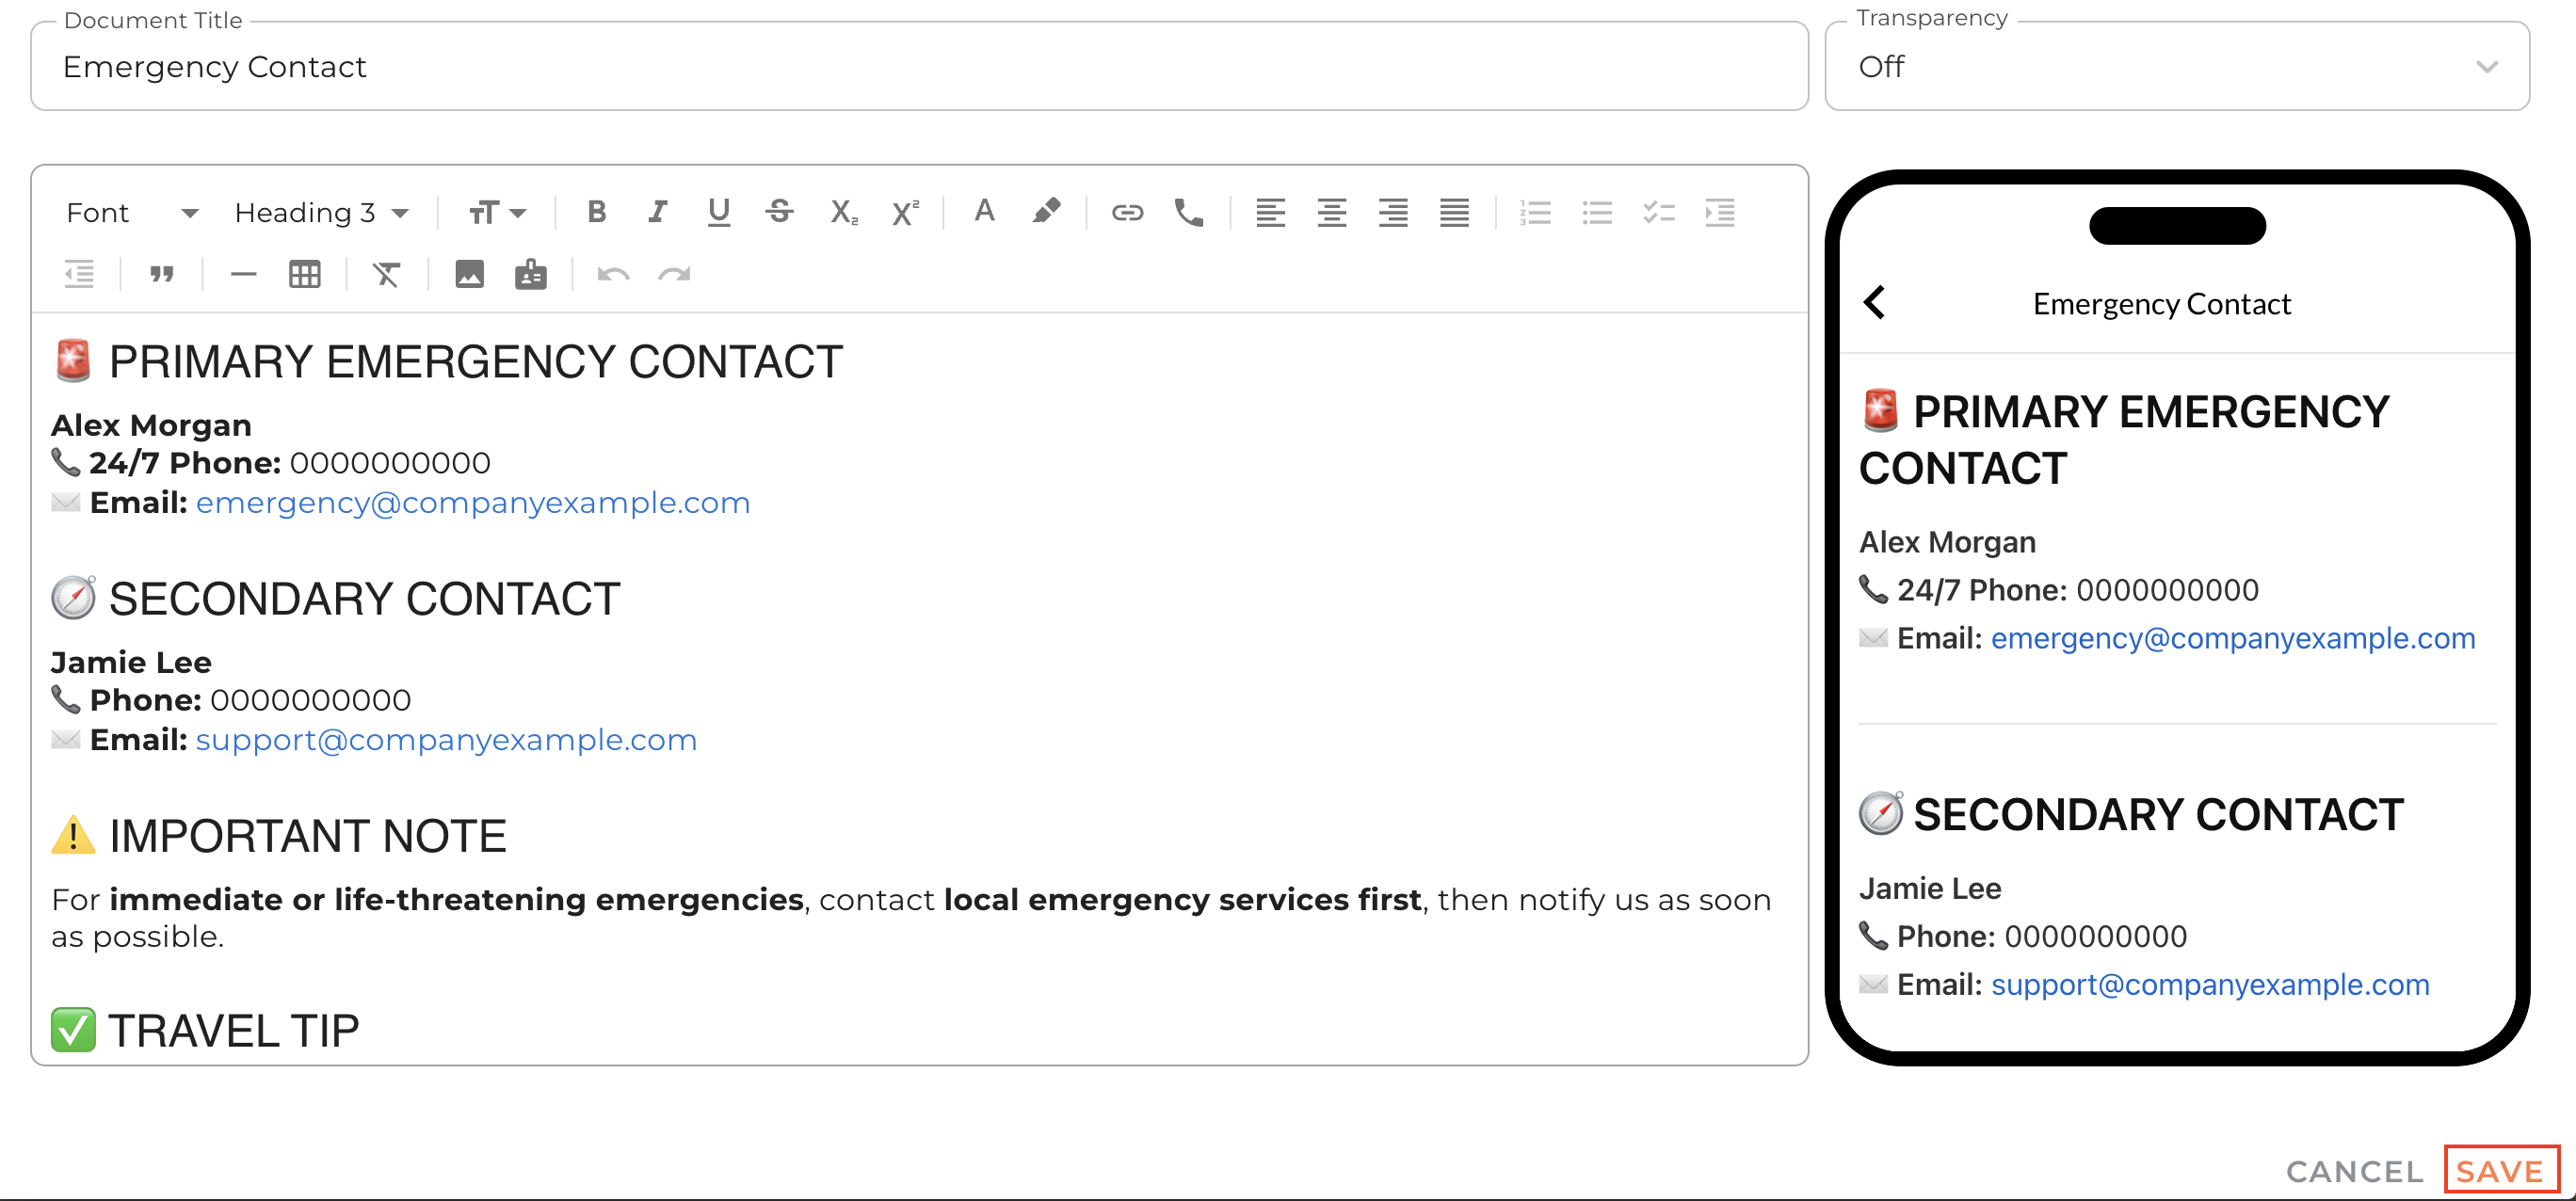
Step 2: Title the document
In the ‘Document Title’ field, put the desired title for your clients to see.
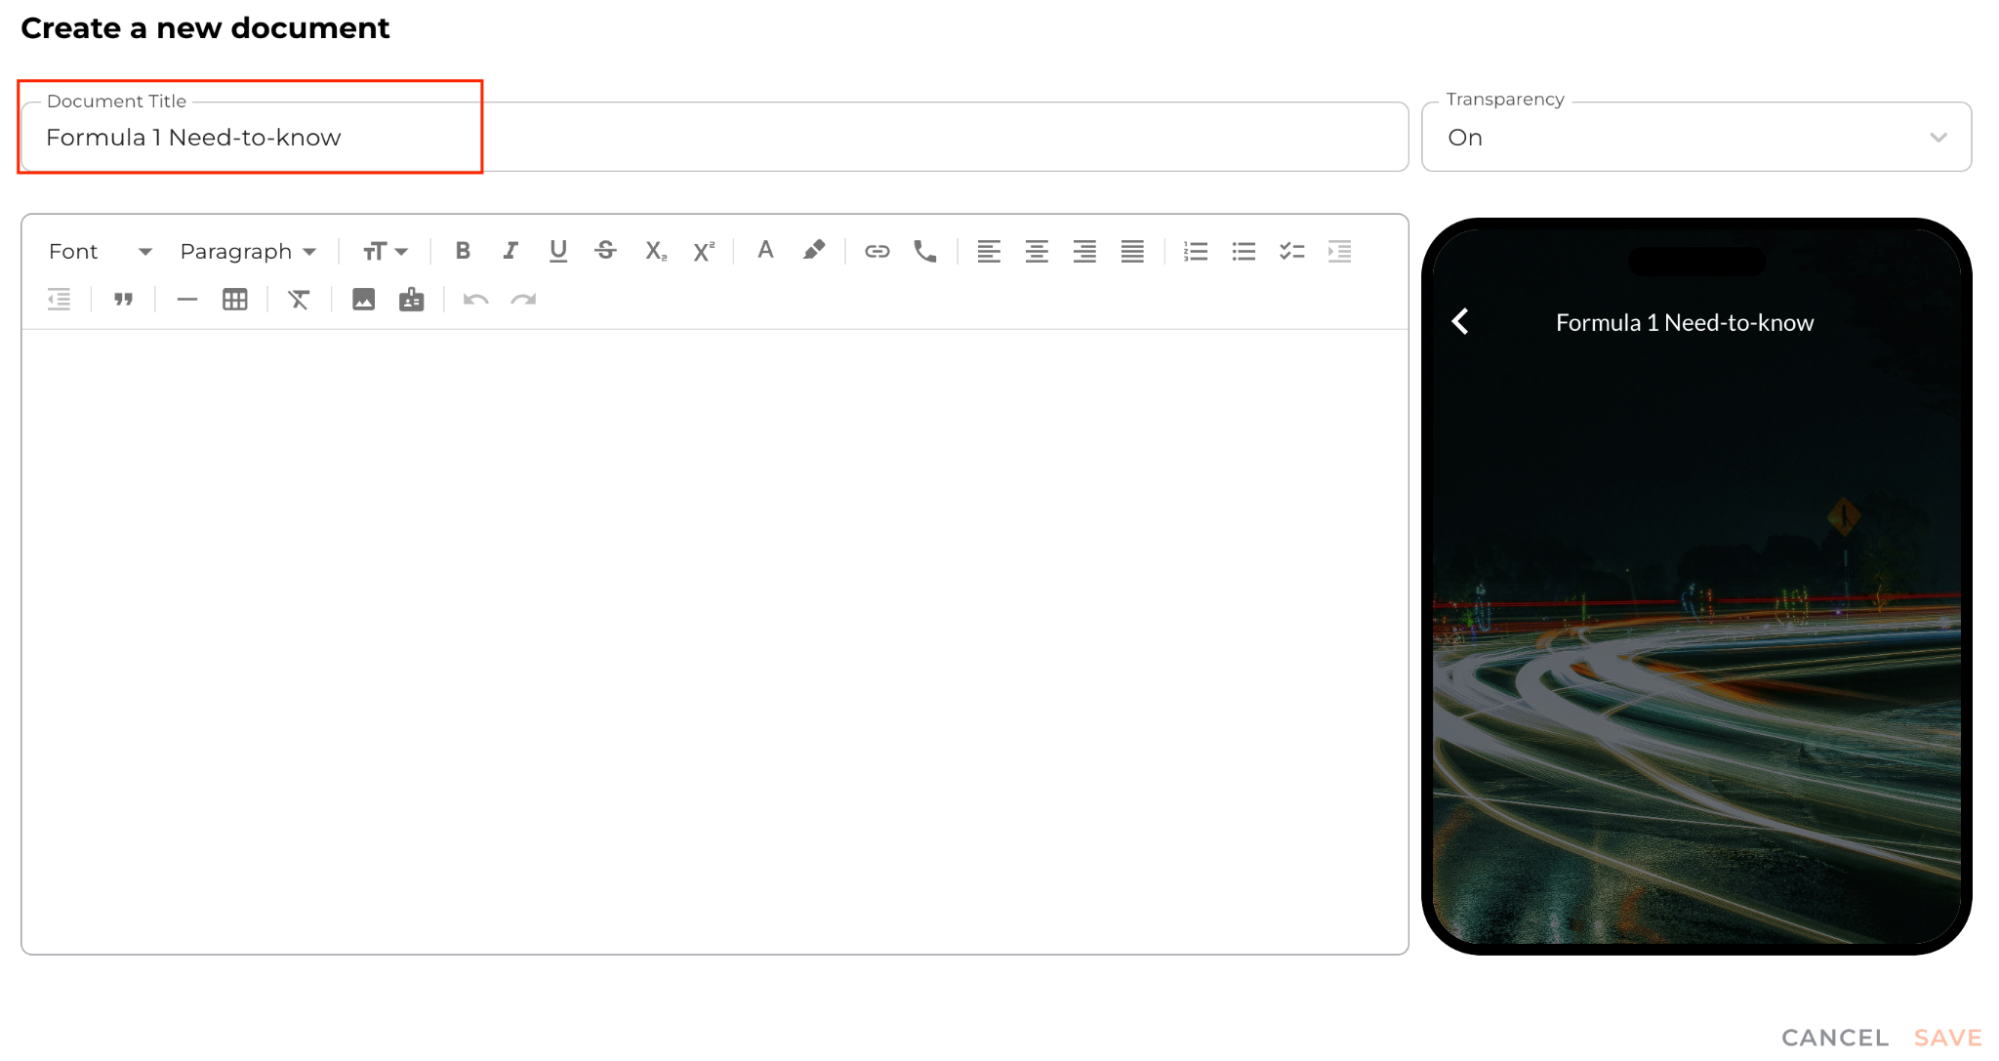
Step 3: Build the document
You can now create your document from scratch using the various features within the document builder.
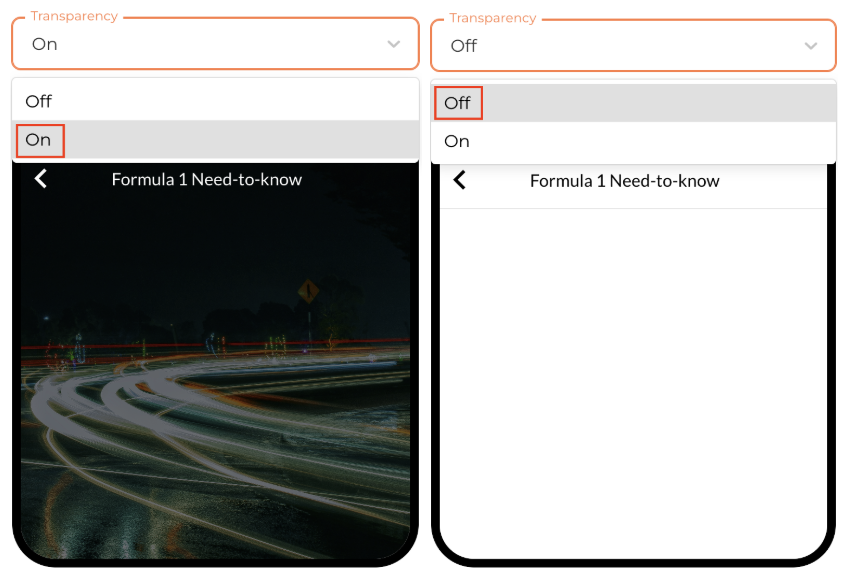
To change the background, select from the Transparency menu. When transparency is on, the home screen image will be the background. When transparency is off, the background will be white.
Text:
To add text, simply begin typing in the blank field.
There are many formatting options for the text within the document:
4 font styles
Text styles: 6 different headers
Text size
Rich text formatting: bold, italics, underline, strikethrough, subscript, and superscript
Text colour
Highlight colour
Hyperlinks
Linked phone number for direct calls
Text alignment
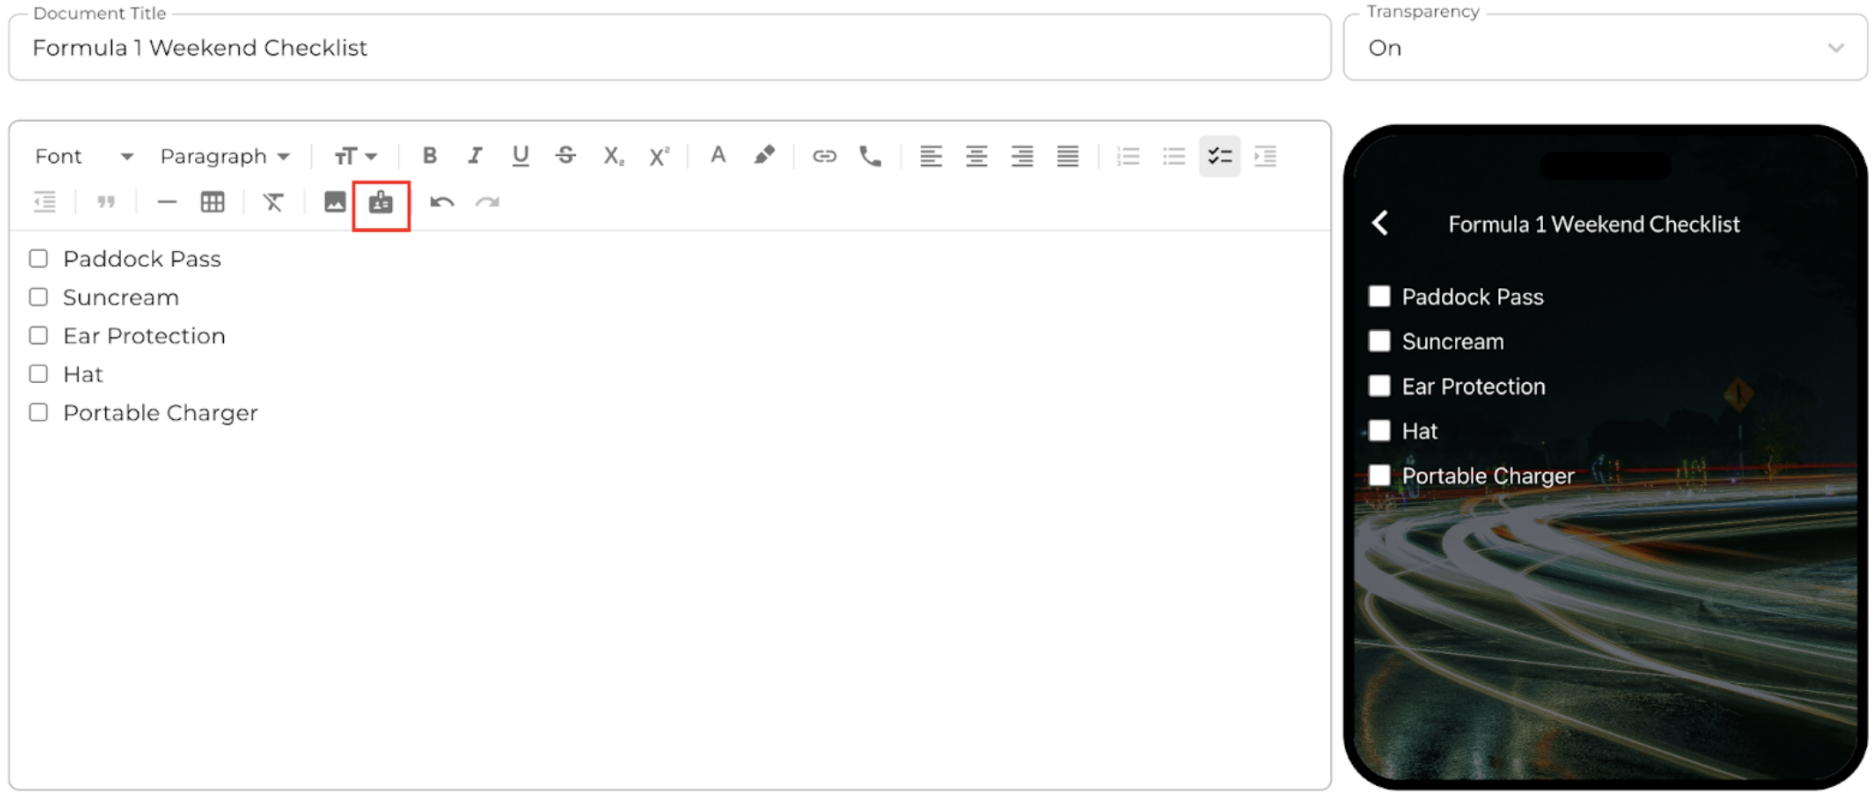
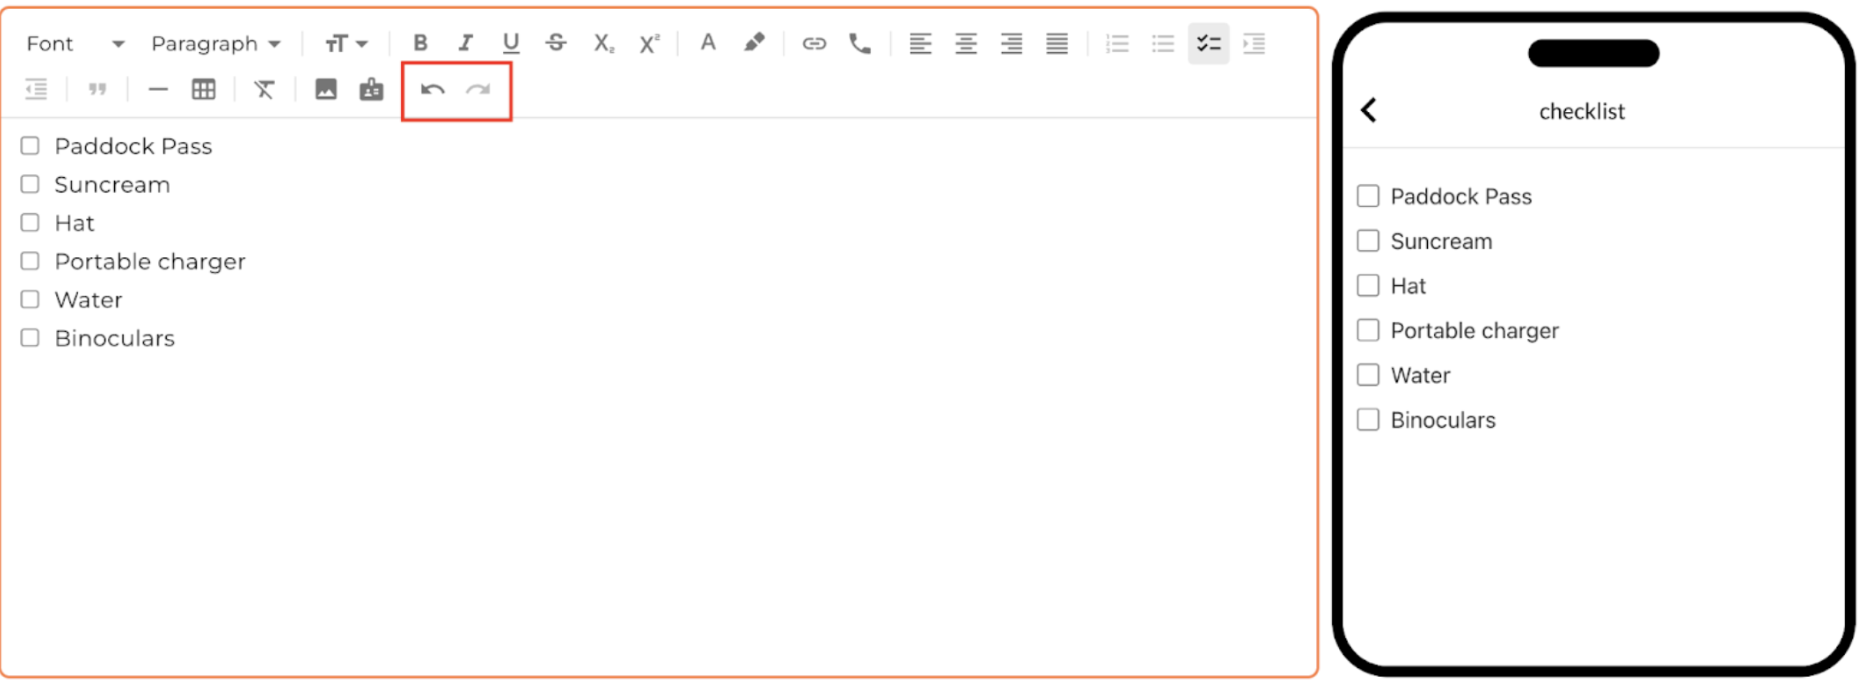
Lists: numbers, bullets, checkboxes

Images:
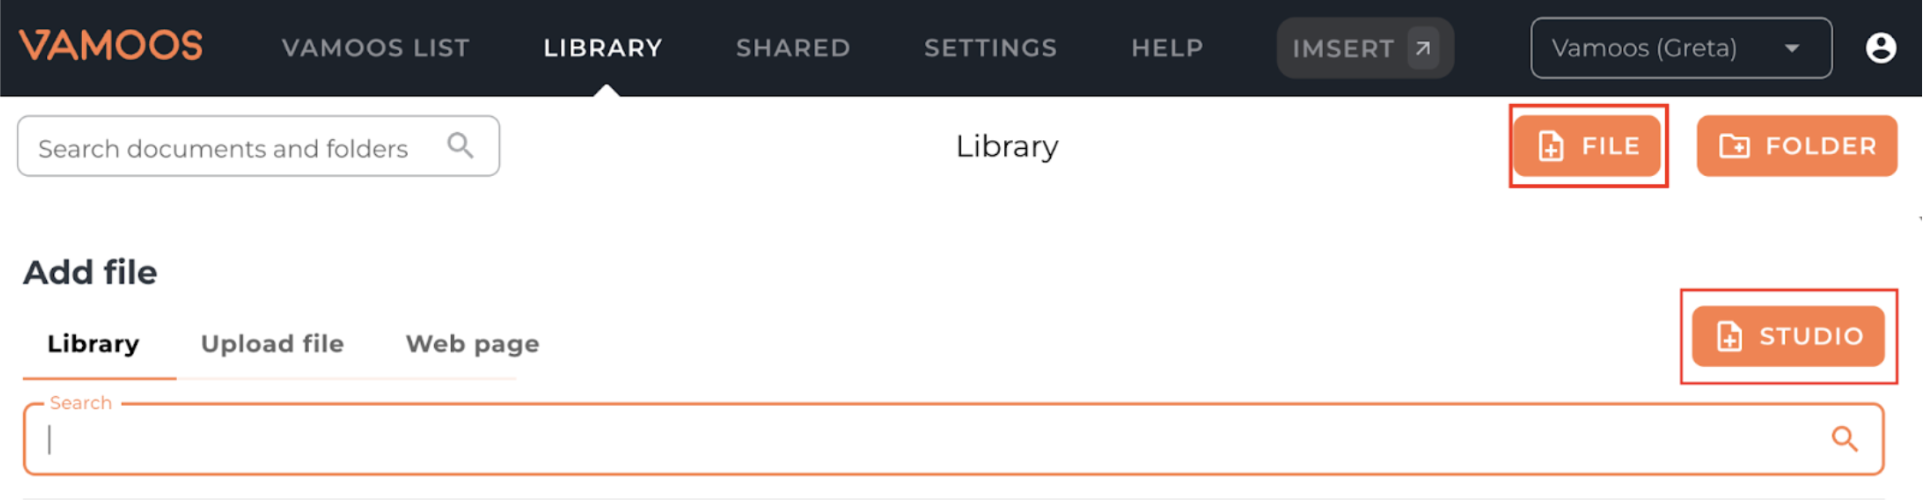
To add an image, select the picture icon in the menu.
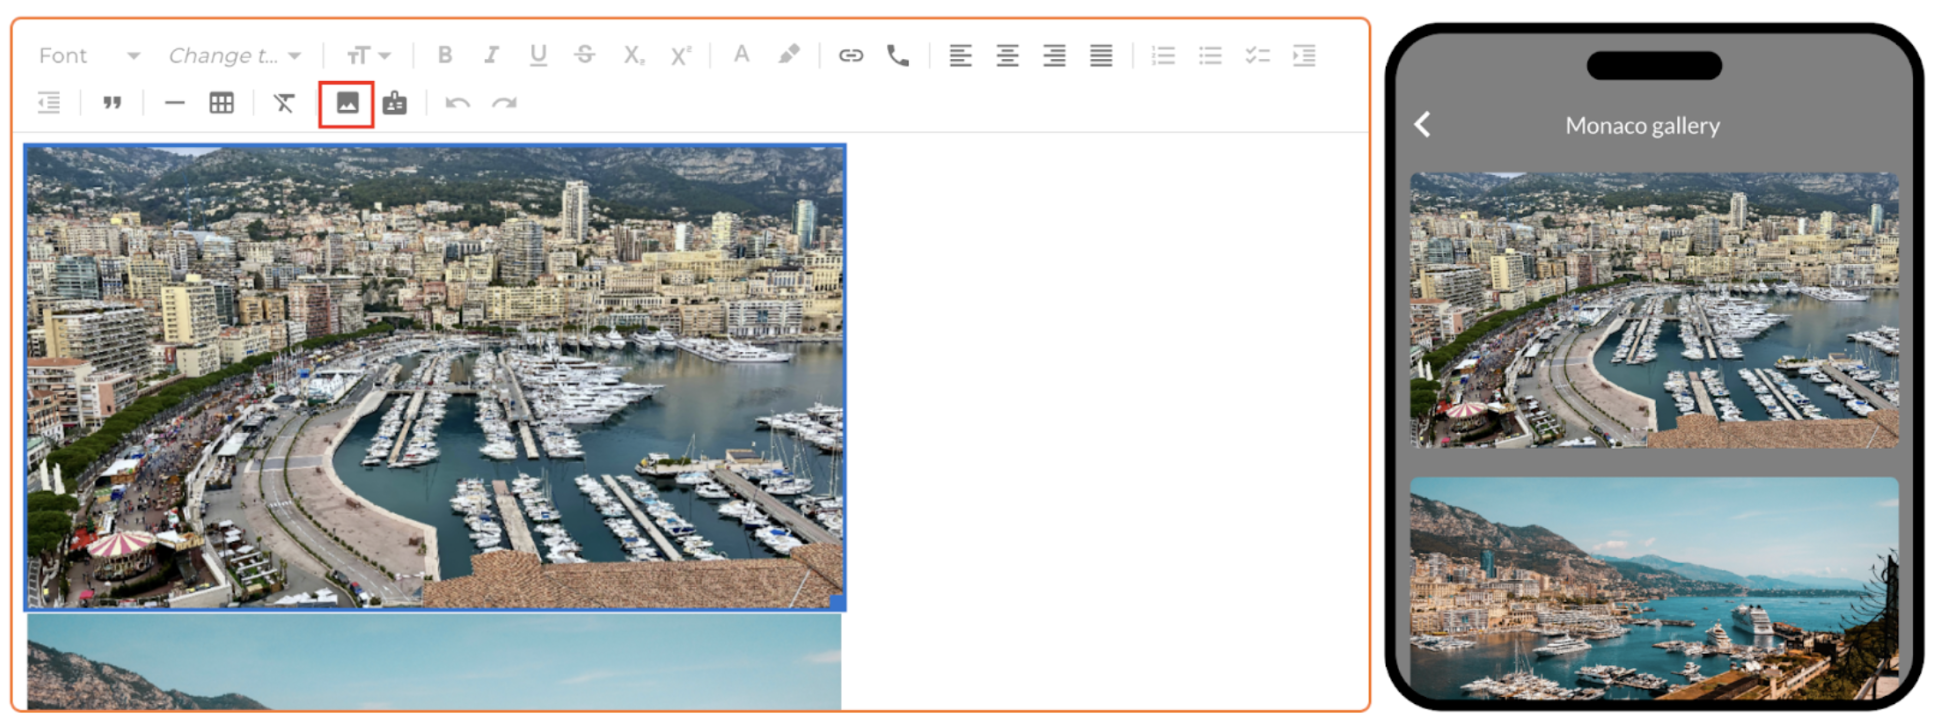
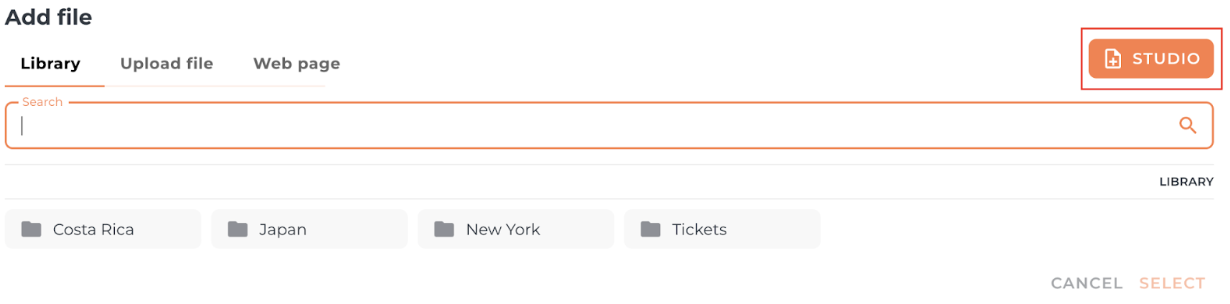
Upload an image via:
Your Vamoos Library
Your device
Imsert
Unsplash
PLEASE NOTE: The images must be in JPG, JPEG, PNG, or GIF format.
There are some formatting options for images:
Resize the images by hovering over the photo, grabbing the bottom right-hand corner, and dragging the image to be larger or smaller.
Change the alignment of the image. You can add multiple images to each document.
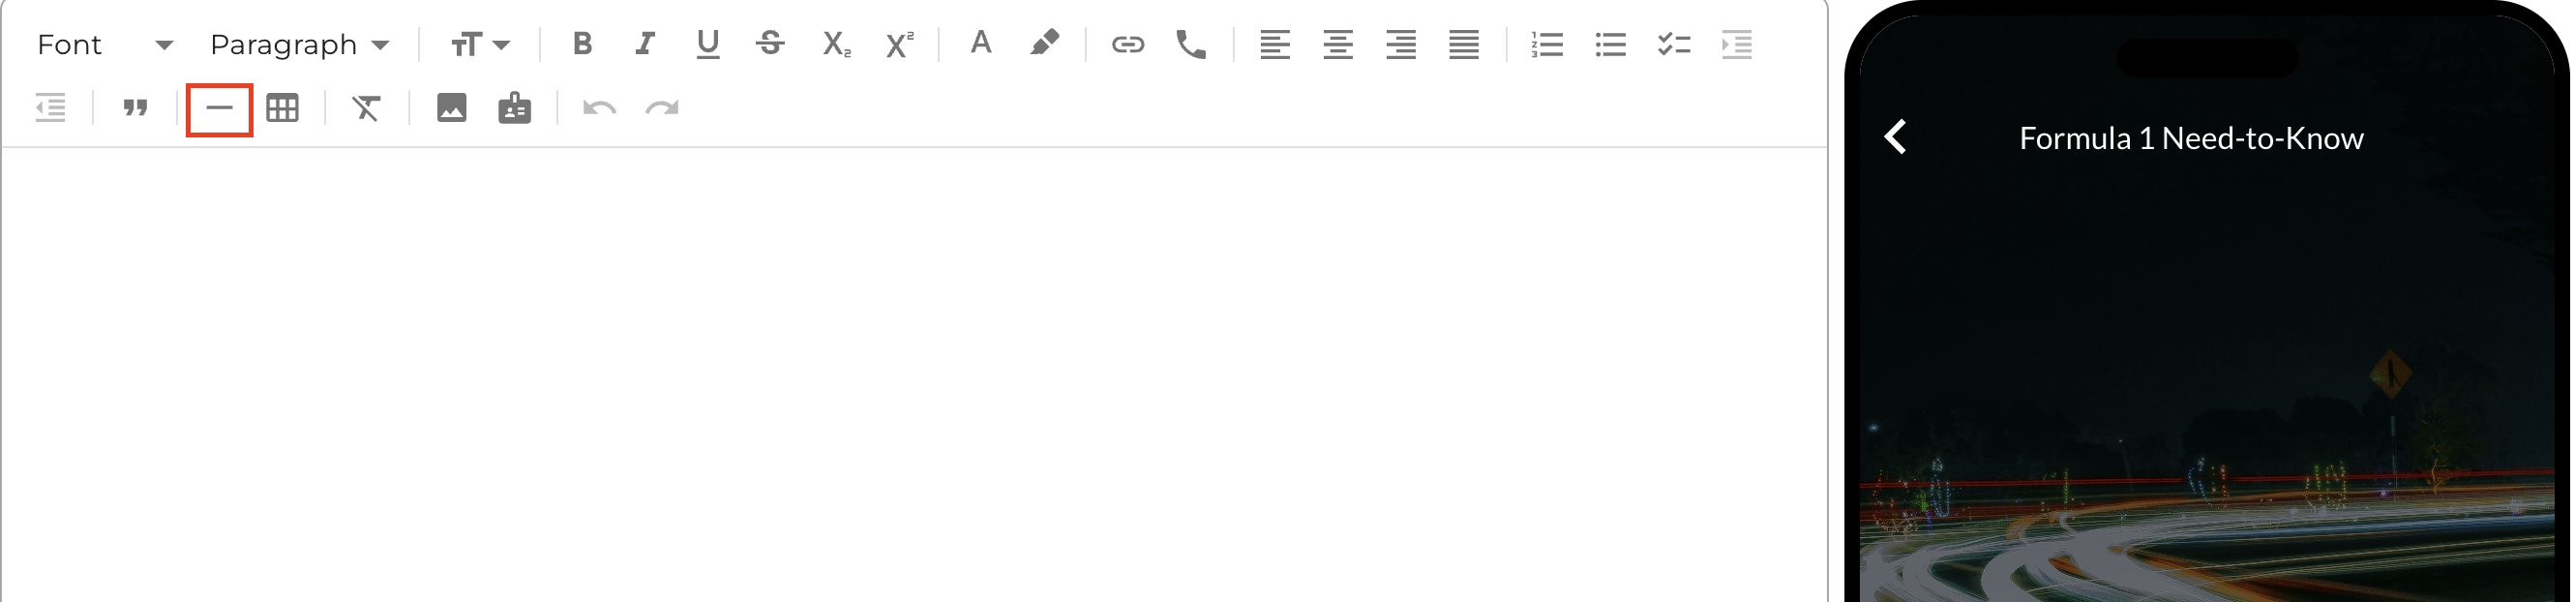
Other tools:
Add your Logo to the document by selecting the Add Logo button. If you have multiple brand profiles, you will be able to select from those.
Insert a horizontal line break with the following button.
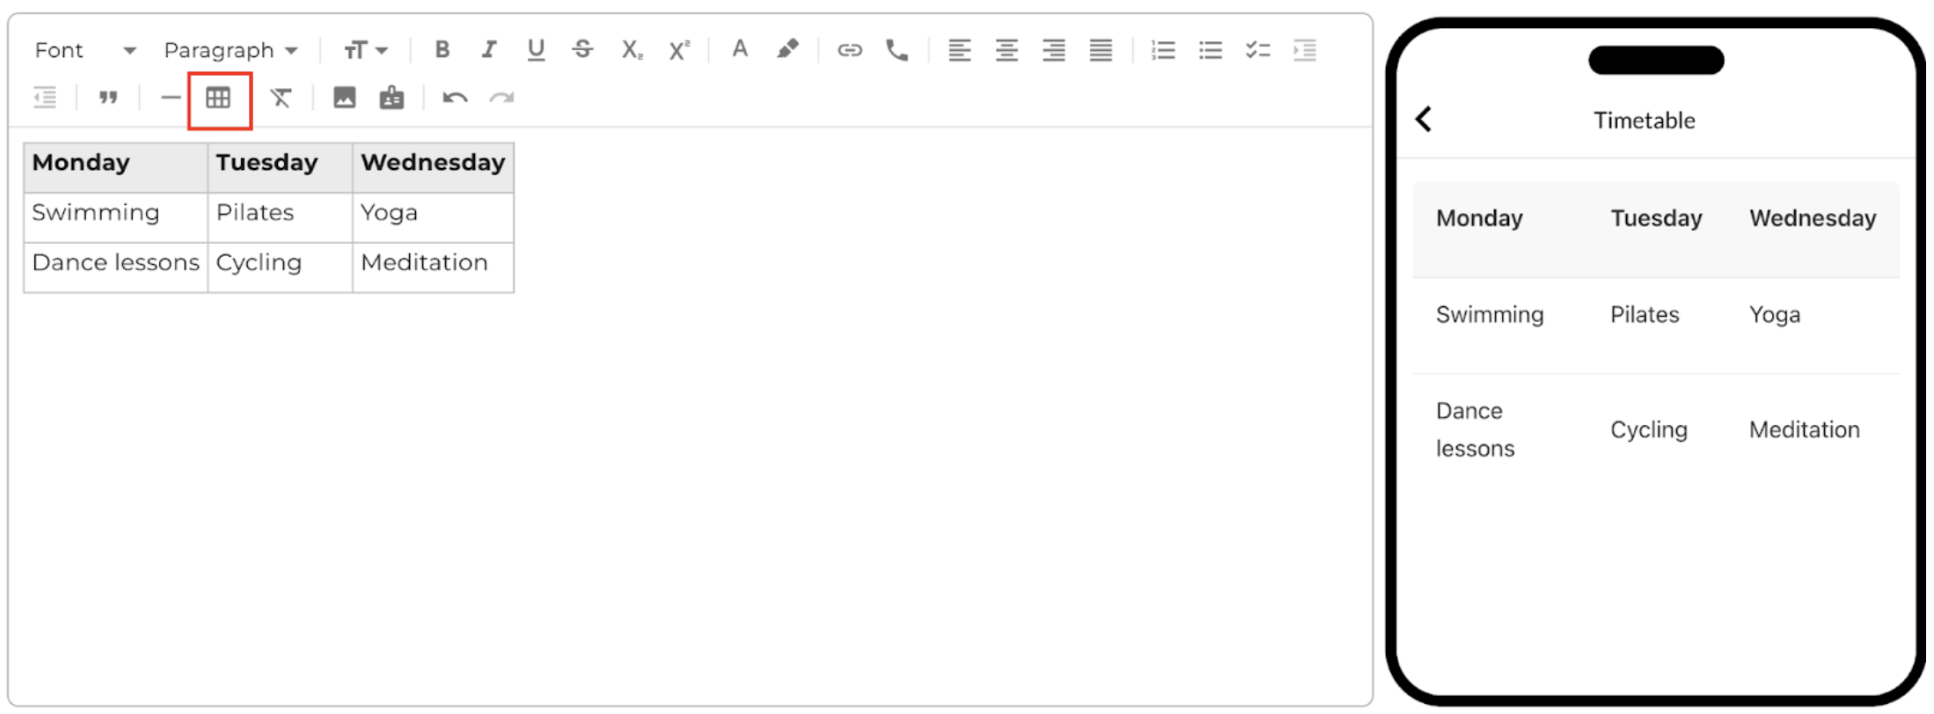
Insert a table with the following button. There are several formatting options within tables:
Add or remove rows and columns
Add or remove header rows, columns, and cells
Merge cells
Split cells
NOTE: Text within a table can be formatted with the same tools as regular text.
Undo and redo your work.
TOP TIP: create your studio documents in the library to access and add the document to any trip.
How to Bulk Upload Studio Documents to Trips
Step 1: Applications Folder
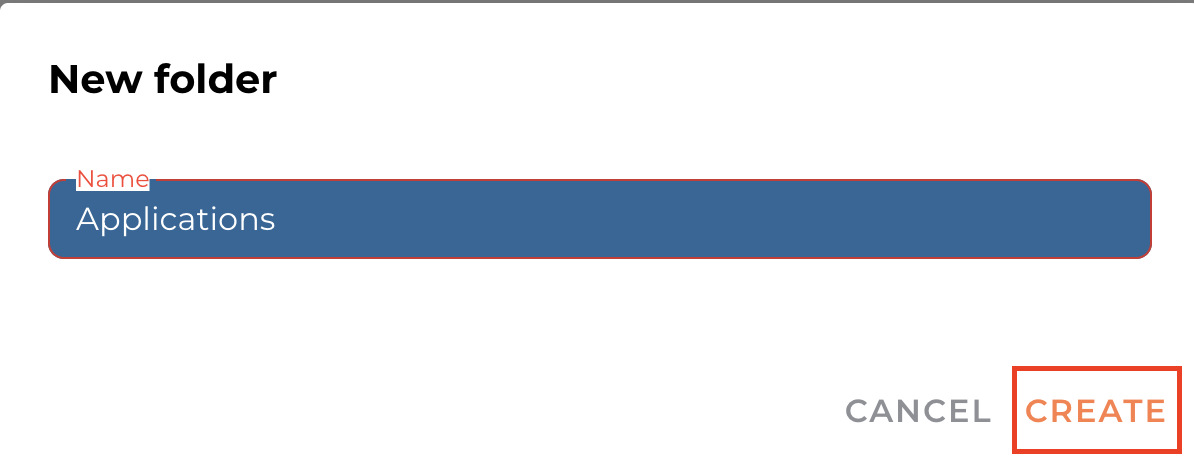
Head to the Library at the top of the page and create a new folder titled ‘Applications’ by clicking the FOLDER button, then CREATE.

Note: If you already have a folder for your Studio Applications, skip to Step 2.
Step 2: Create or Upload an Existing Studio Document
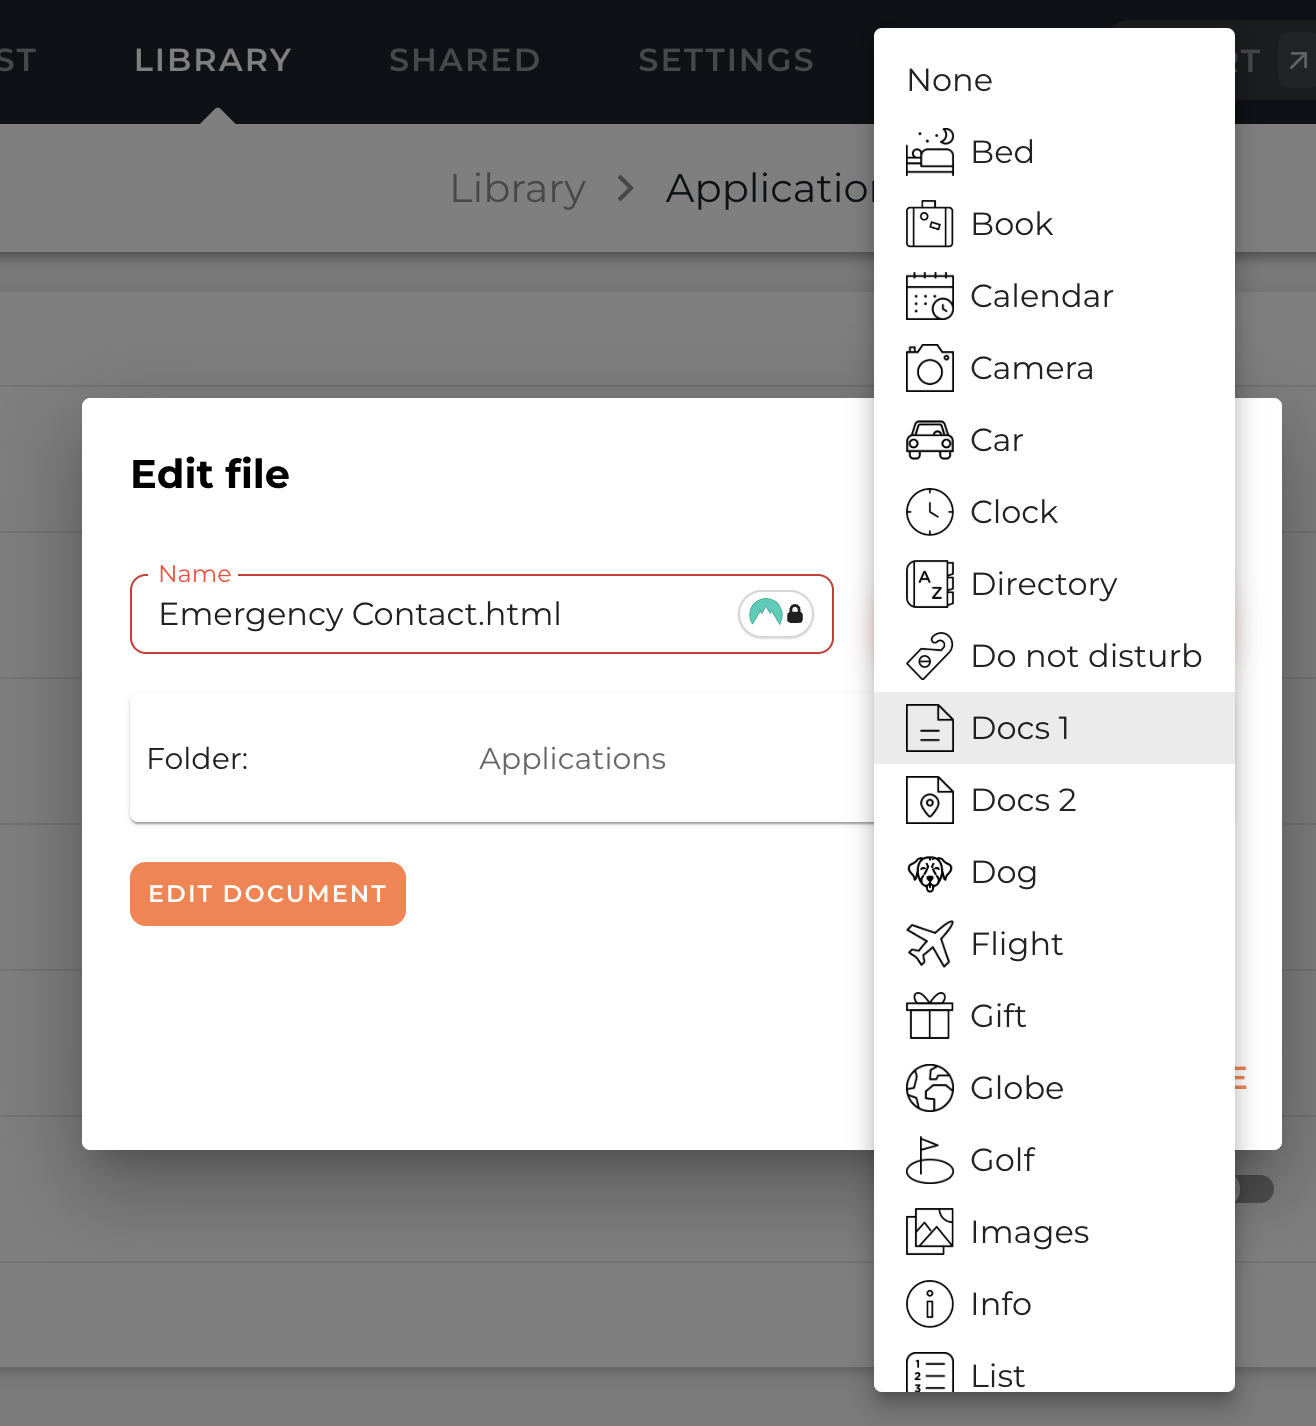
To Create a new Studio Document within your Application folder, click FILE, then select STUDIO and SAVE.
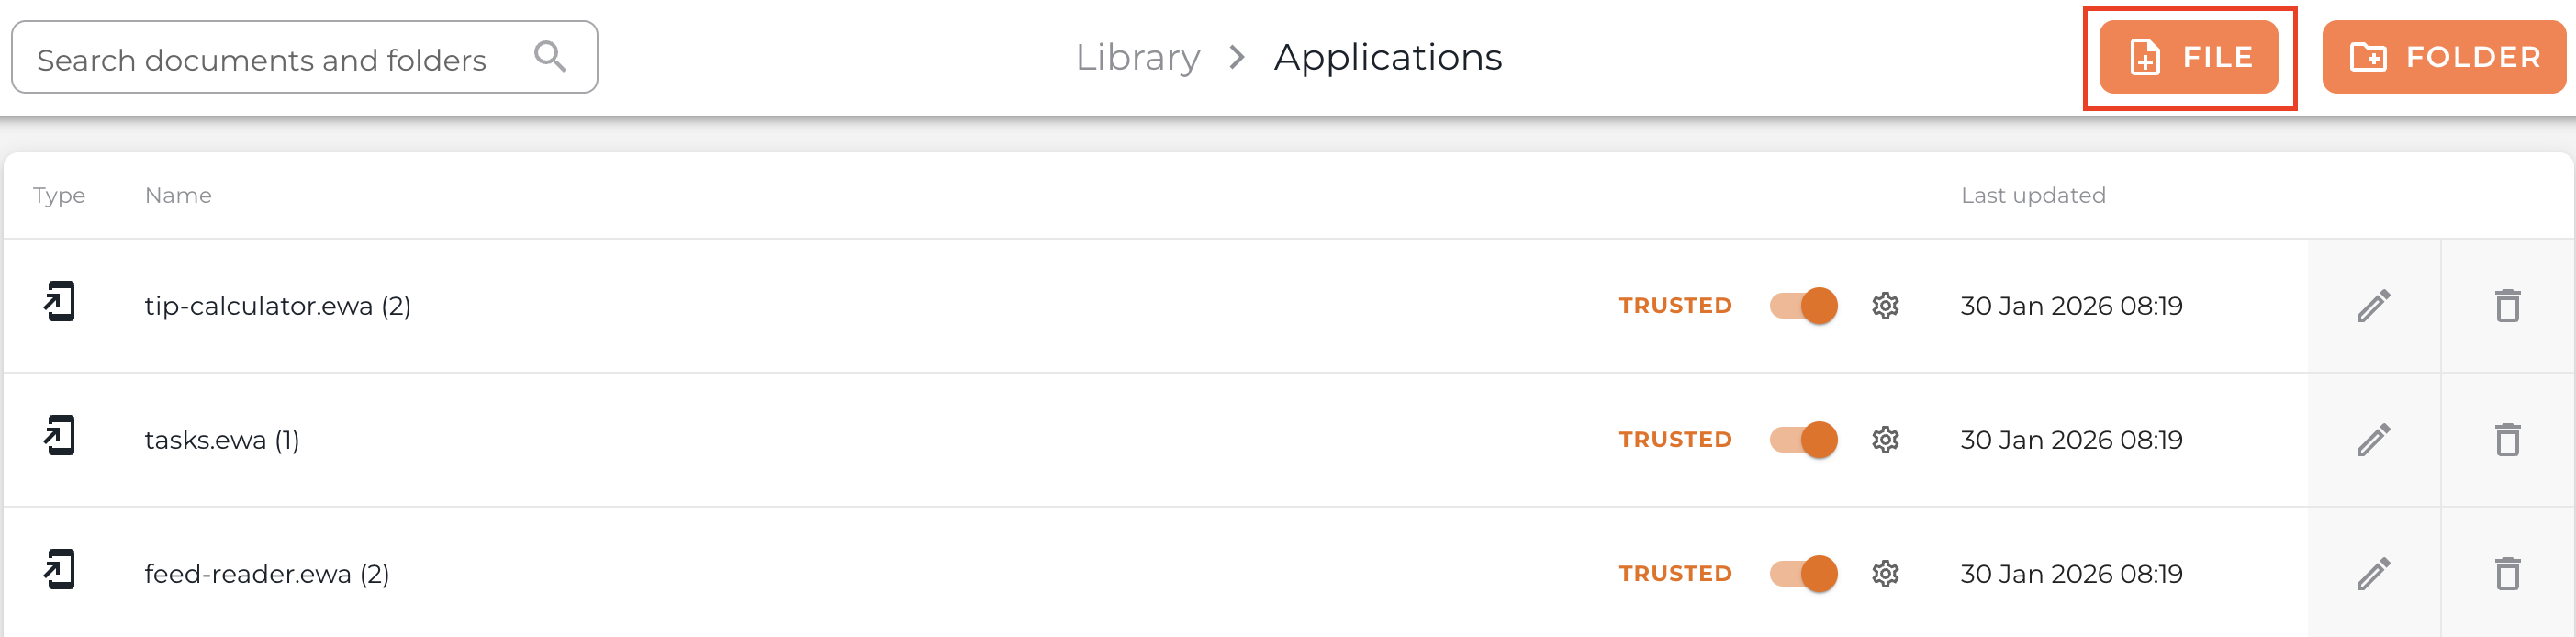
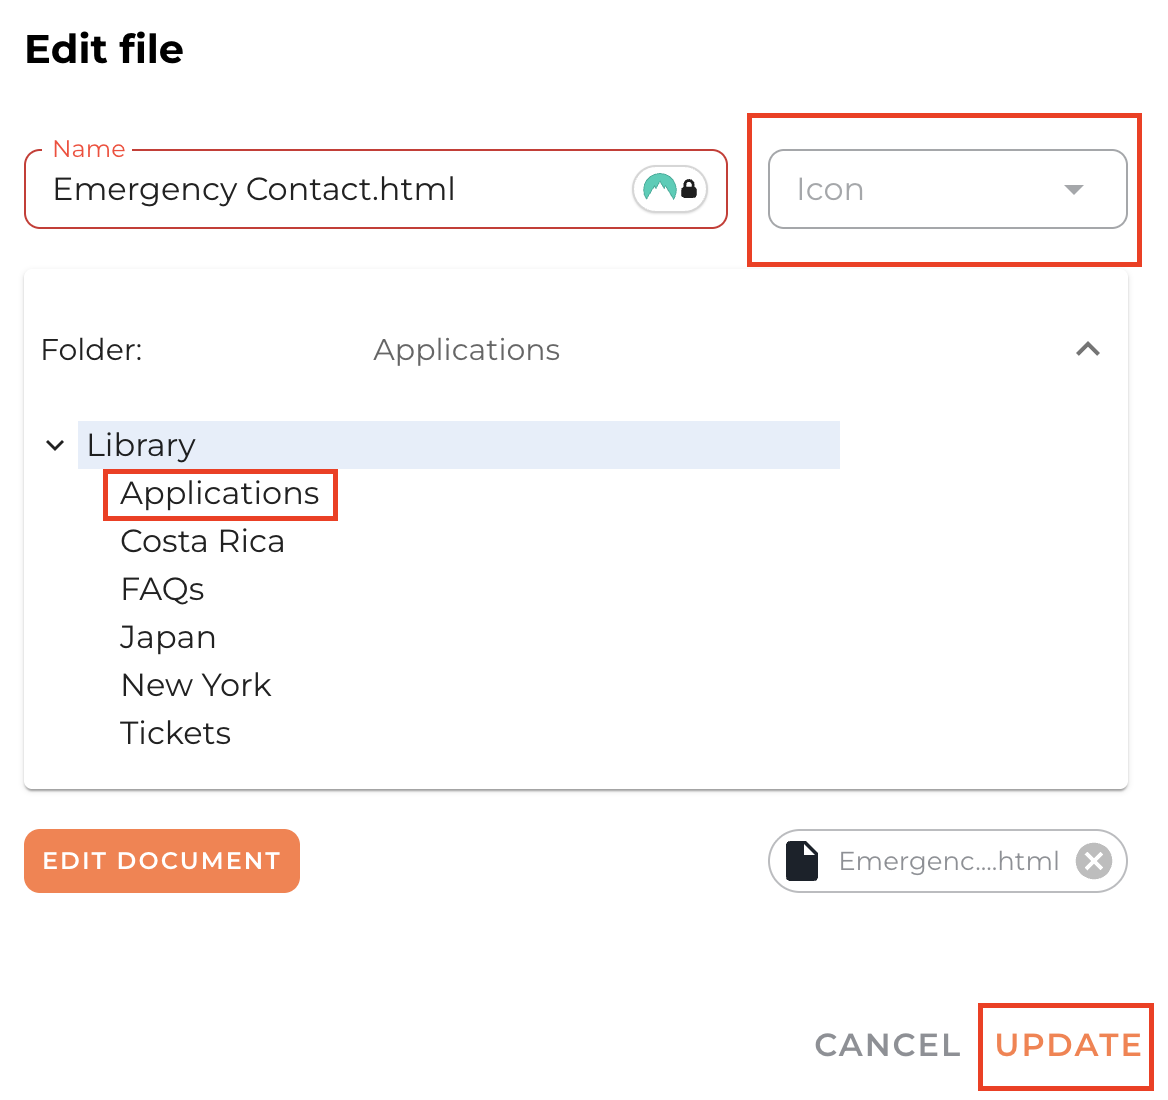
You will then need to click Edit File and choose your desired icon. Click UPDATE to save your changes.

To add an existing Studio Document to your Applications folder, click Edit File, and from the dropdown list select Applications Folder. Choose your desired Icon. Click UPDATE to save your changes.
Step 3: Add Document to All Trips
Head to Settings at the top of the screen, click GENERAL and scroll to the Trip Menu.
Switch from Default to Studio homescreen layout. Click +ADD and select the document you want to add from the list.
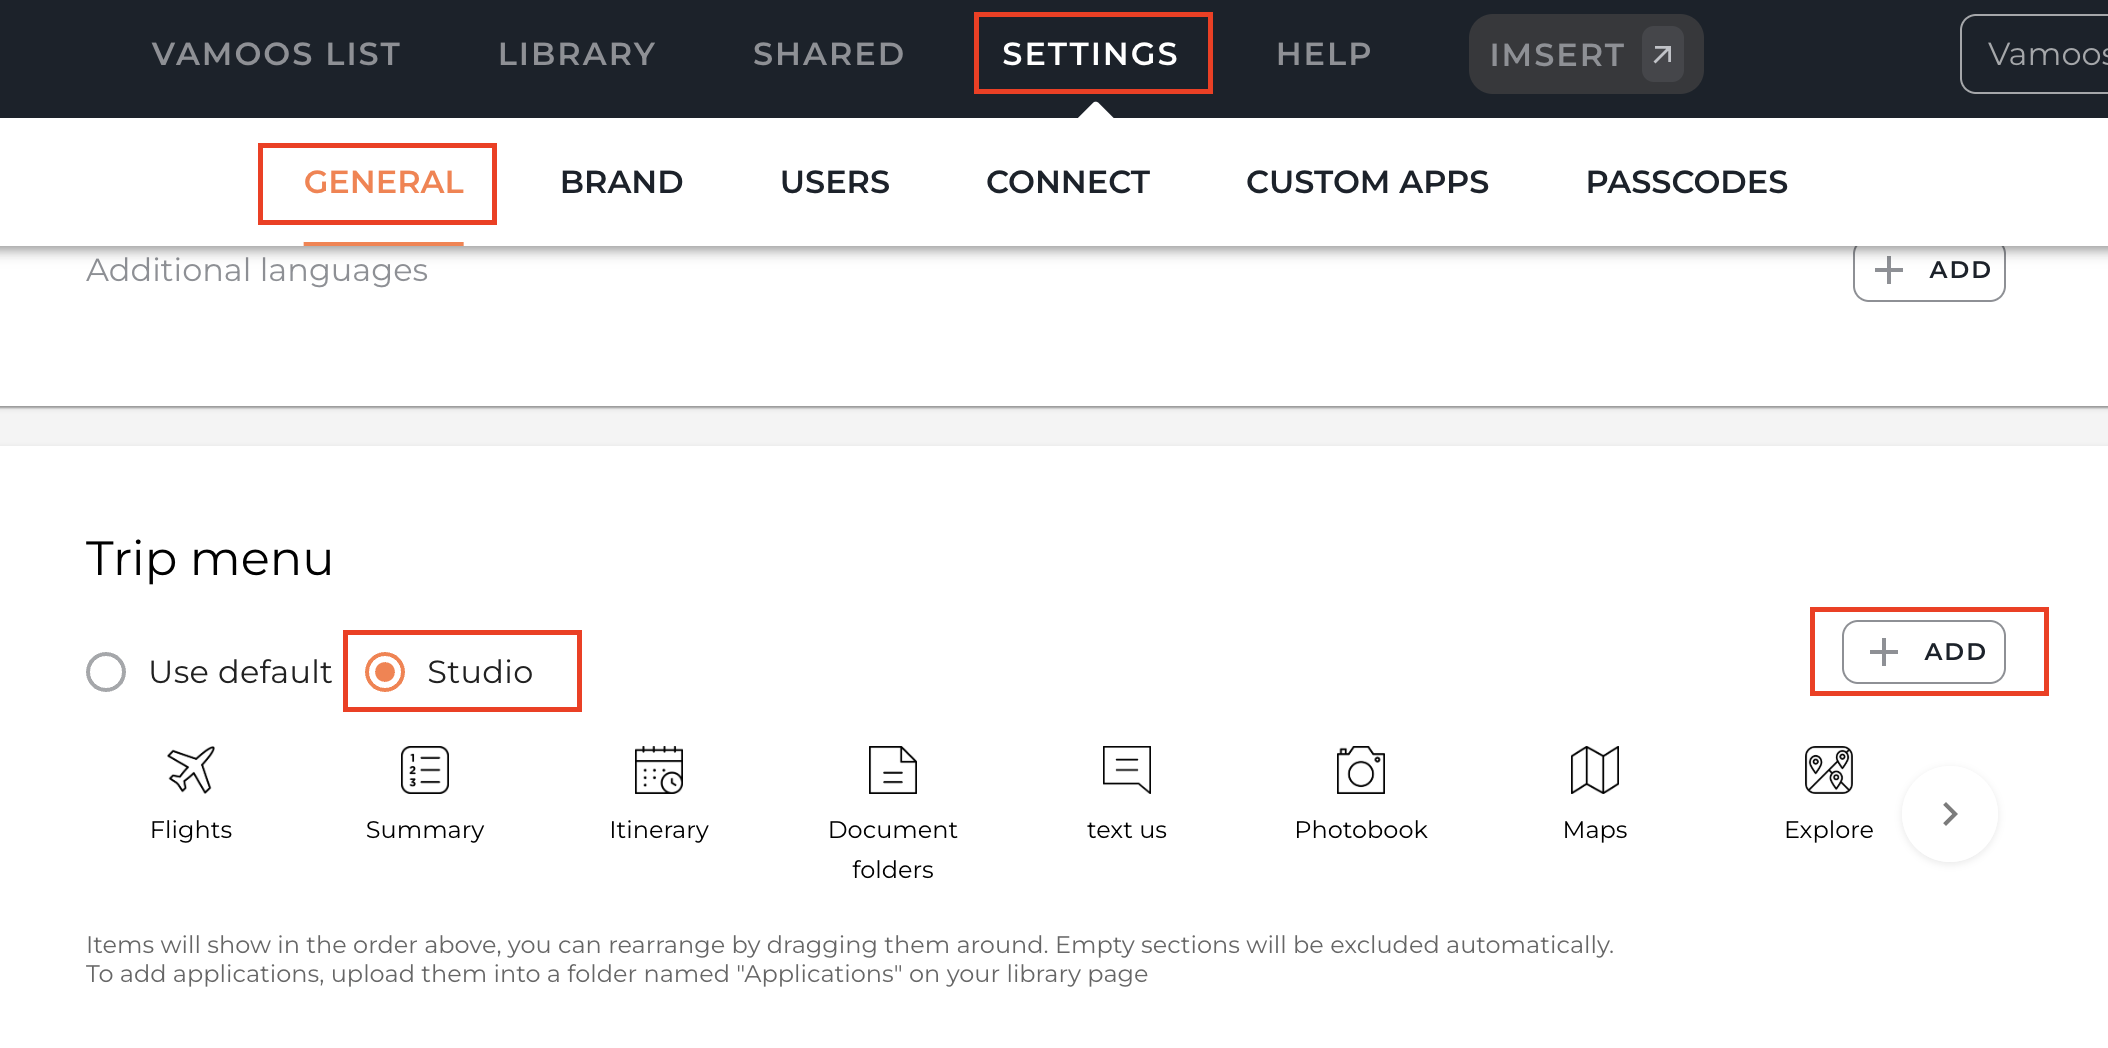

Top Tip: drag and drop to rearrange the order of the icons!
Create Multiple Document Sections
Step 1: Open the Documents section
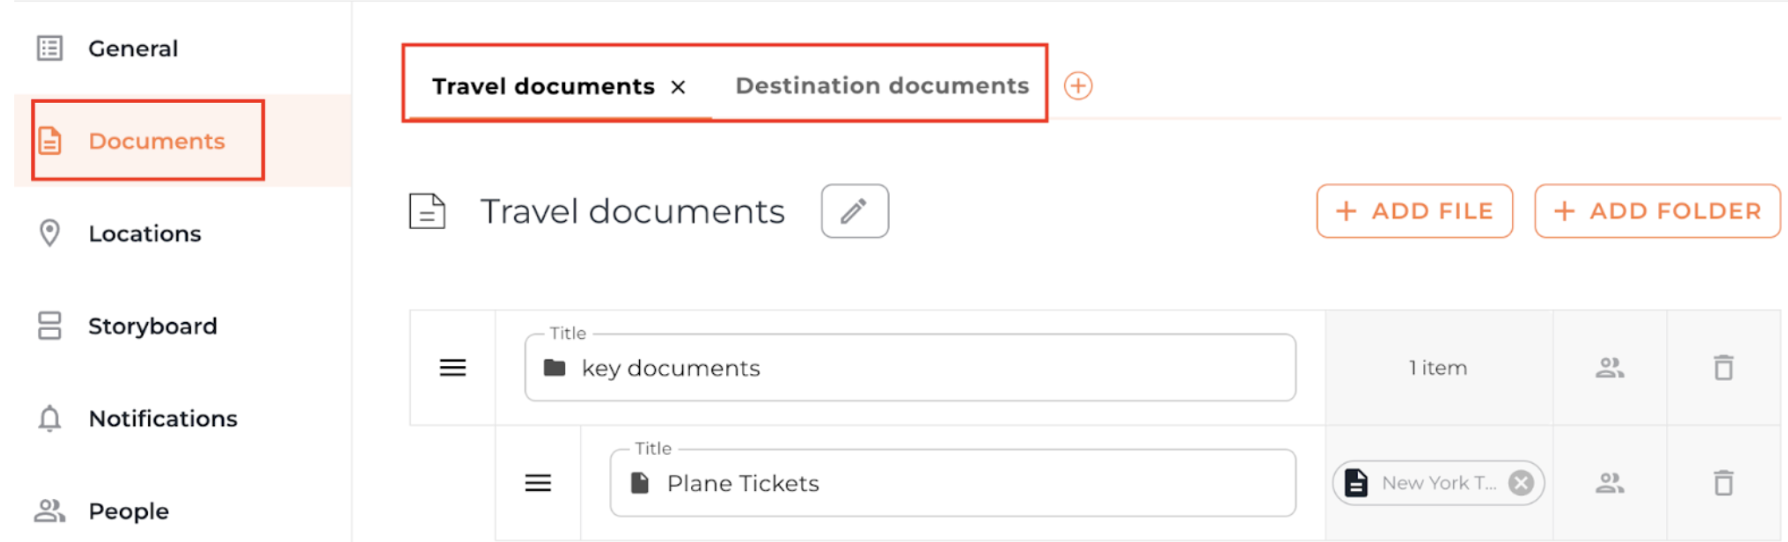
Go to Documents within any trip.
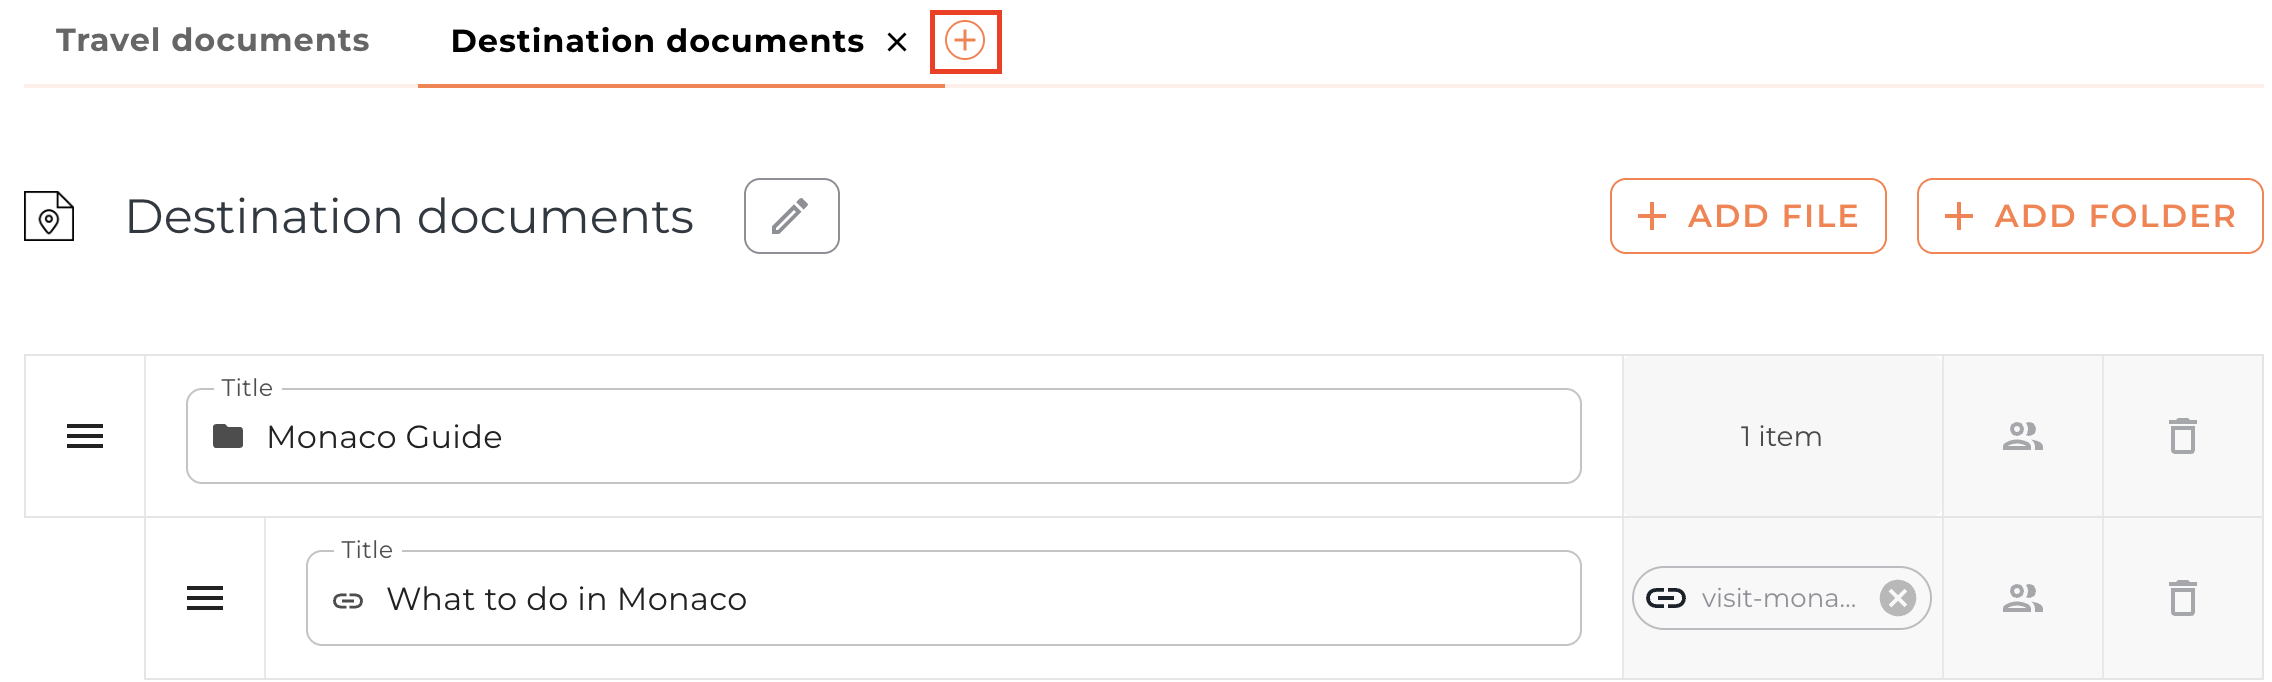
Step 2: Create a new document section.
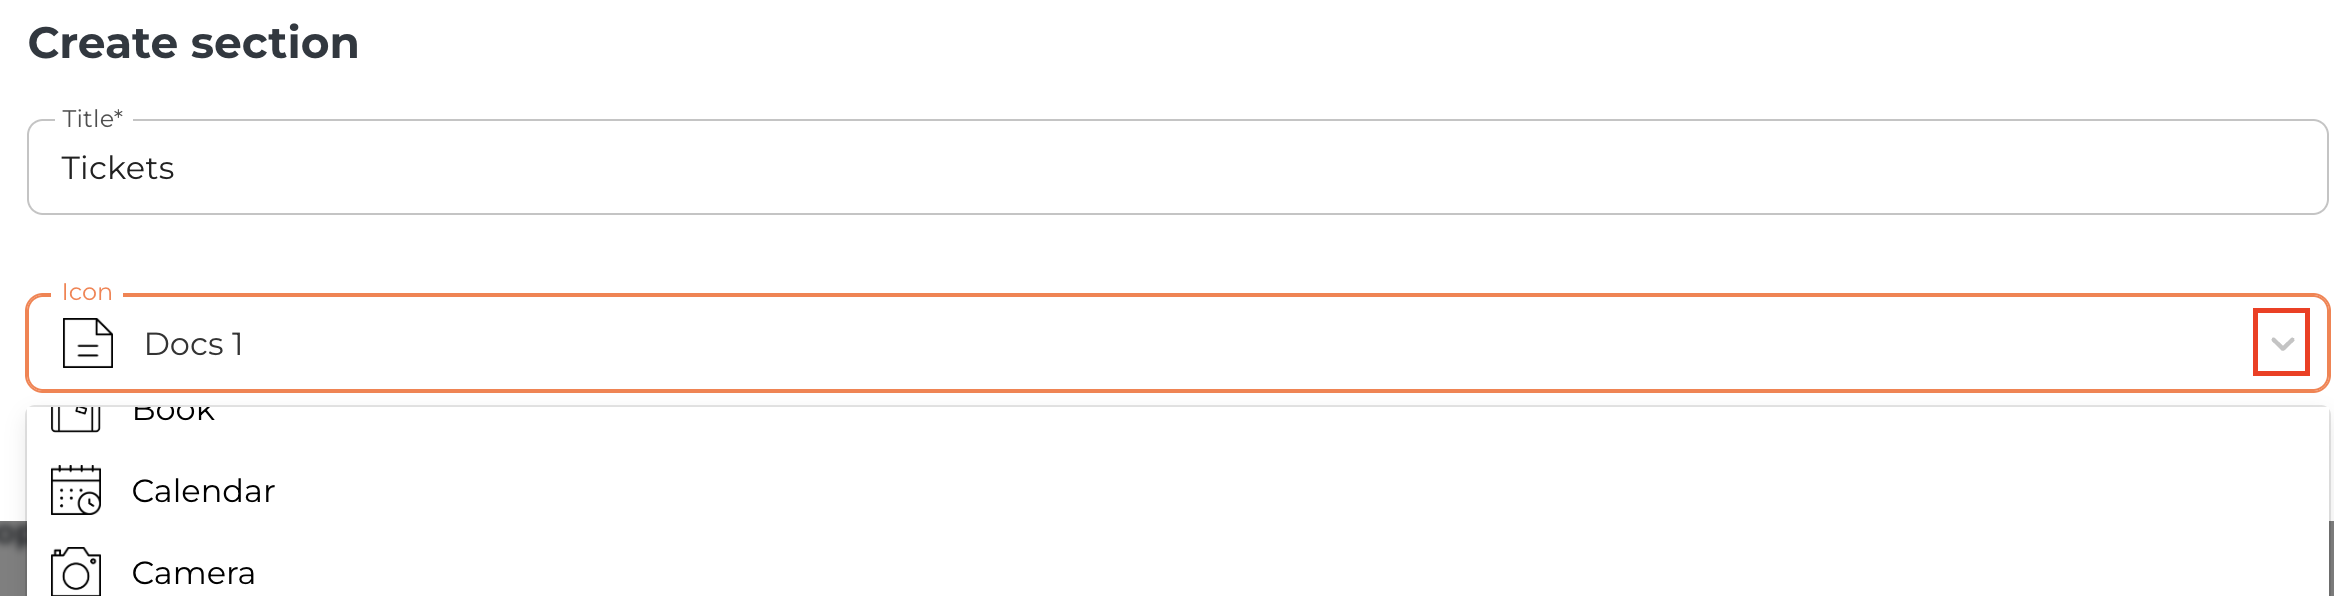
Click + to add a new document section.
Step 3: Add a document title
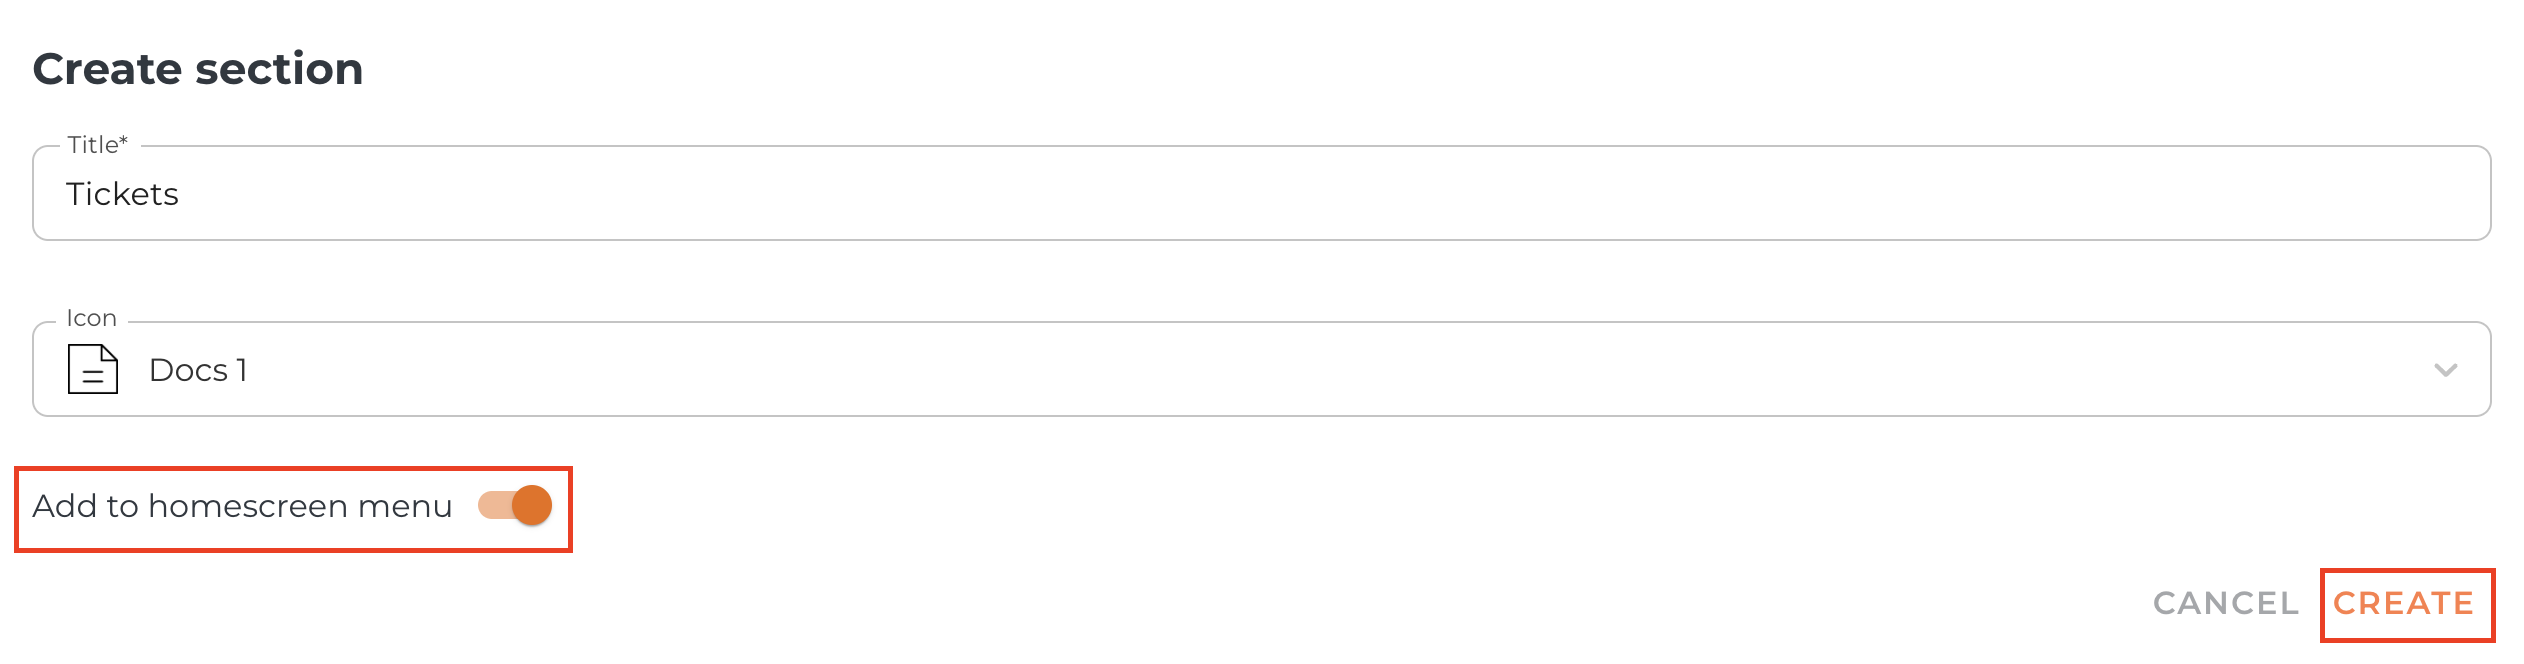
In the ‘Title’ field, put the desired title for your clients to see.
Step 4: Choose your icon
Click on the drop down arrow and choose a desired icon from the list and click CREATE.
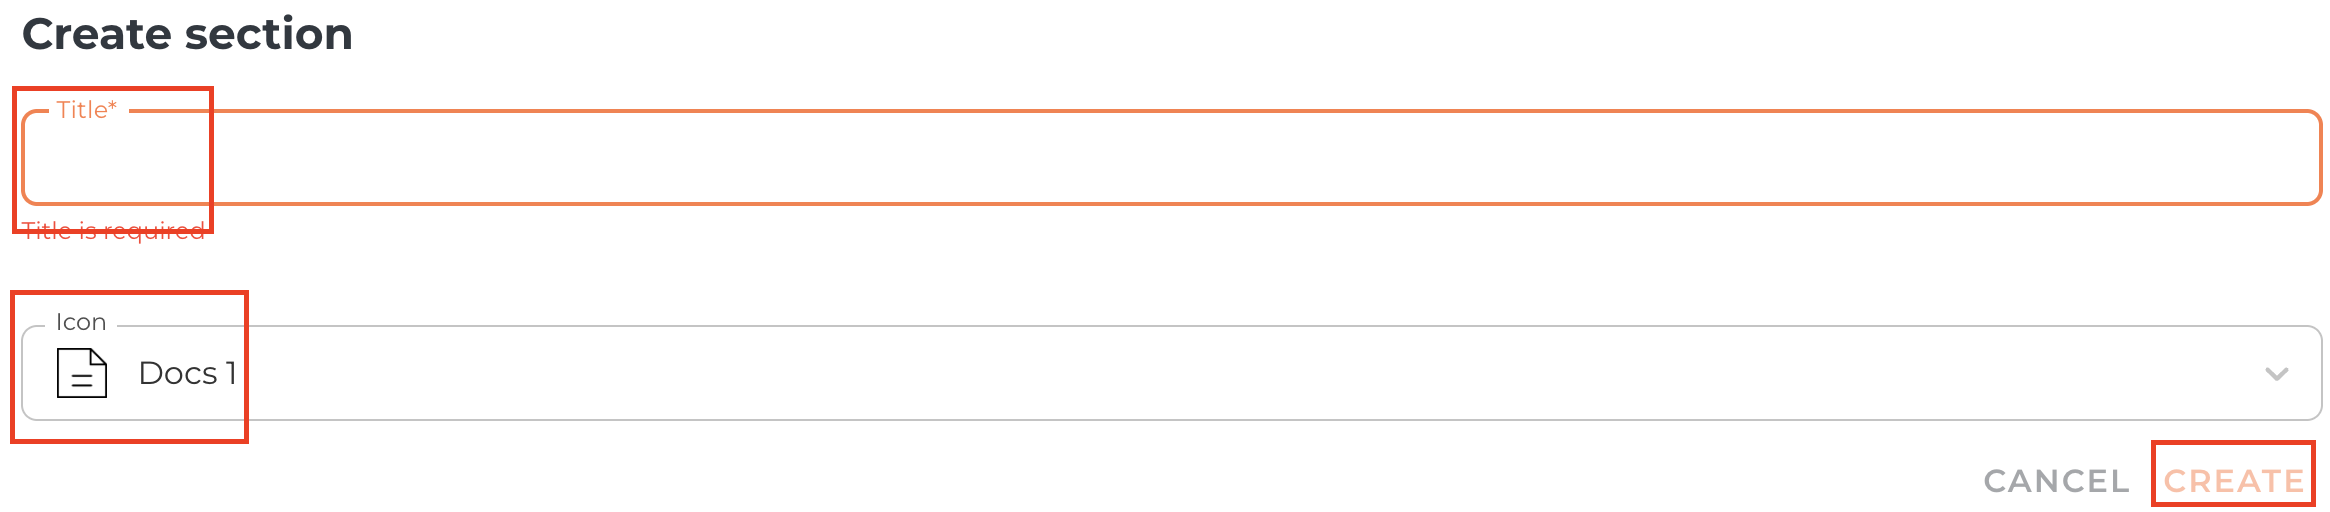
Step 5: Add Section to Home Screen Menu
Enable the “Add to home screen menu” option to display this section on the app’s home screen.
Delete Document Sections
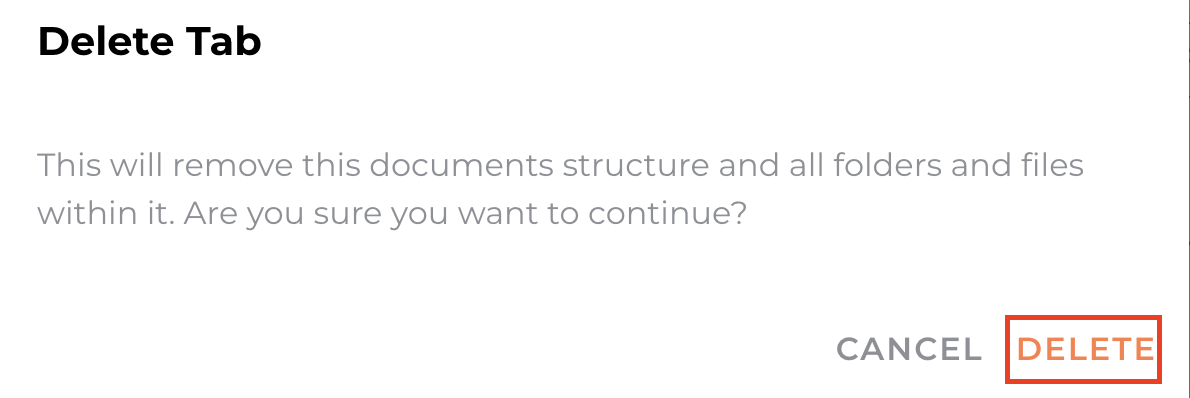
Step 1: Select Document Section you want to delete.

Step 2: Delete the section.
Click on the X to delete the desired document section and confirm by clicking DELETE.

Uploading videos
Step 1. Open the trip details
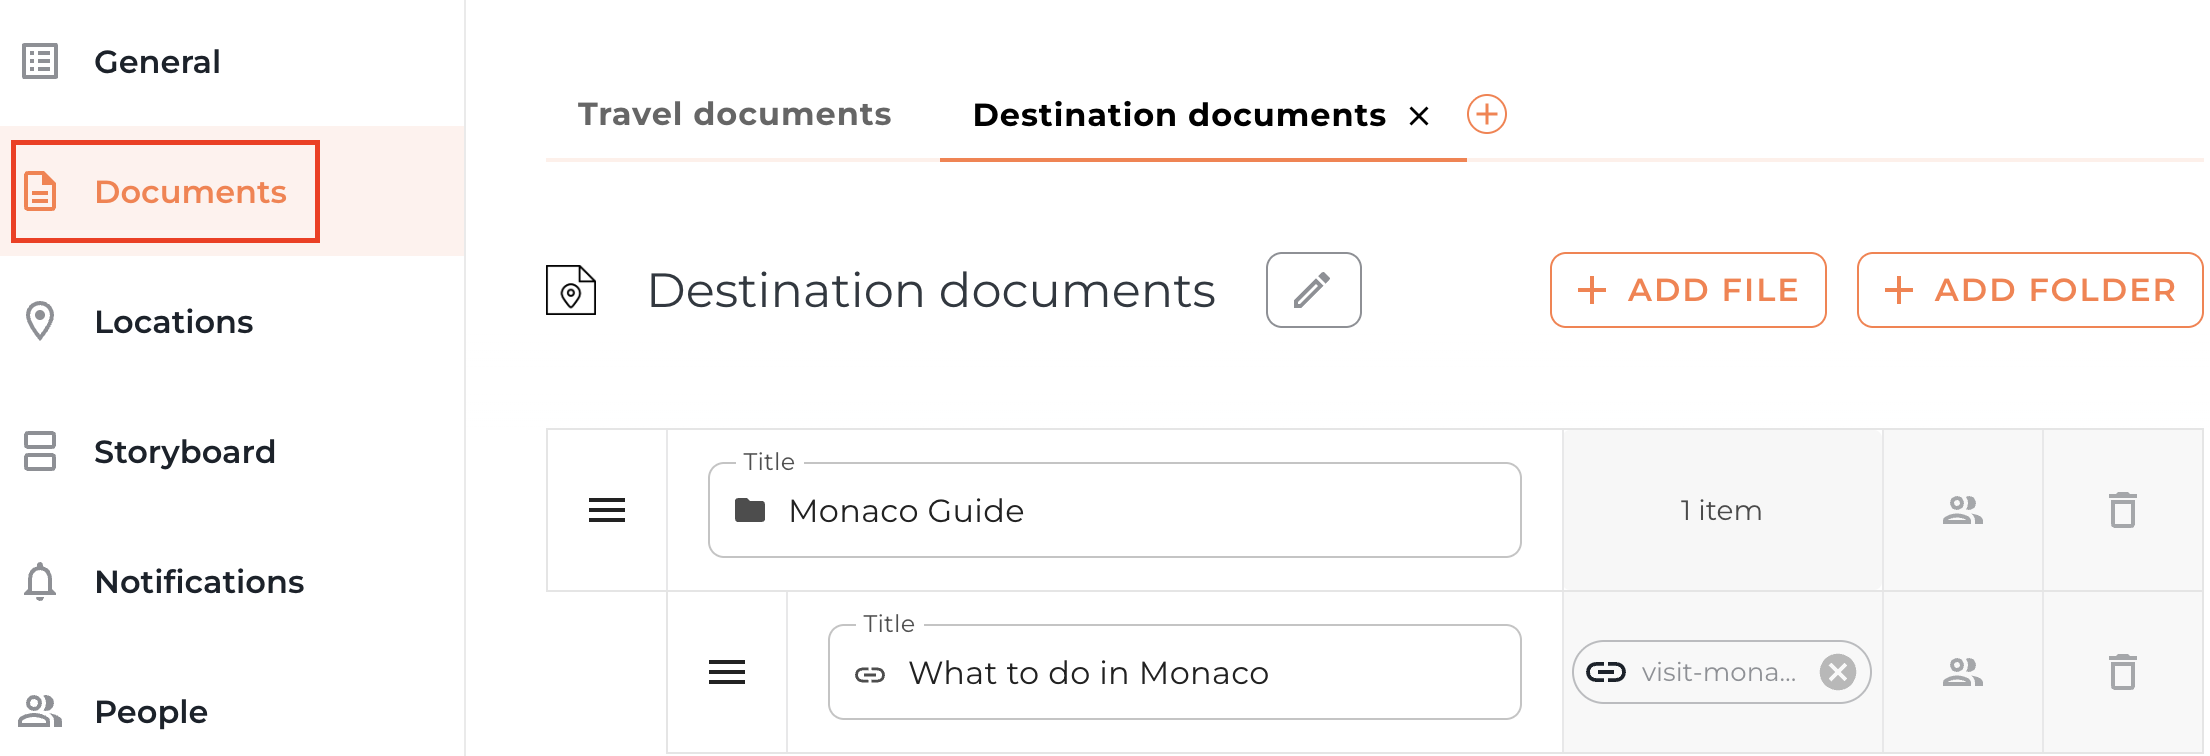
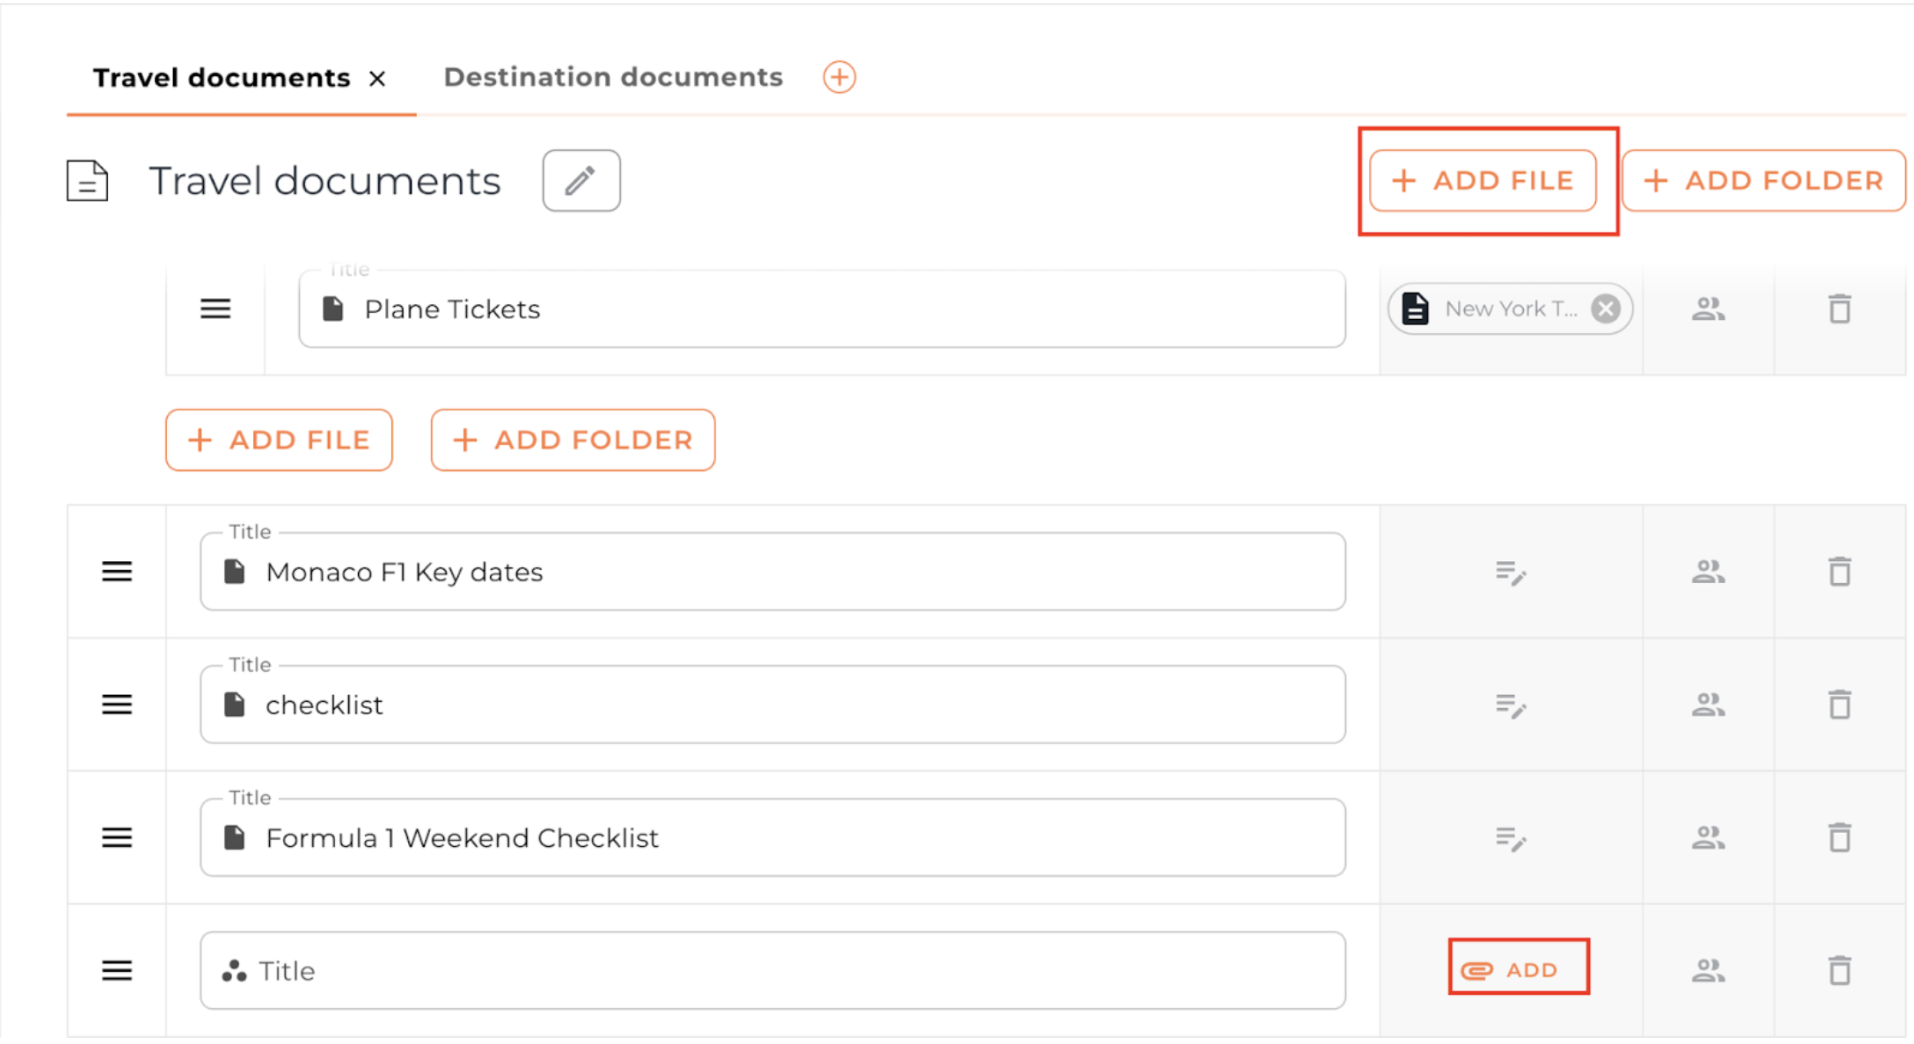
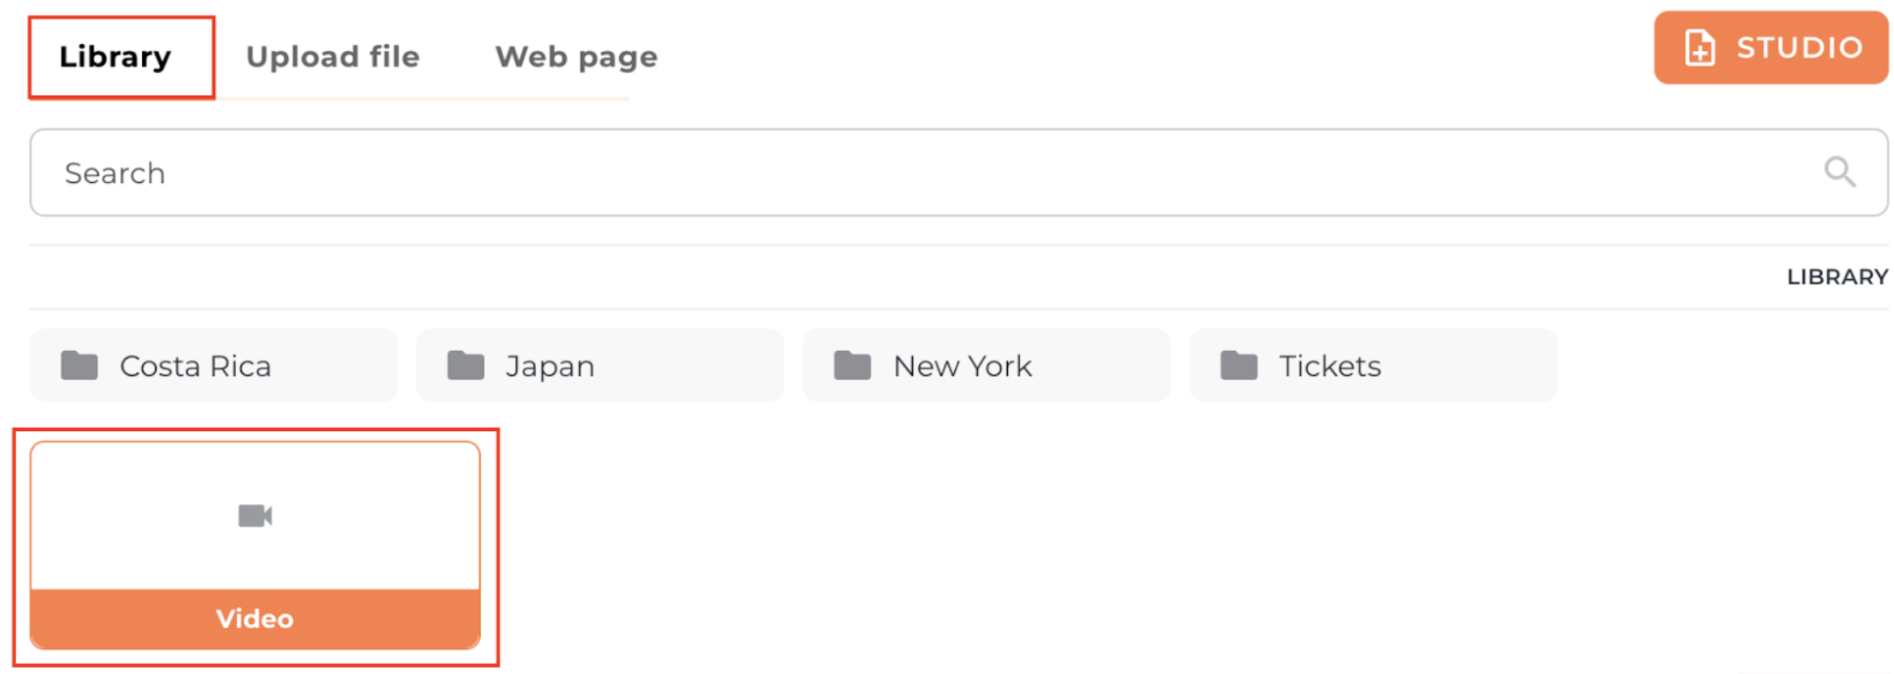
Choose a trip from the Vamoos List, go to Documents on the left-hand side and choose from Travel Documents or Destination Documents.
Step 2. Create a File
Click on the +ADD FILE button and click ADD again to attach a file.
Step 3. Upload the video
You can choose to upload the video from the Library or your device.
Step 4. Title
Create a name for the file.
PLEASE NOTE: video must be in mp4 format and cannot be uploaded to the Studio.
Document folders
Step 1. Open the trip details
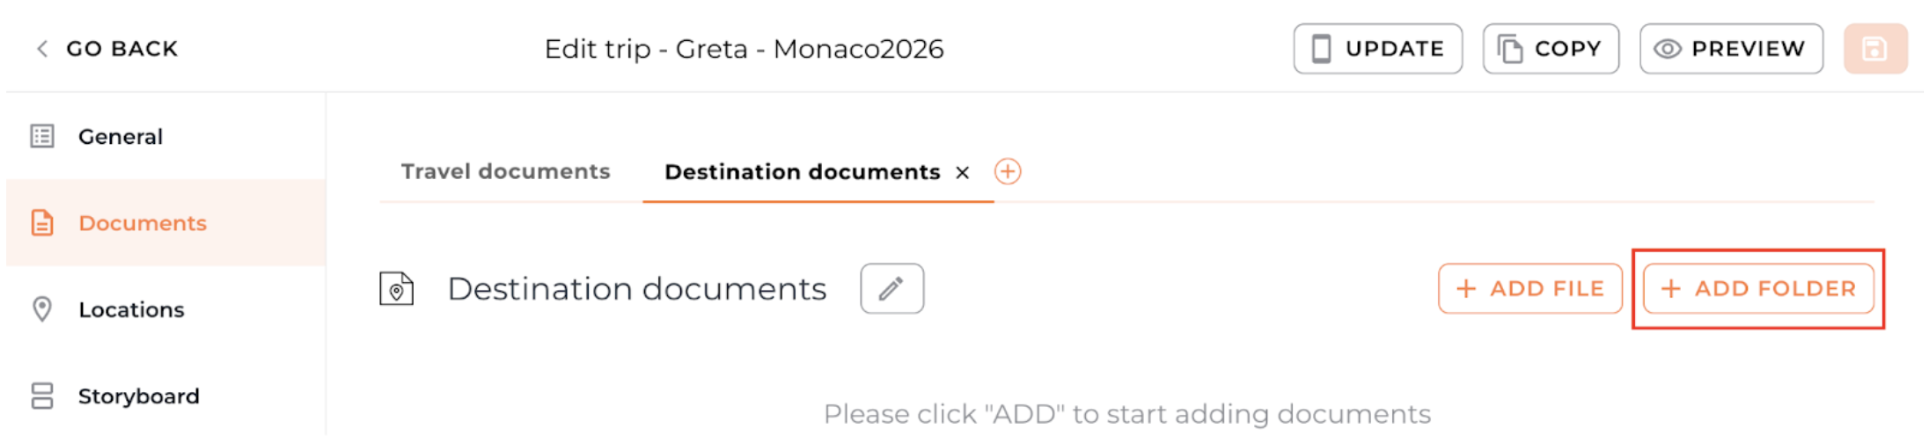
Choose a trip from the Vamoos List, go to Documents on the left-hand side and choose from Travel Documents, Destination Documents or create a Studio Document.
TOP TIP: you can rename these to fit the type of information you are uploading.
Step 2. Create the Folder
To create a folder, press + ADD FOLDER.
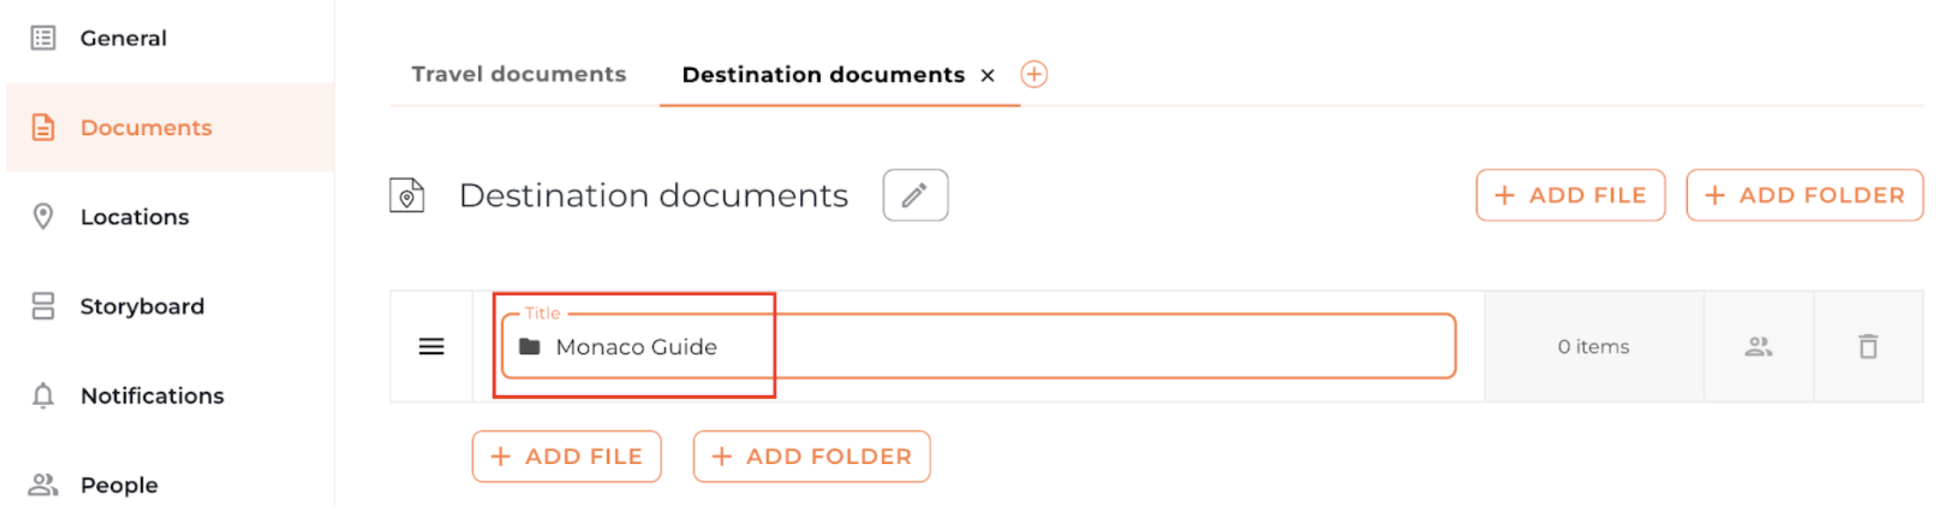
Step 3. Title the Folder
In the ‘Title’ section, fill out the folder name.
Moving the documents into folders
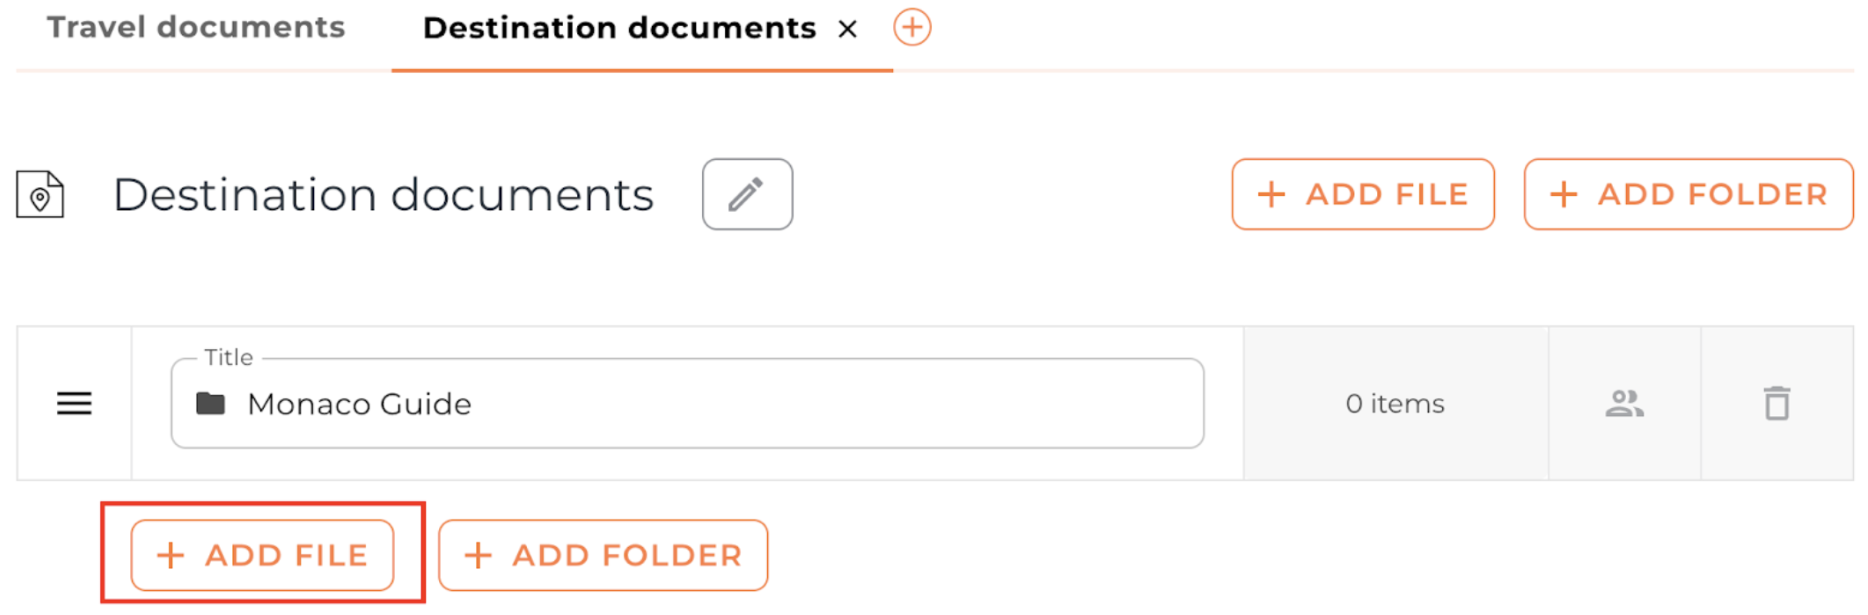
Step 4. Adding documents into folders
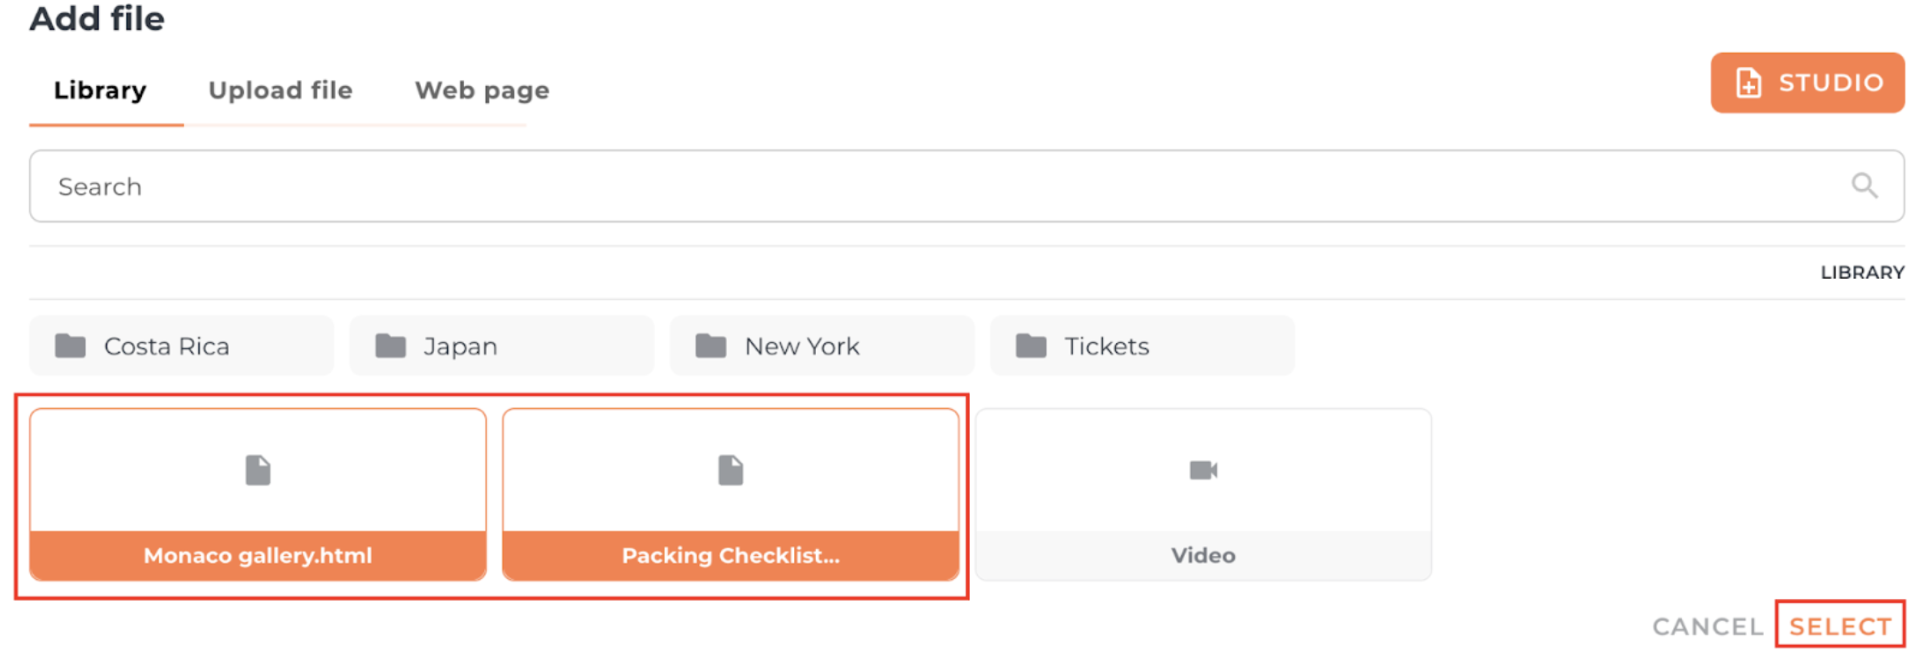
In order to upload documents to the folder, click +ADD FILE, give it a title and press on the ADD button.
You will have the option to upload PDFs from the library, link a website or Studio Document and press SELECT.
Creating sub-folders
Step 1: Create a folder
Do this by clicking +ADD FOLDER, name your folder by giving it a title.
Step 2: Create second folder
Under the Title section, you have the option to +ADD FOLDER, this will allow you to have sub categories within a folder.

TOP TIP: you can restrict who has access to the documents by personalising it.
Removing Folders
Step1: click on the Trash icon
Step 2: Confirm by pressing DELETE

Removing Files
Step 1: click on the Trash icon.
Step 2: Confirm by pressing DELETE.
Creating Studio Documents in the Library
Step 1: Library
Head to the Library the the top of the page.

Step 2: Create a new File or Folder
Select FILE or FOLDER at the top of the page and click the +Studio option.
Step 2: Title the document
In the ‘Document Title’ field, put the desired title for the document for your clients to see.
Step 3: Build the document
You can now create your document from scratch using the various features within the document builder.
Step 4: Uploading from Library to the trip
Choose a trip from the Vamoos List or create a new one.
On the left hand side, select Documents. Choose if you would like to upload Travel Documents, Destination documents or add your own section.
Step 5: Adding Studio Documents
Click +ADD FILE, then click on the paperclip icon and select Library.

Step 6: Choose the document
You can select more than one document to upload from the Library and confirming by pressing SELECT.
Please note: edits made to the document in the Library will automatically update this document for all trips.
FAQs
Q: How will this work via my API?
A: This will not affect your API. You will continue to send information and you can now create docs dynamically via the API - send across in HTML.
Q: What file types can I upload to the library and the Documents section?
A: You can upload PDF, JPG, JPEG, PNG, GIF, video/mp4, HTML, ZIP, application/zip files.
If you have any further questions or need help with this, you can contact us at support@vamoos.com.