
POIs for trips: add points of interest to the map
✅ For Travel Companies
Highlight your expert local knowledge and provide clients with personalised Points of Interest (POIs) for their trip.
In this article:
Introduction to Points of Interest (POIs)
POIs let you recommend the best places for clients — from the tastiest local restaurant to hidden gems, Instagram spots, or practical essentials like ATMs.
They’re created at company level and appear automatically in trips that fall within range. You can then personalise which POIs display for each trip.
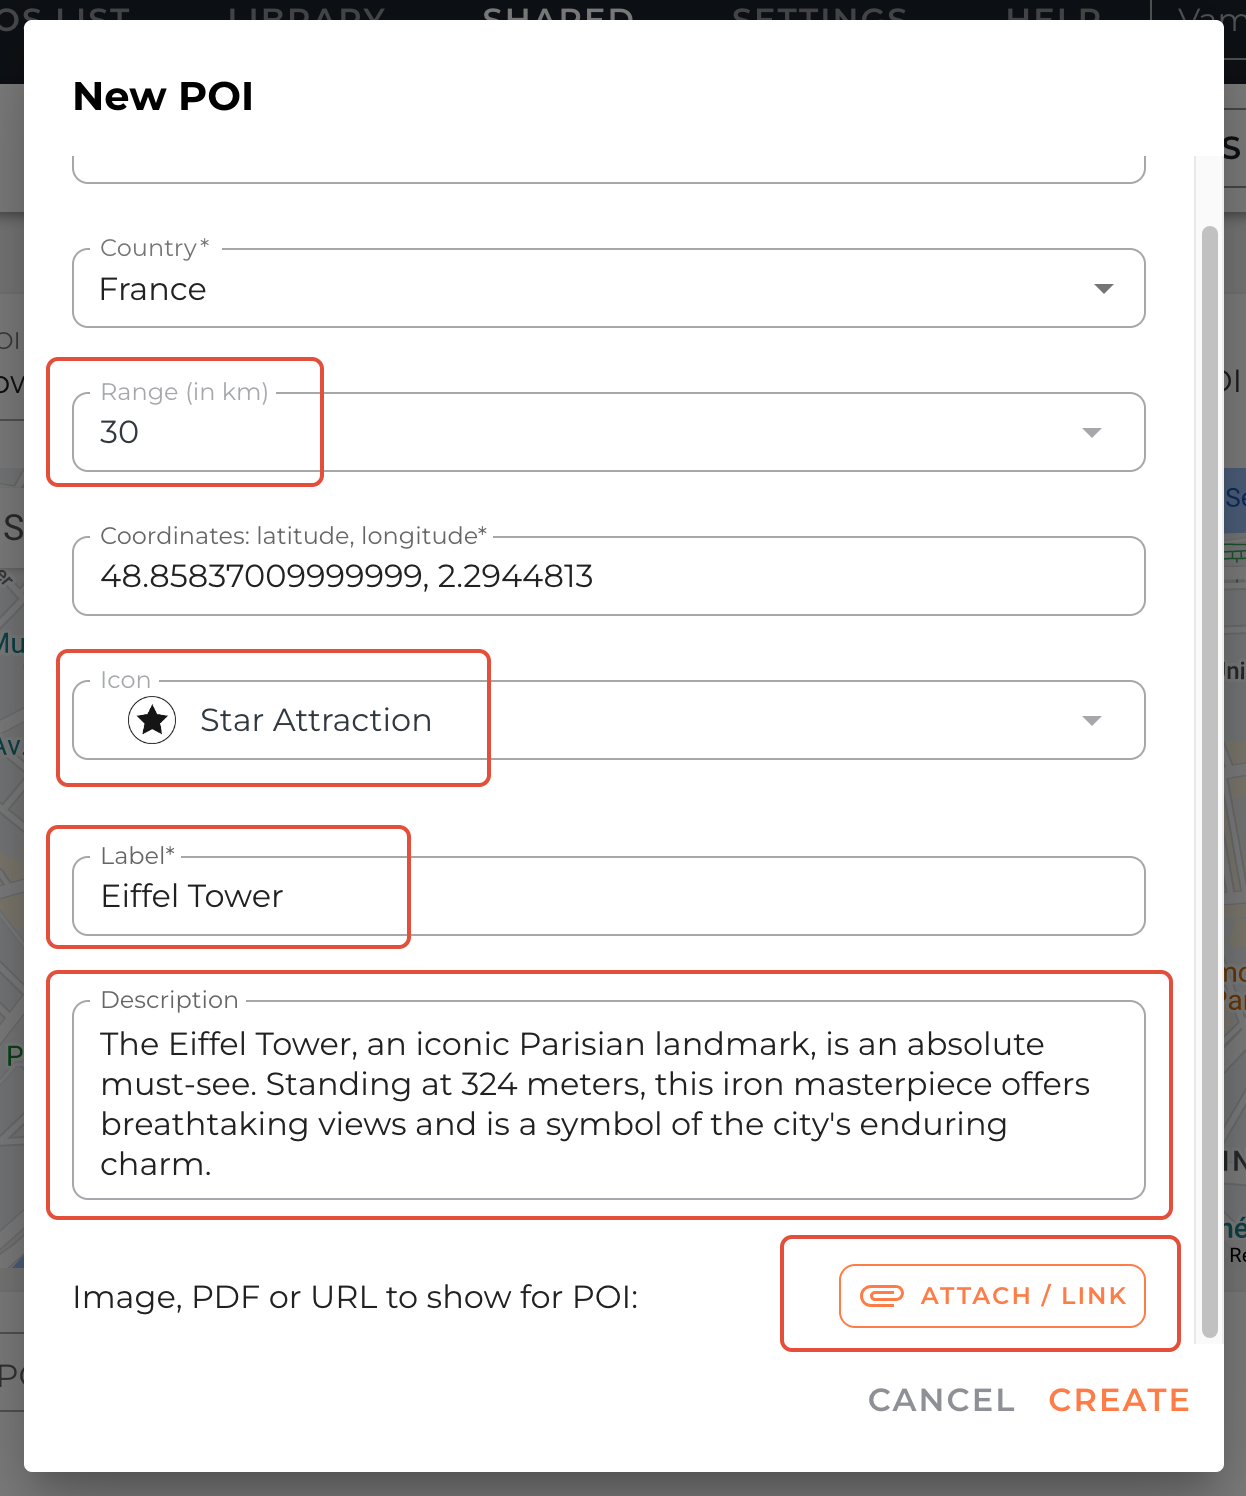
Adding a POI
Go to Shared , then click POI in the top menu bar.
Search for the place in the map-integrated search bar (powered by Google Maps) and select the correct suggestion.
Click Add POI.
A pop-up lets you personalise fields such as:
Range (km): Controls when a POI will show for a trip, based on location range.
Icon: Choose a relevant category to help clients filter (customisable).
Label: Amend the name if needed.
Description: Explain why this place is worth visiting. Be specific — e.g., recommend a dish at a restaurant.
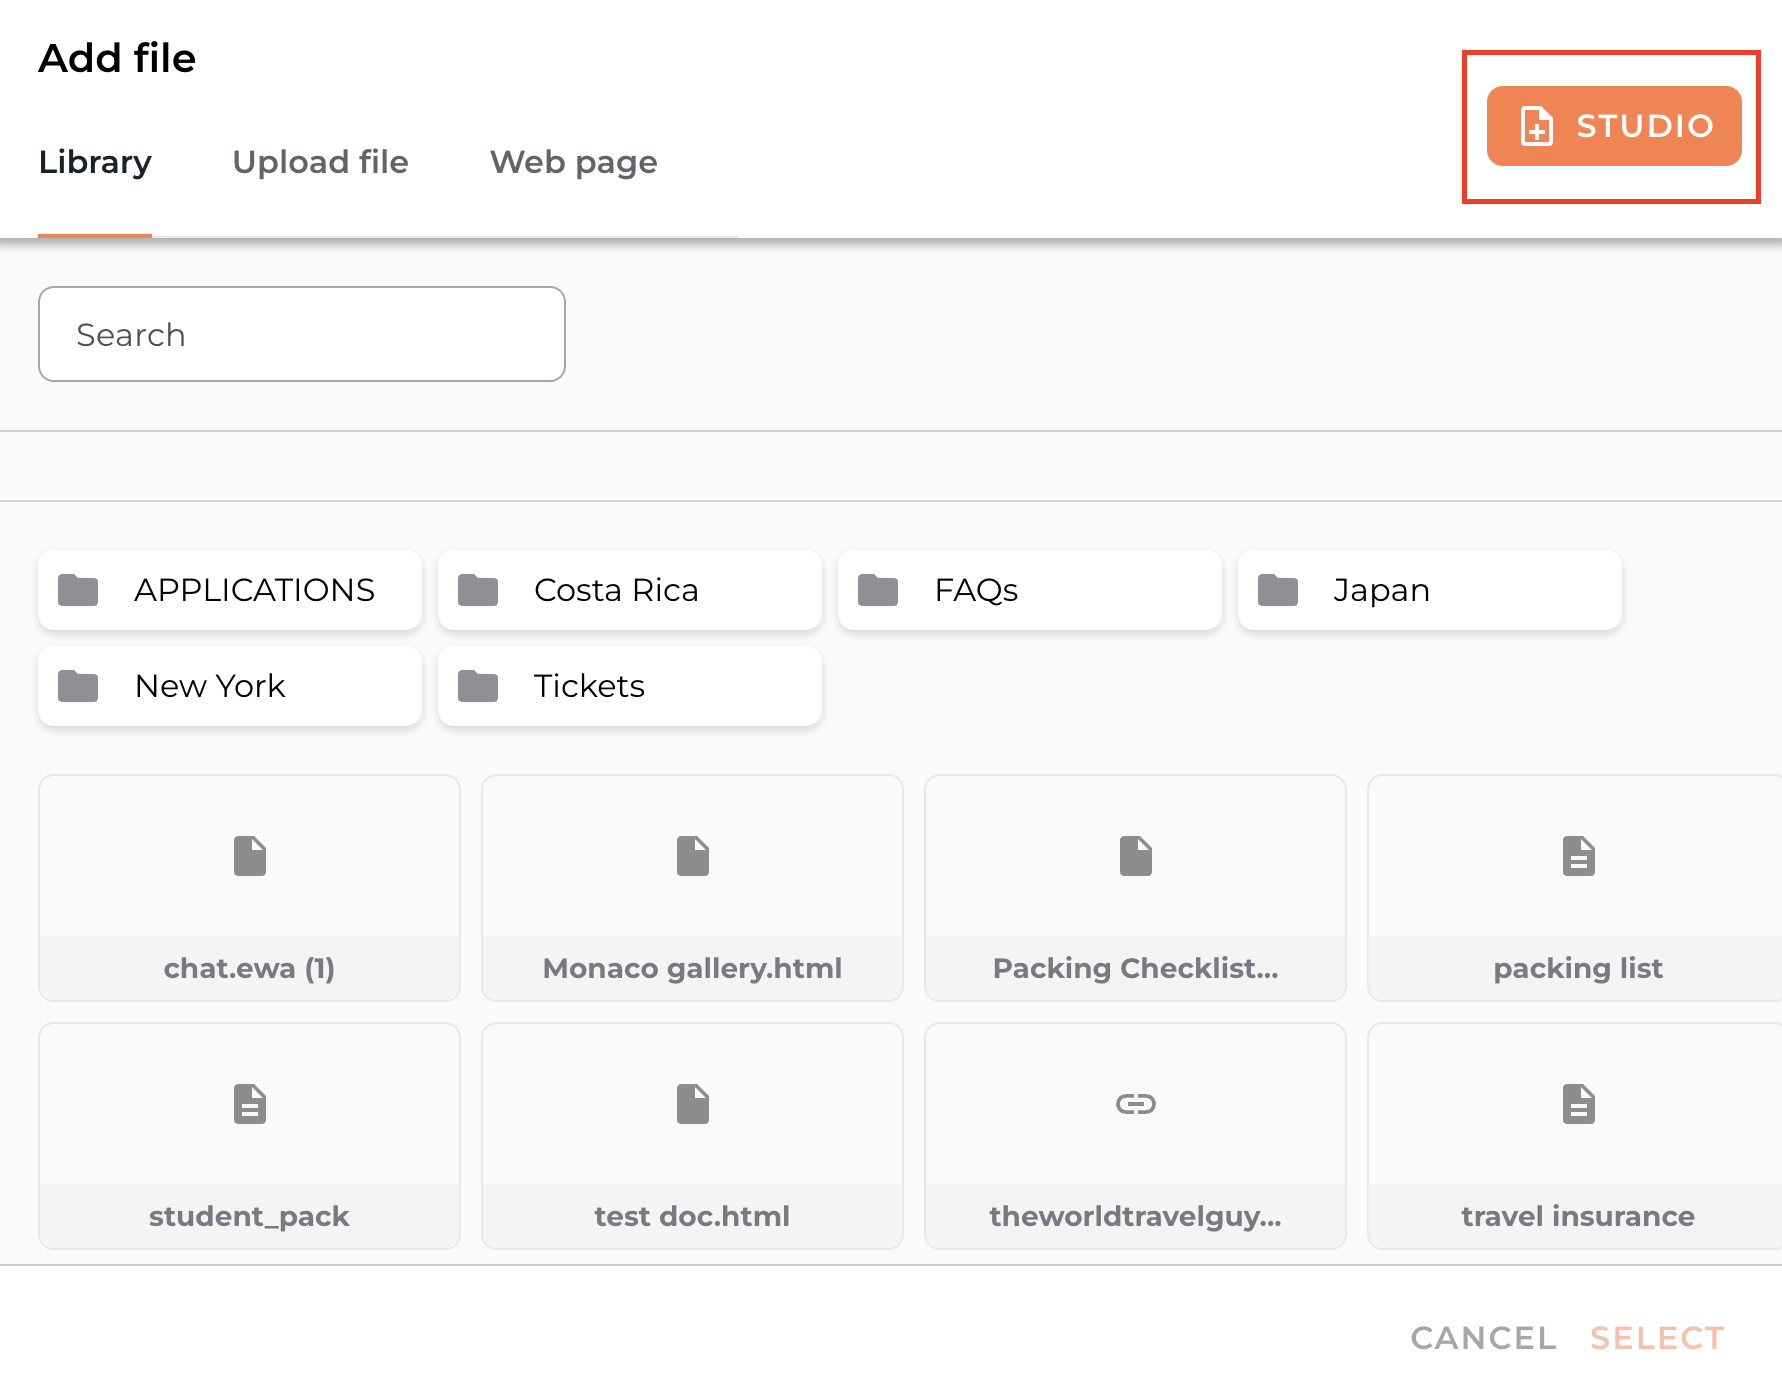
Media: Attach an image, PDF, URL or Studio Document to make the POI more engaging.
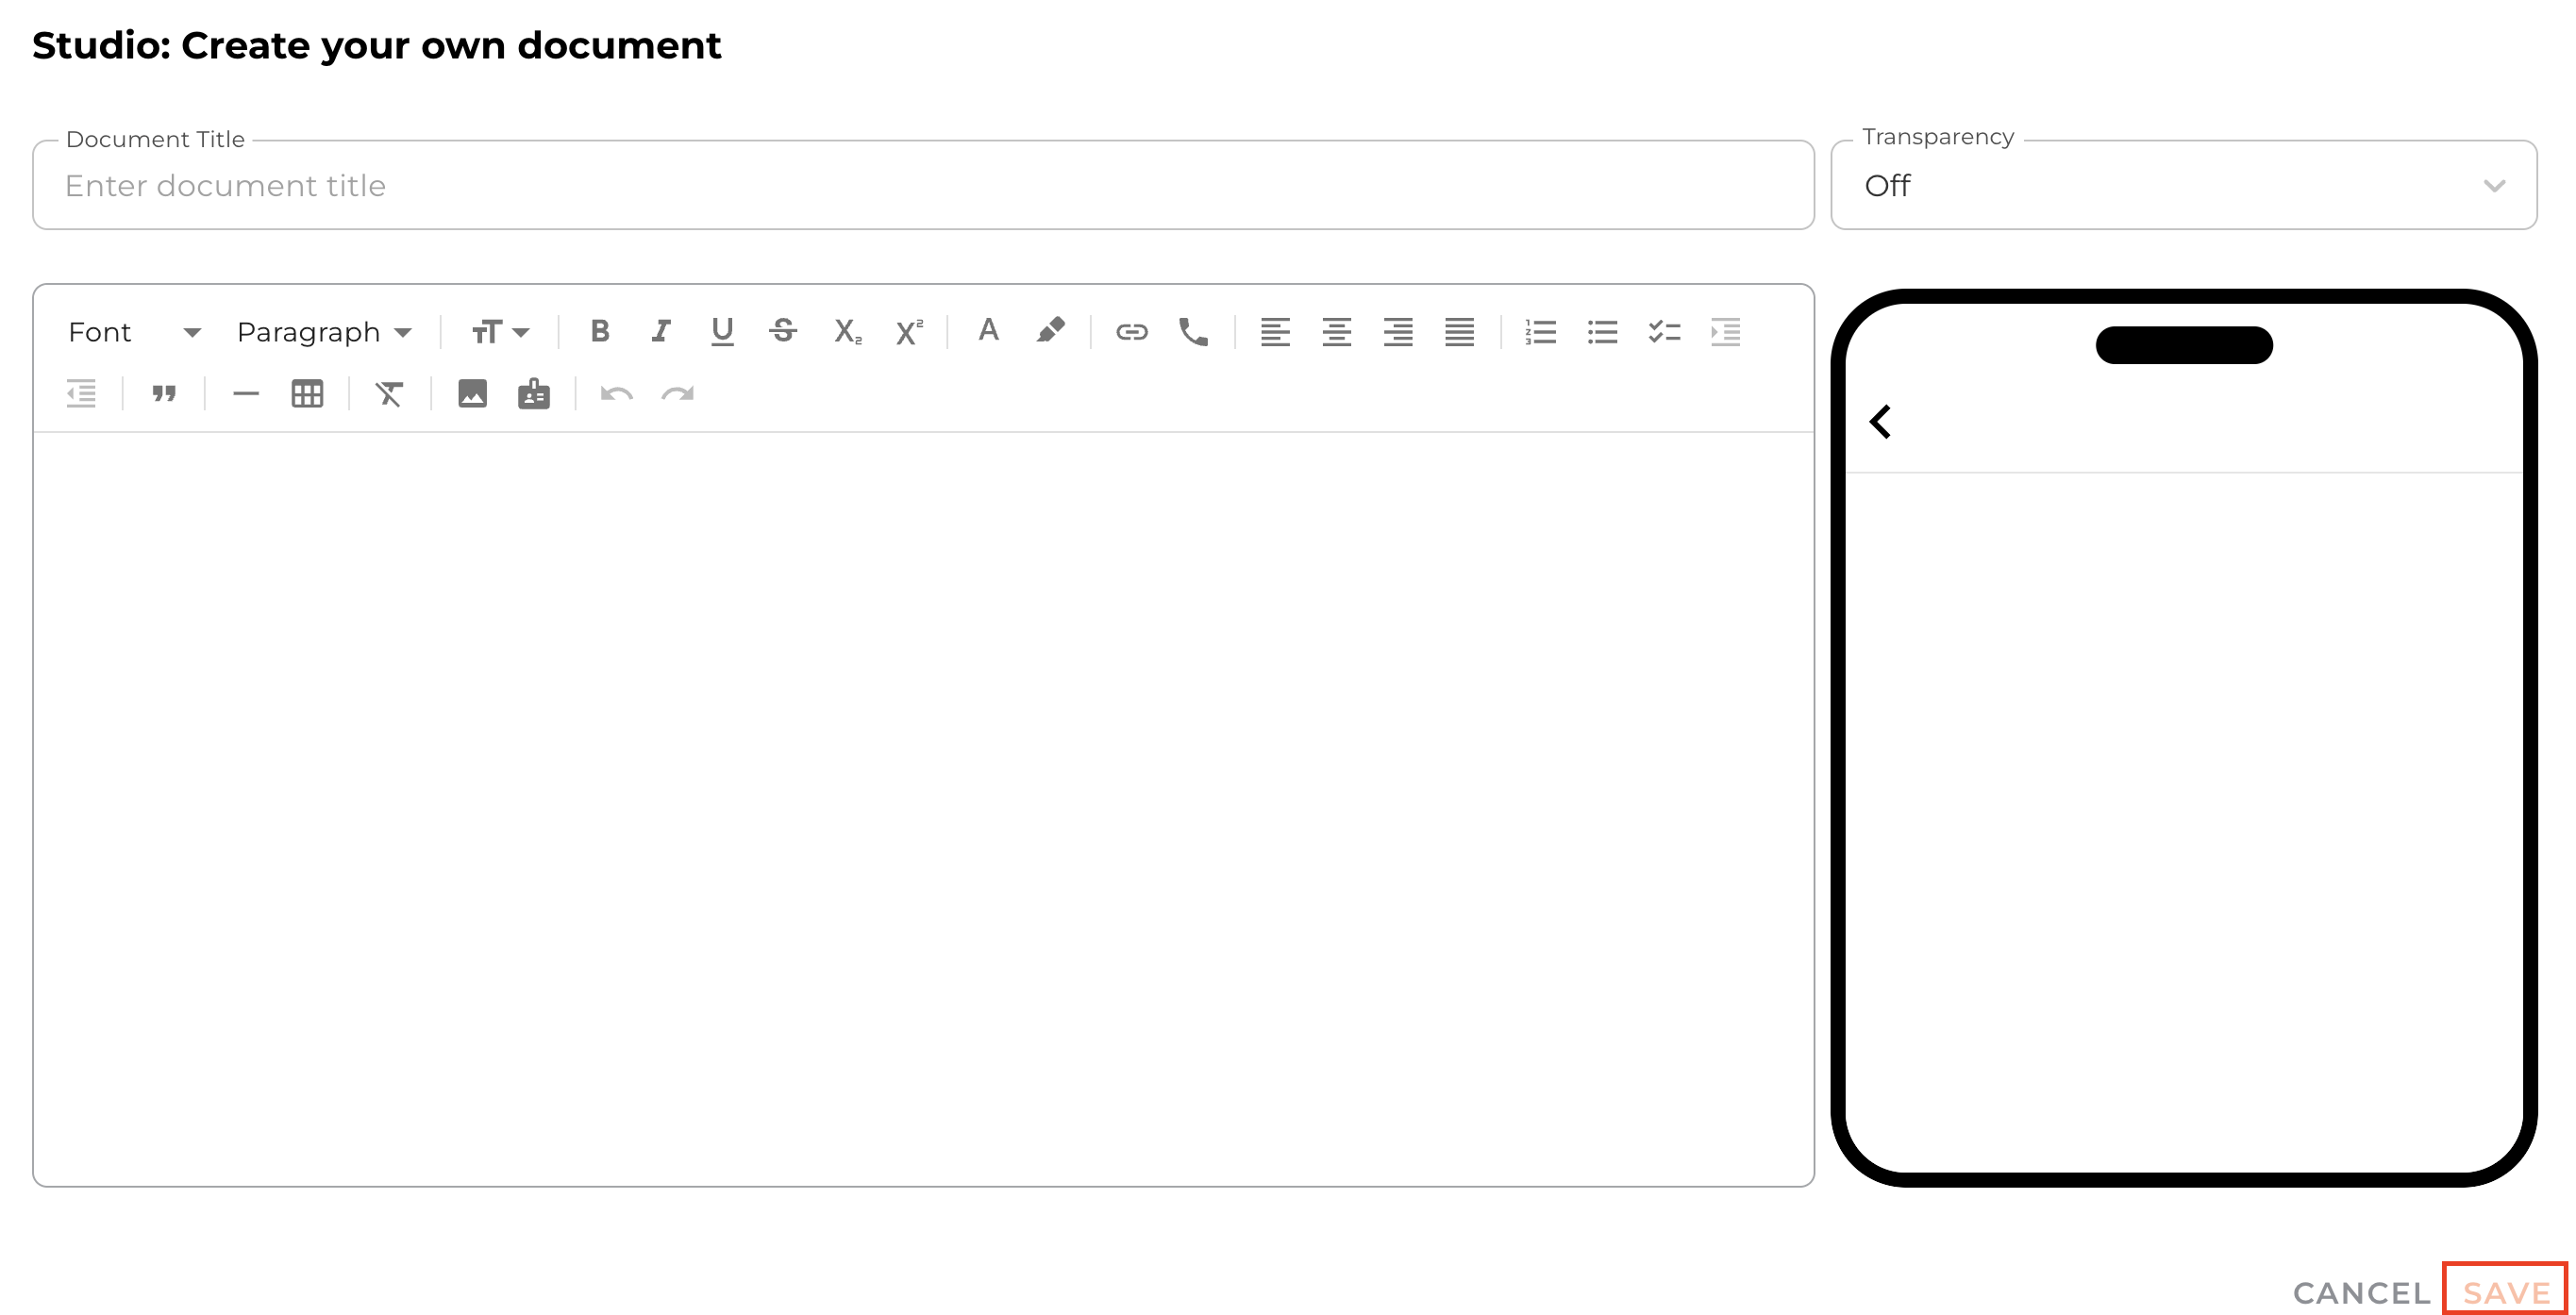
You can create a Studio Document directly in the POI by clicking Studio, create your document and SAVE.
Press Create and your POI will be saved.
Adding a POI by coordinates or dropping a pin
If a POI doesn’t appear in Google Maps search, you can:
Drop a pin: Right-click on the map to drop a pin at the correct location, then follow the same steps to personalise it.
Use coordinates: Click Create POI in the top right, then paste in exact coordinates in the pop-up box.

Renaming POI categories
All POI icon names are customisable. If you can’t find a category that fits, rename it.
Go to Shared → POI → Manage Icons to edit category names.

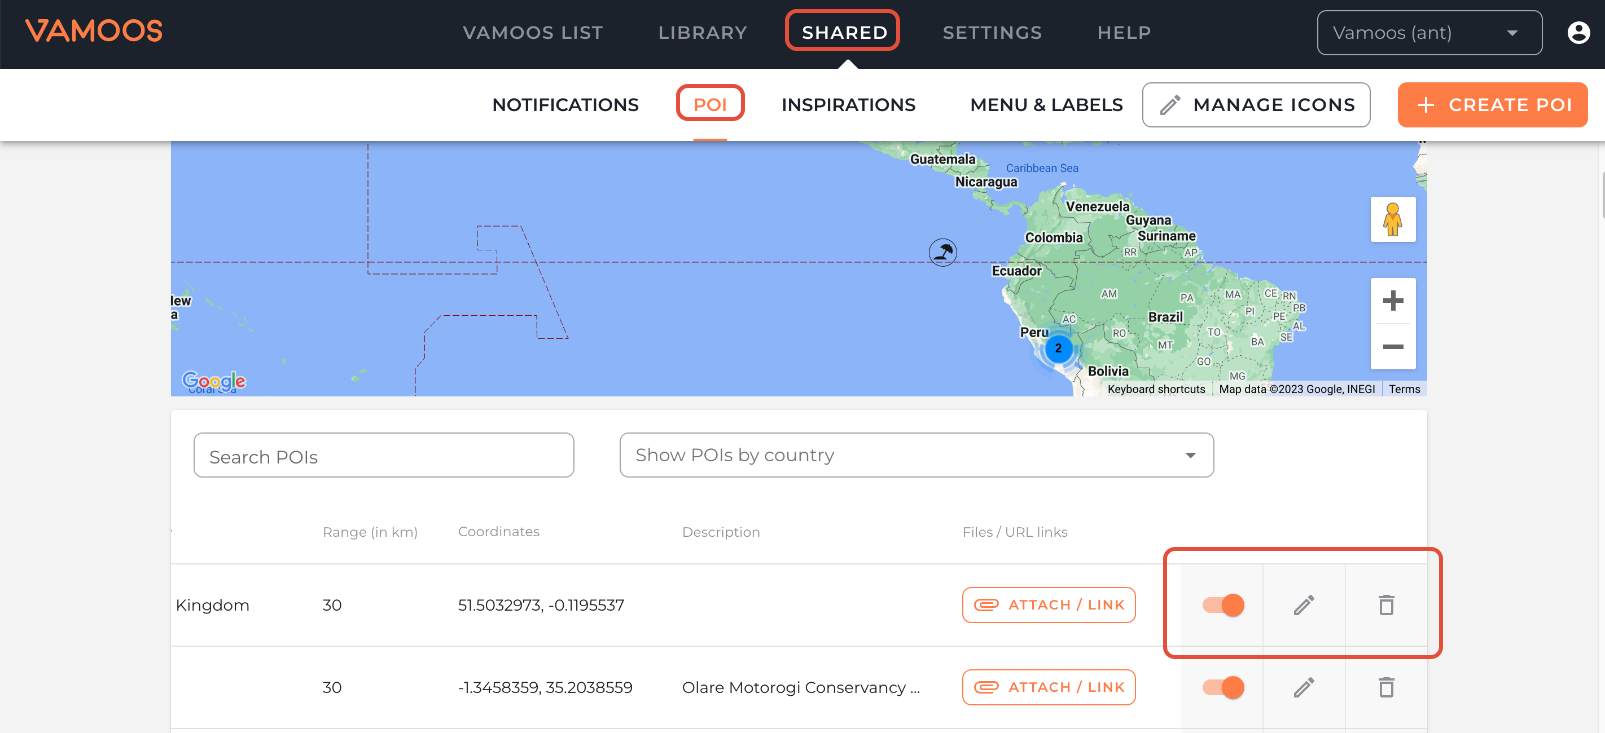
Editing, deactivating, or deleting a POI
Go to Shared → POI and scroll down below the map to view your existing POIs.
Search or filter by country to find the POI you want to manage.
On the right-hand side, you’ll see options:
Deactivate/hide: Toggle the switch off.
Edit: Click the pencil icon.
Delete: Click the bin icon.
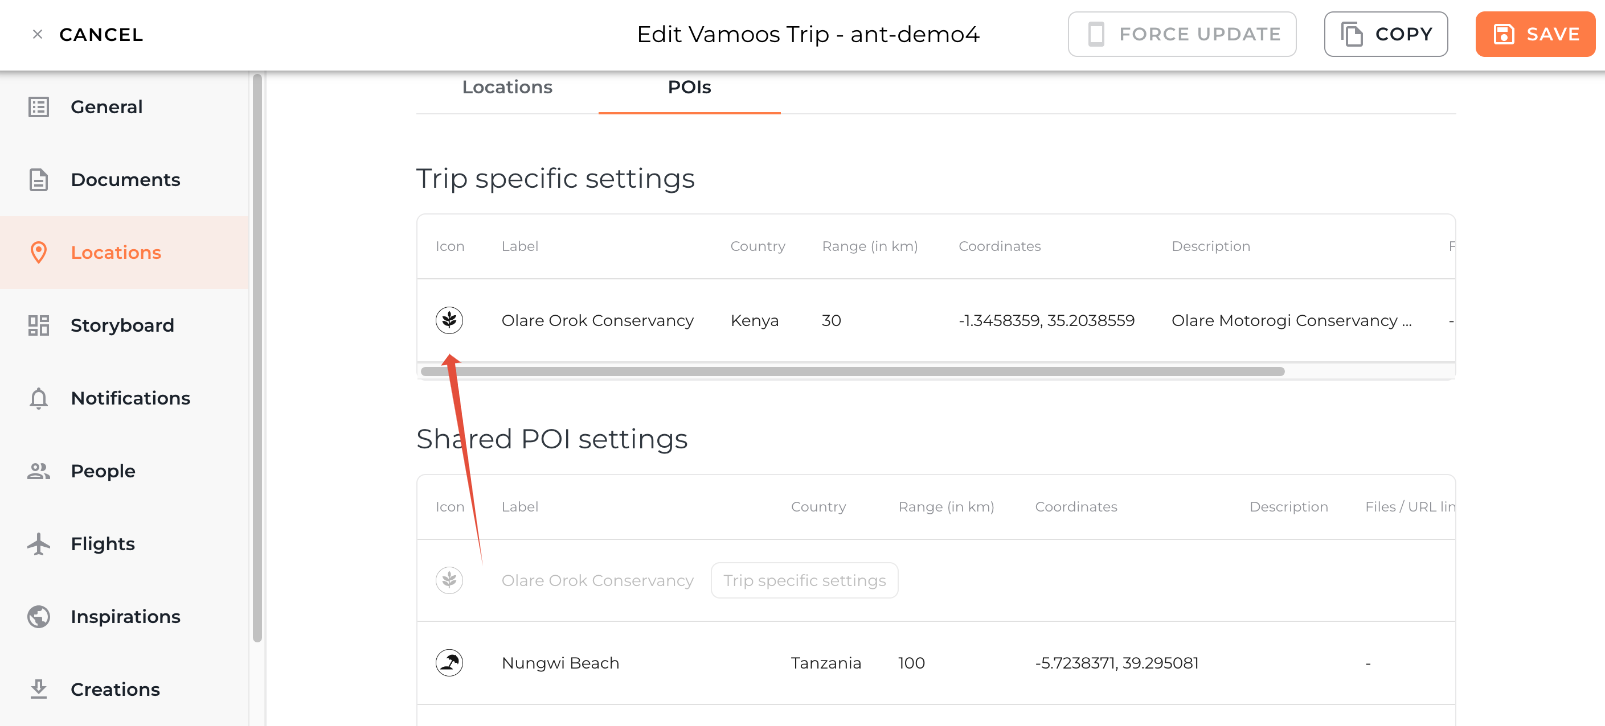
Show or hide POIs for a specific trip
Shared POI settings affect all trips, but you can also control visibility on a per-trip basis.
Open a trip → Locations → POI.
You’ll see:
Trip-specific settings
Shared POI settings
Toggle a POI on/off in Shared POI settings to customise visibility for this trip. It will then appear in the Trip-specific section.
The List & viewing POIs on the app
POIs can be viewed in two ways:
The Map: Default view with icons across the bottom to filter by category. Tap an icon for details, or use the arrow for driving directions.
The List: Optional view that allows clients to sort POIs by distance or type — helpful if you have many POIs.
Enable The List at trip level: Go to General in a trip → toggle Enable the List.
Enable account-wide default: Go to Settings → toggle Show POI list by default.
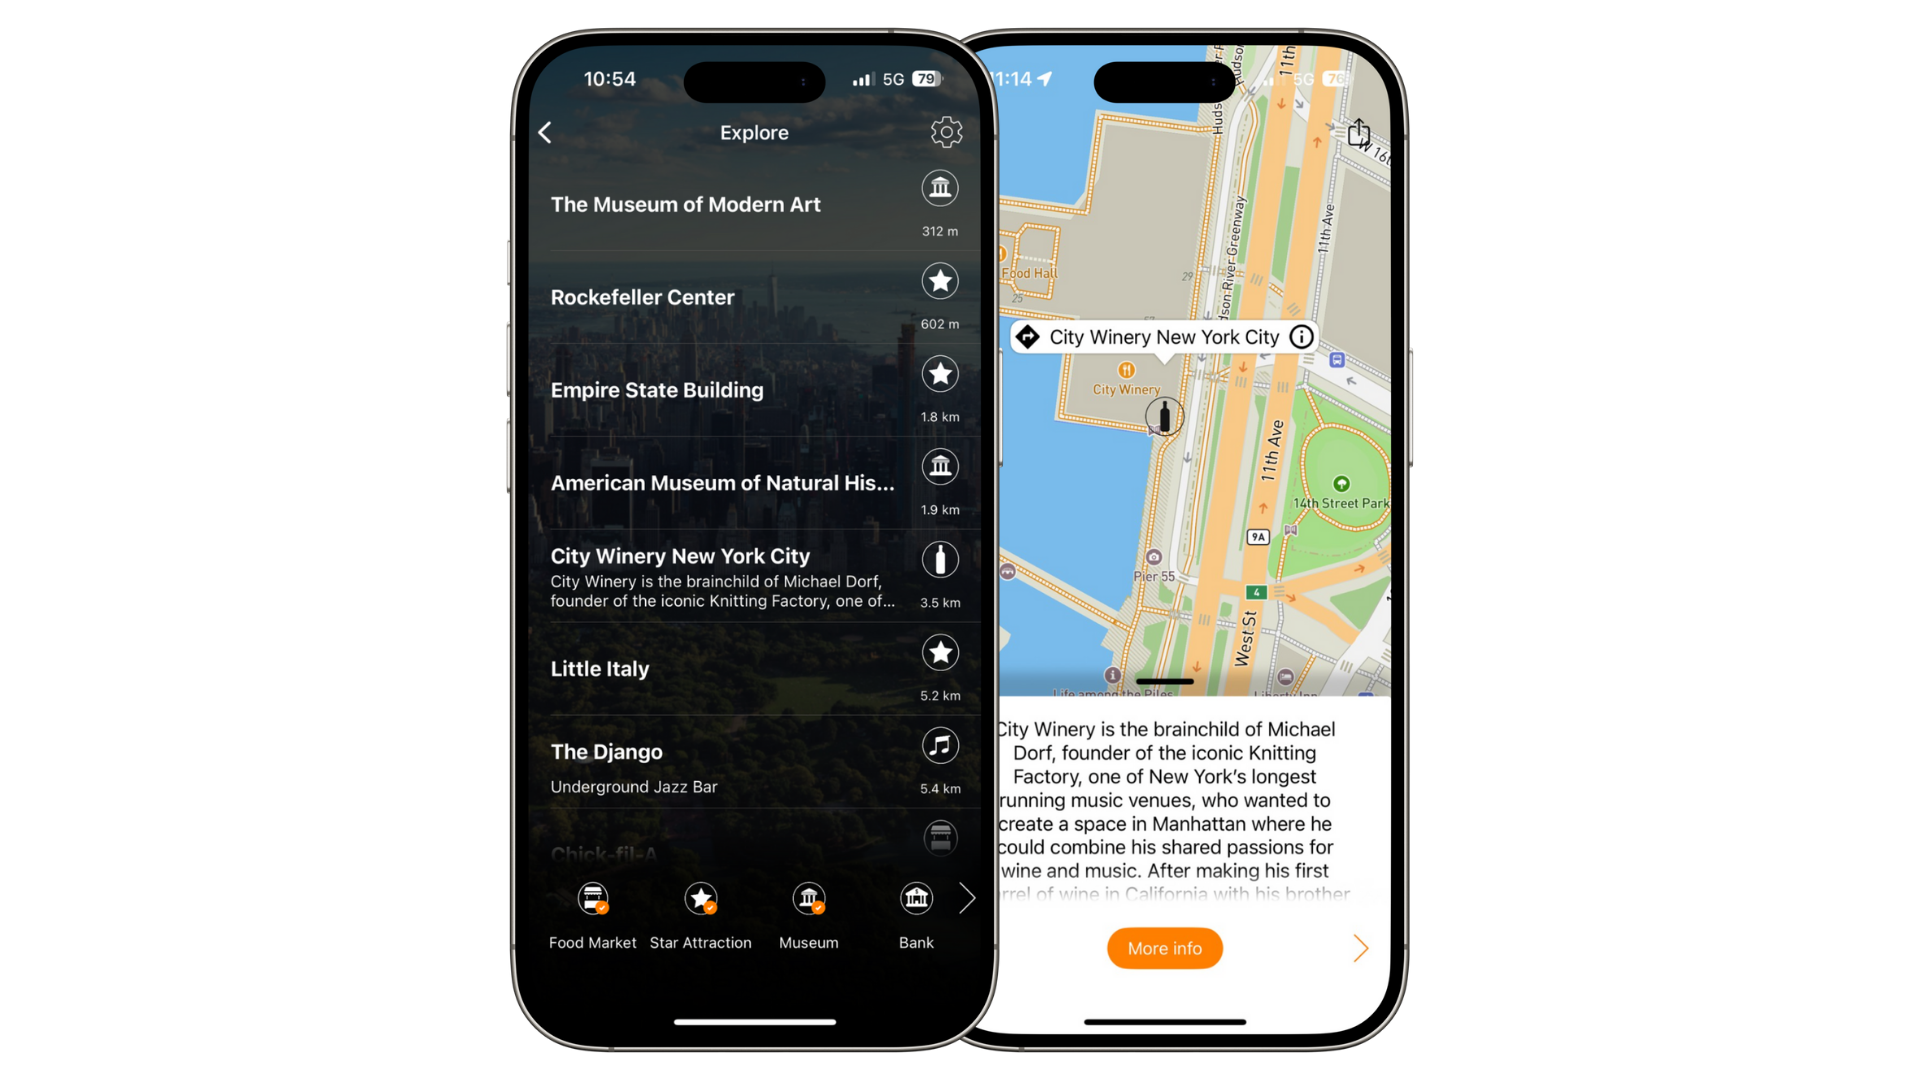
TOP TIP: Rename “The List” to something more engaging like Explore. You can do this in Menu & Labels.
FAQs
Q: Why can’t I see The List on the app?
A: You need at least 5 POIs for The List to show, and it must be enabled in the General section of the trip.Q: Do POIs work offline?
A: Yes, as long as the maps have been loaded once while online.
If you have any further questions or need help with this, contact us at support@vamoos.com.