
Storyboard: add your day-by-day itinerary
✅ For Travel Companies
The Vamoos Storyboard is a brilliant feature that lets you create visually stunning and interactive itineraries for your clients. The paper itinerary is a thing of the past!
In this article:
Introduction to the Storyboard
Vamoos Storyboard allows you to create a visual and interactive day-by-day itinerary.
Upload as much or as little information as you’d like for travellers to easily access and view during their trip.
Add beautiful images and link locations for each day (or section) so travellers have a preview of their trip and know where they need to go.
Add day-specific documents that are relevant to the activities your travellers are doing that day (vouchers, tickets etc).
How to view the Storyboard
The storyboard content can be displayed in two ways in the app:
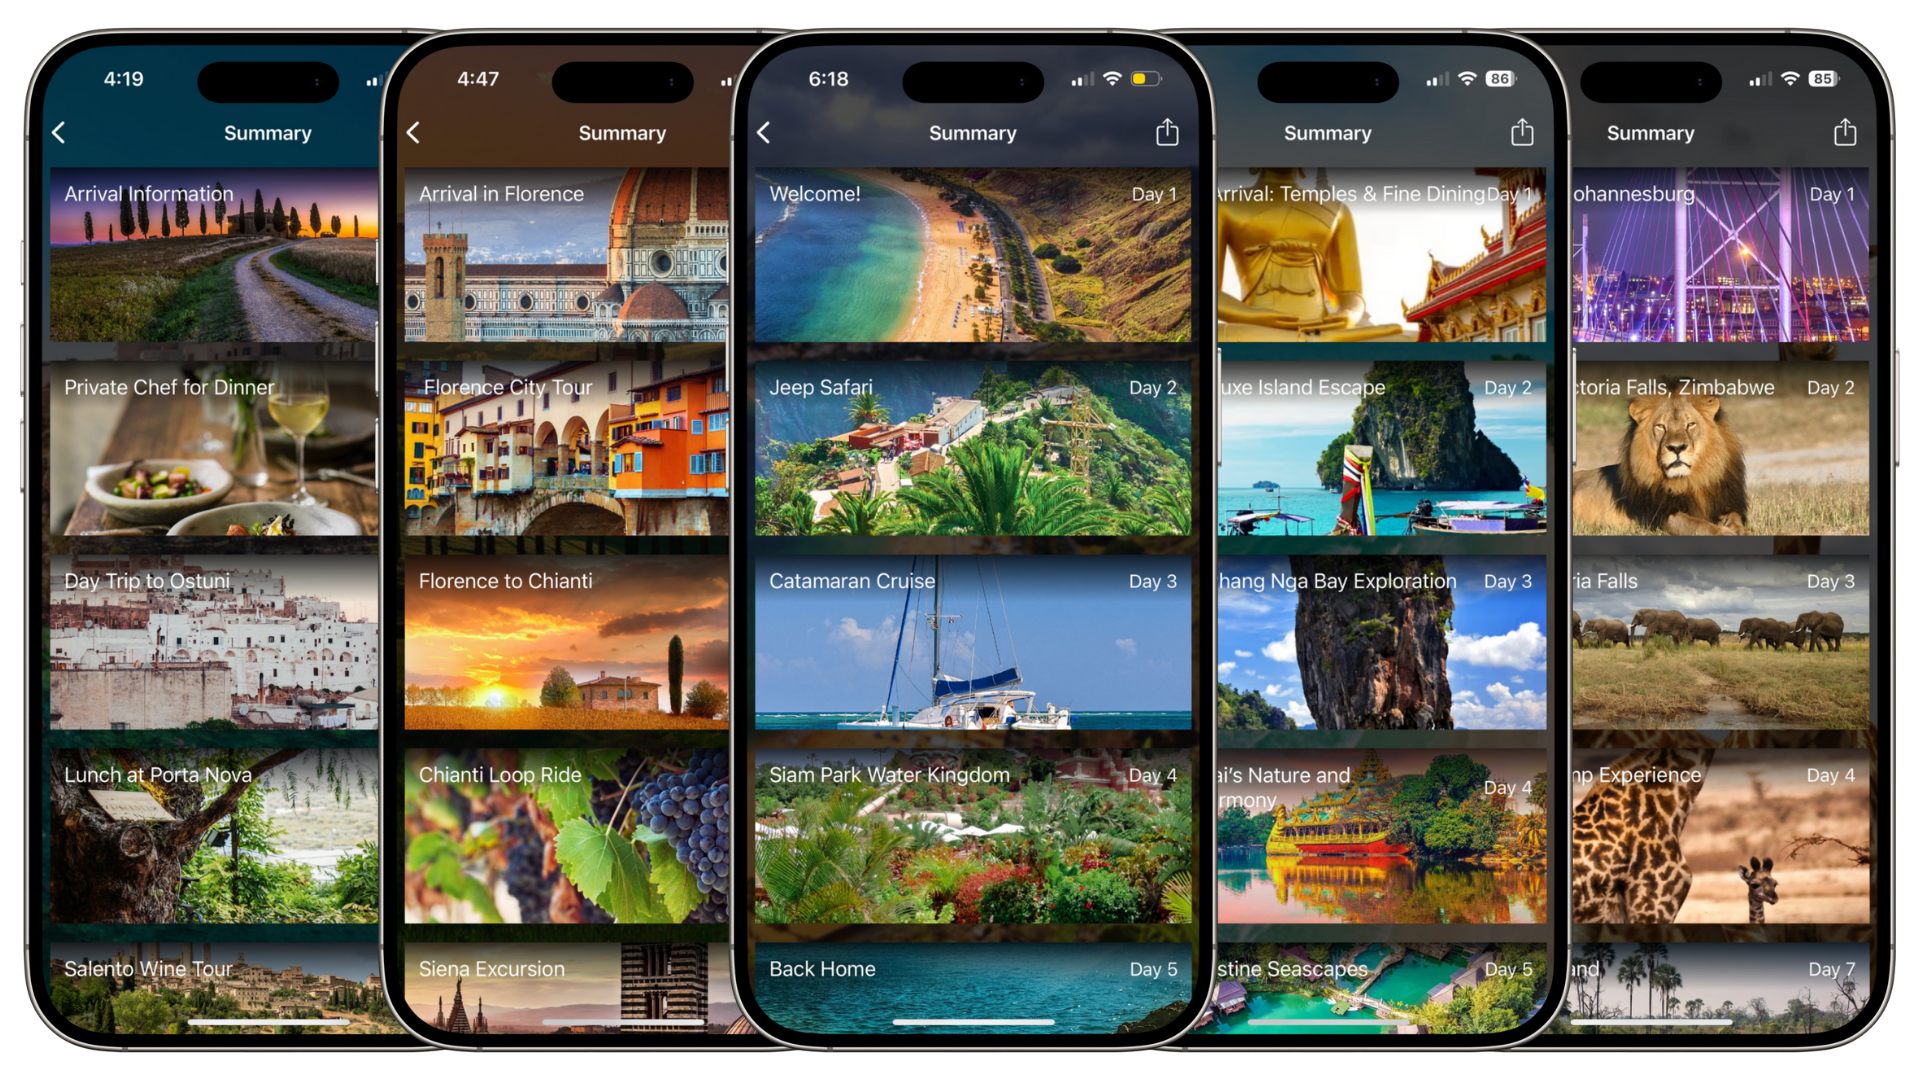
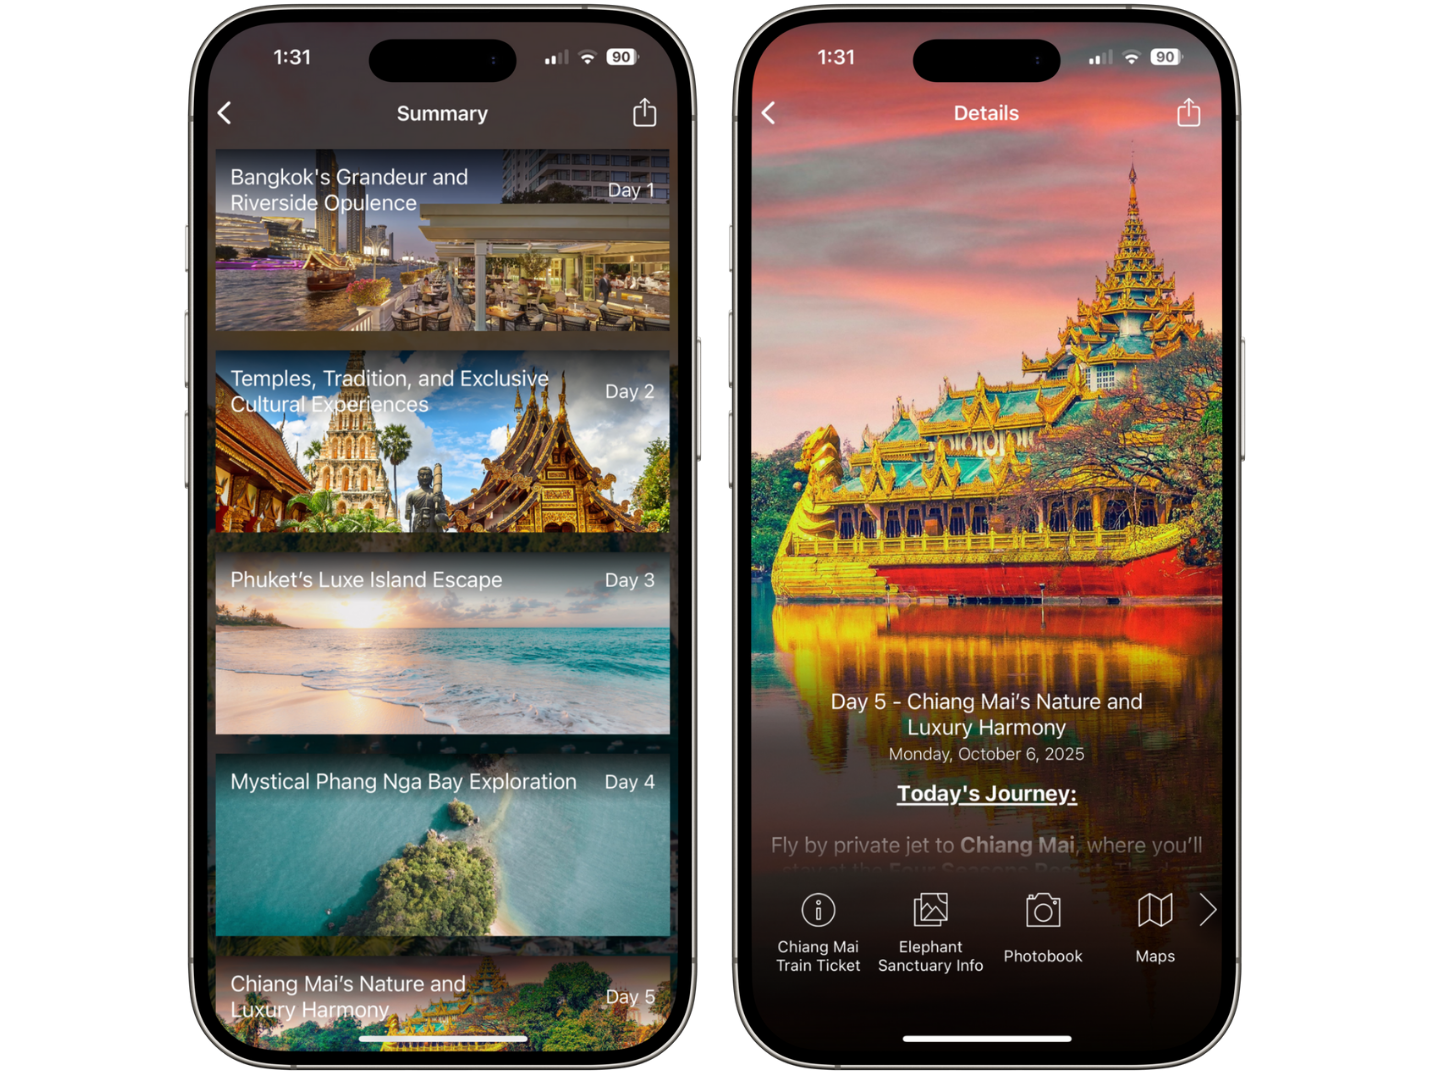
Summary View: This presents the content in an image-led list. It will provide a visual overview of the itinerary for the user showing just day titles & numbers (left screenshot).
Detailed View: This provides a detailed view of a specific day of the itinerary. The user can see full information relating to that day (right screenshot).
Select which view you’d like to show on the app via the dropdown in the Storyboard section of a trip.

TOP TIP: Change your account default in Settings → General → Default Storyboard Settings.
How to use the Storyboard
Go to your Vamoos List, create a trip, and select Storyboard in the left-side menu.
Press ADD to create a blank frame and start filling your information.
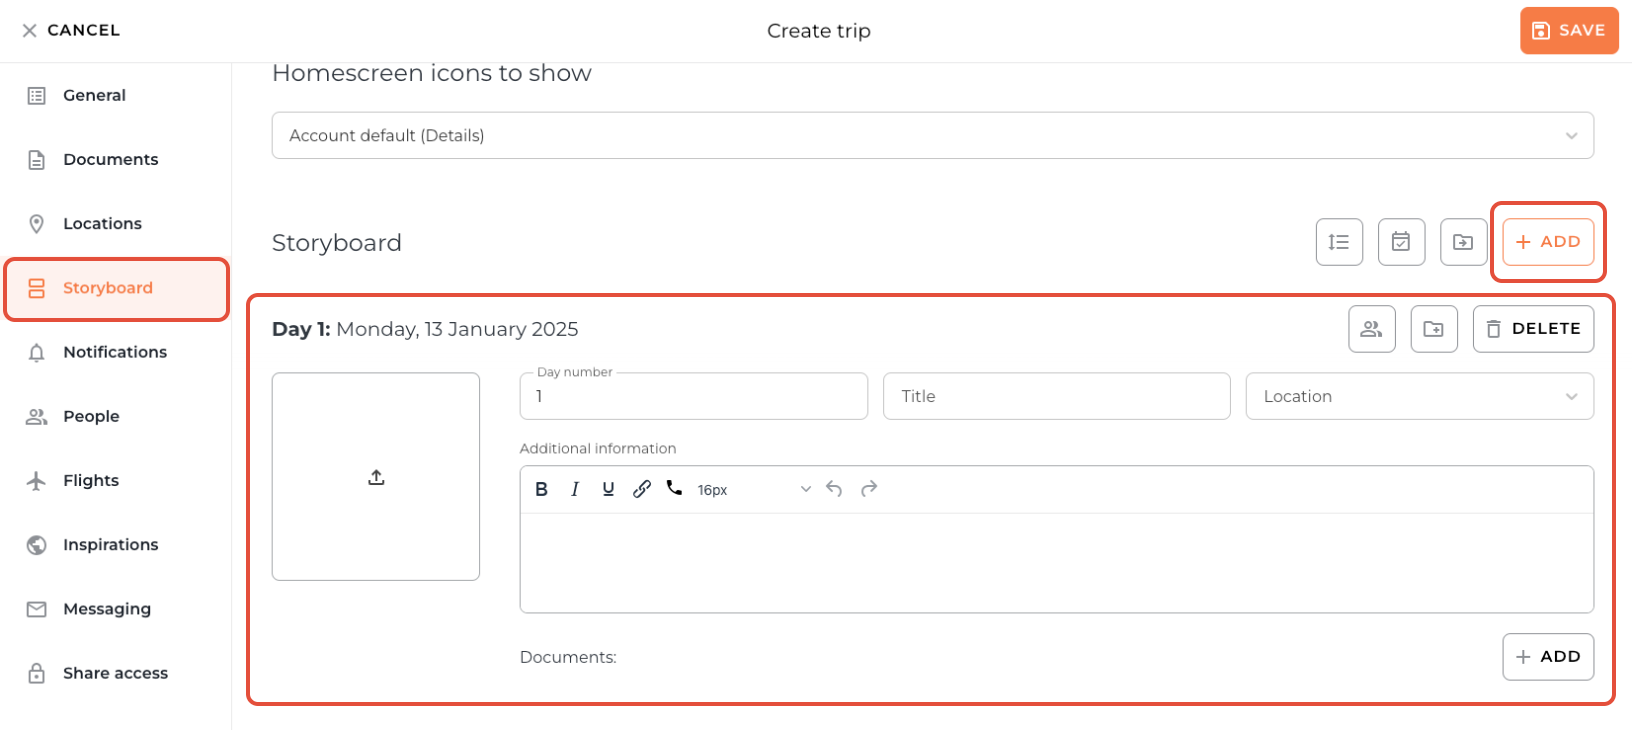
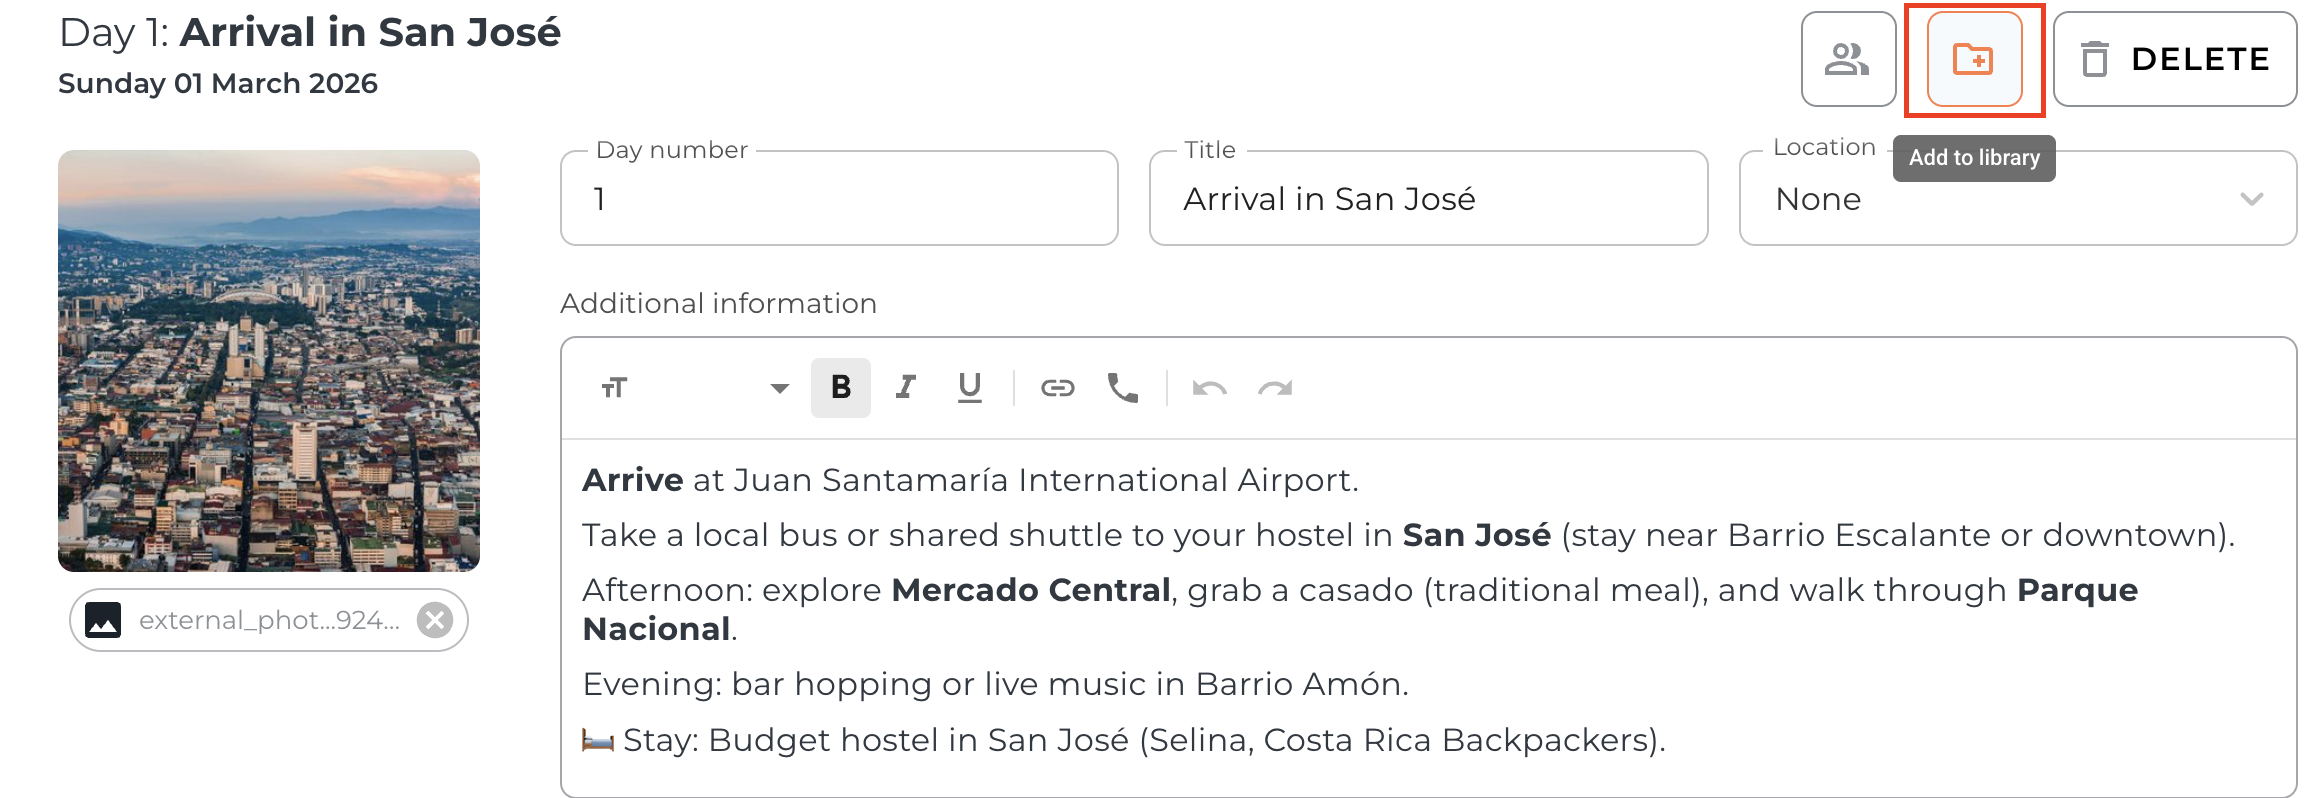
Day Number: link frames to days of the trip (you can add multiple frames per day).
Title: give each day a title (Activity, location etc).
Location: link each Storyboard frame to a location. This will automatically pull through PDFs/URLs attached to the location. By default, this document/link will appear under an icon named Accommodation. You can change this in the Menu & Labels section.
Documents: Add day-specific documents or links (e.g. e-tickets, background reading, playlists, confirmations).
Additional Information: add your full description of what that day or section of the trip will include. You can also use the formatting tool bar to hyperlink and highlight key information.
Background Image: press the square upload image icon to add your image. This image will be displayed on both the Summary and Details view of the Storyboard. Images can be png, jpeg or jpg, and our size recommendation is 2048 x 2048 px
Top Tip: Read our advice for choosing great storyboard imagery here.
Adding documents to the Storyboard
You can also add day-specific documents or links to storyboard frames.
These can be anything you would like that is relevant to what your travellers are doing on that day (e.g E-tickets, Background Reading, Spotify Playlists and Booking Confirmations.
To add a document to a Storyboard day, use the + ADD button.
You can choose an Icon and give it a Title.
To attach a PDF, URL link or Studio Document, press the Attach / Link button.

You can create Studio documents in the Storyboard by clicking Studio, create your document and SAVE.
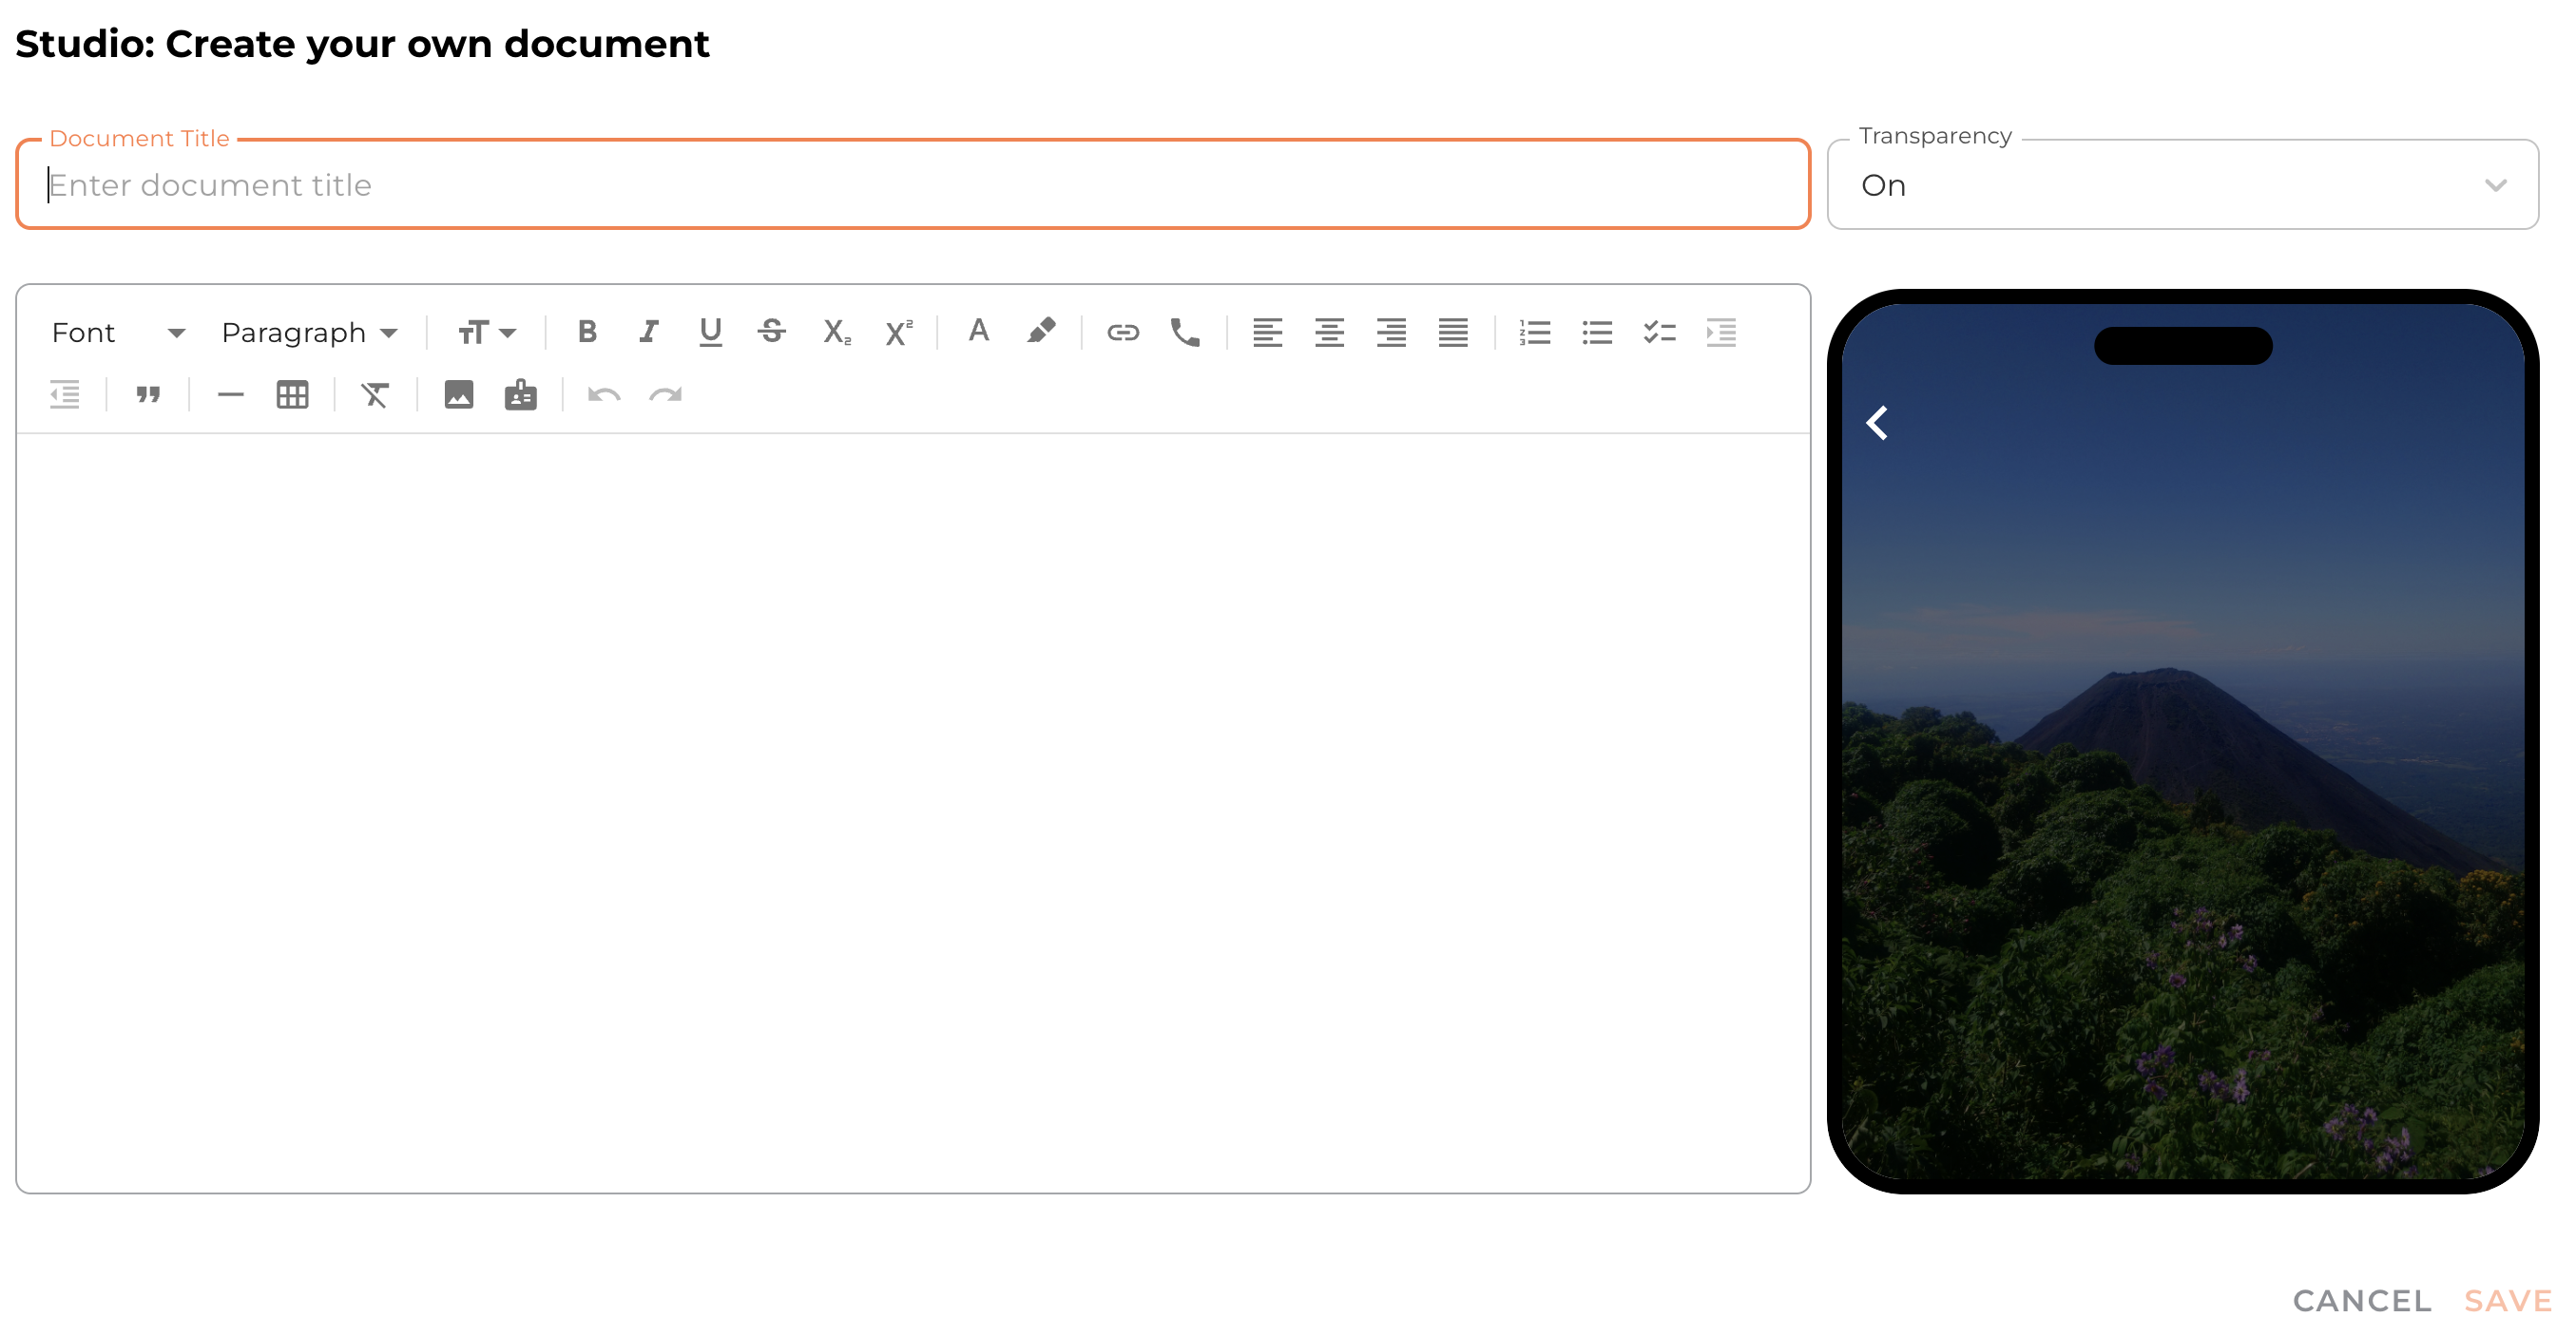
To change the background, select from the Transparency menu. When transparency is on, the Storyboard image will be the background. When transparency is off, the background will be white.
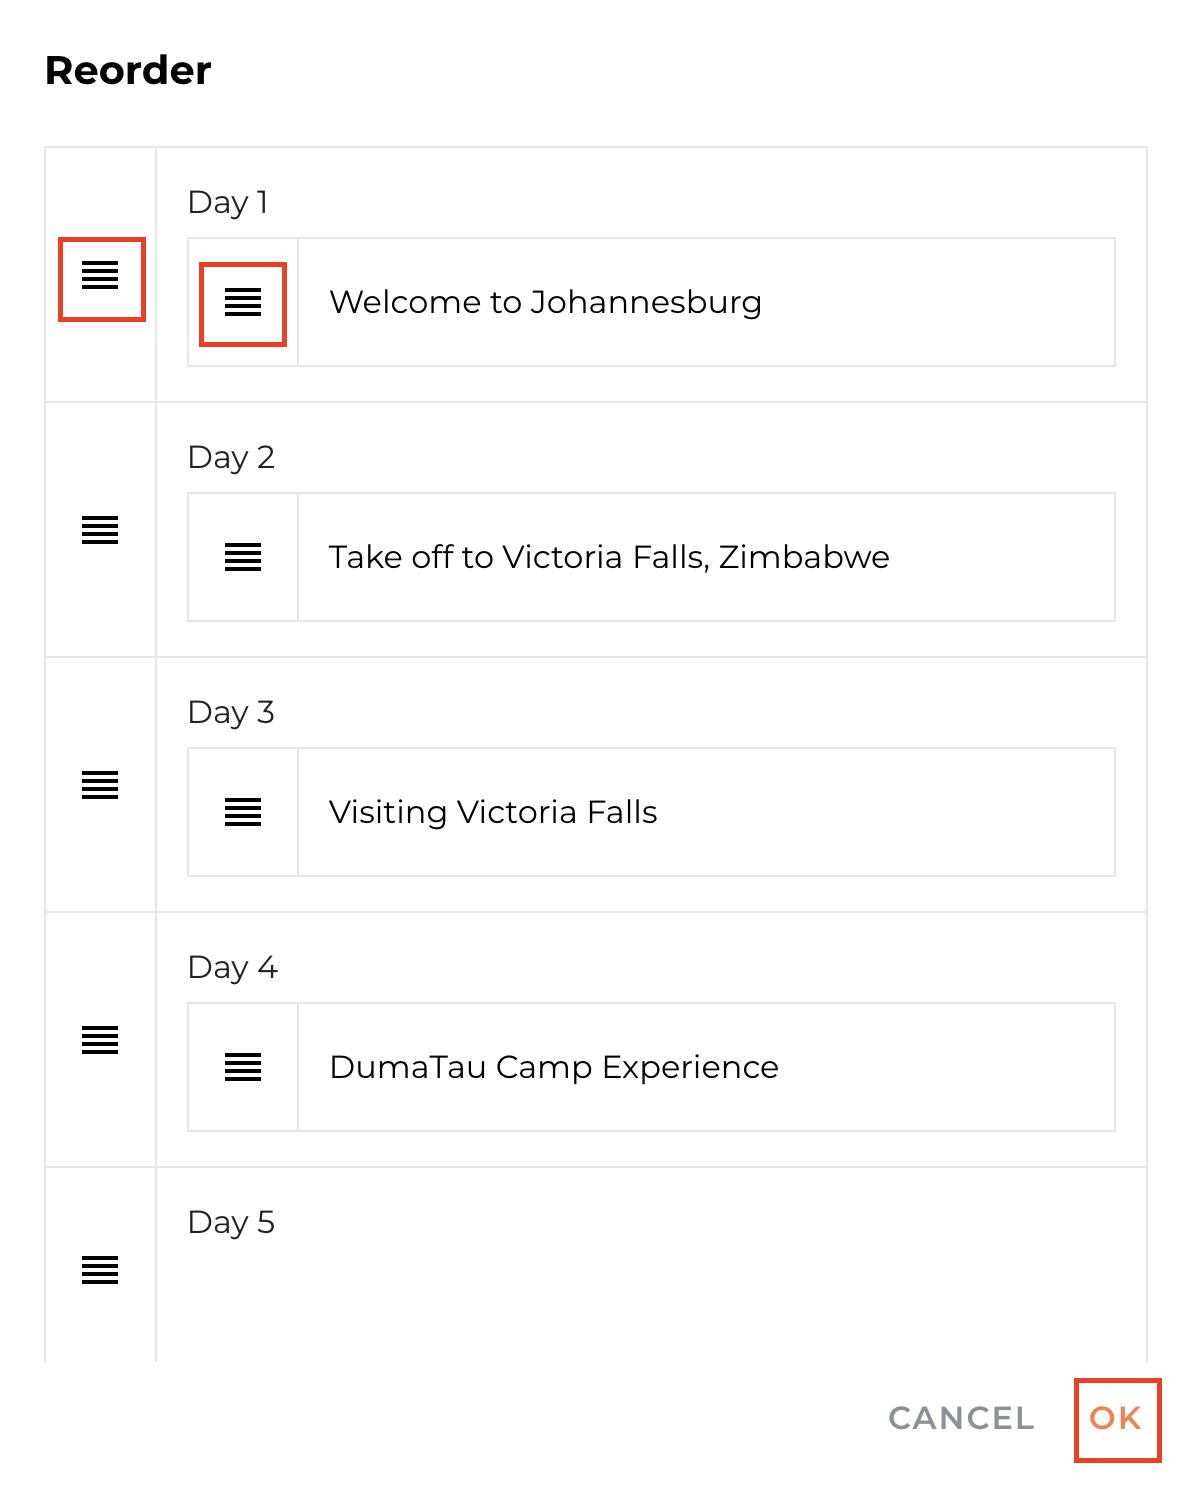
Reordering Storyboard days
You are easily able to accommodate changes to the itinerary by dragging and dropping the Storyboard frames.
Click the Reorder button in the toolbar.
Drag and drop frames to reorder days or move frames within a day.

Hiding dates on the Storyboard
Use the Hide Dates button in the toolbar to not show day numbers and dates.
Useful for resorts or villas where the Storyboard is more about showcasing range of facilities and activities in the area rather than day-by-day itinerary.
This is also great for events as you can use the frames to include agenda, speakers list etc.

The Storyboard Library
Storyboard Library allows you to save frames and re-use it for future trips therefore saving time.
Once you have created a storyboard frame, click Add to Library button.
Give saved frame a name and select a folder to save it in, and press Create.
To use it later, go to Storyboard → Add from Storyboard, and select the saved frame(s). These will be added in the order that you have selected them.

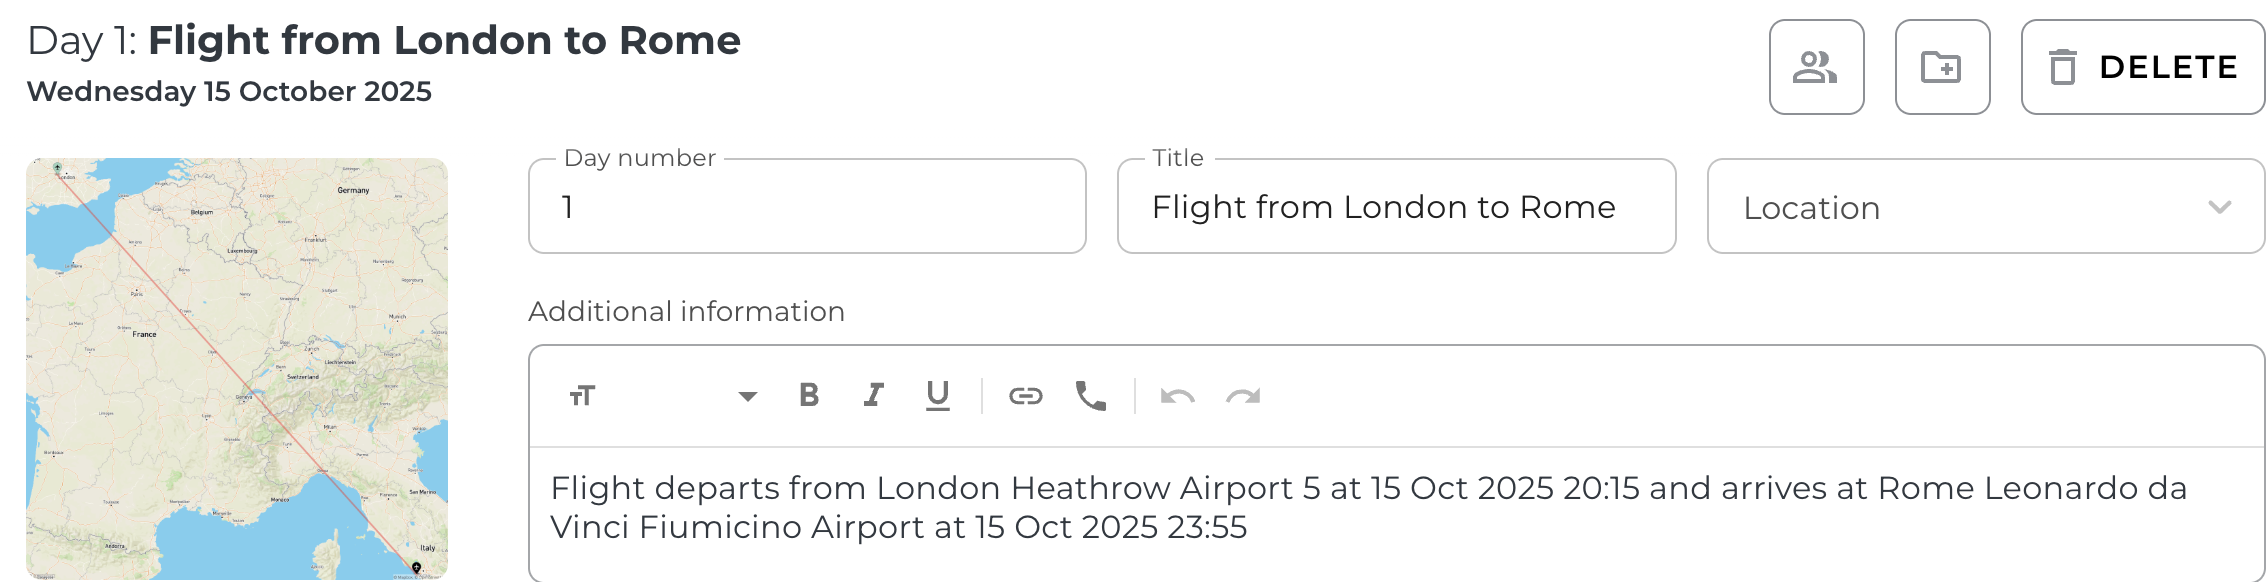
Adding flights directly to the Storyboard
You can add flights directly to the Storyboard and automatically creating a frame for each flight.
They’ll also appear in the Flights section too.
Click Add to Storyboard, select Flights, search by airline code, flight number & date, press Select.
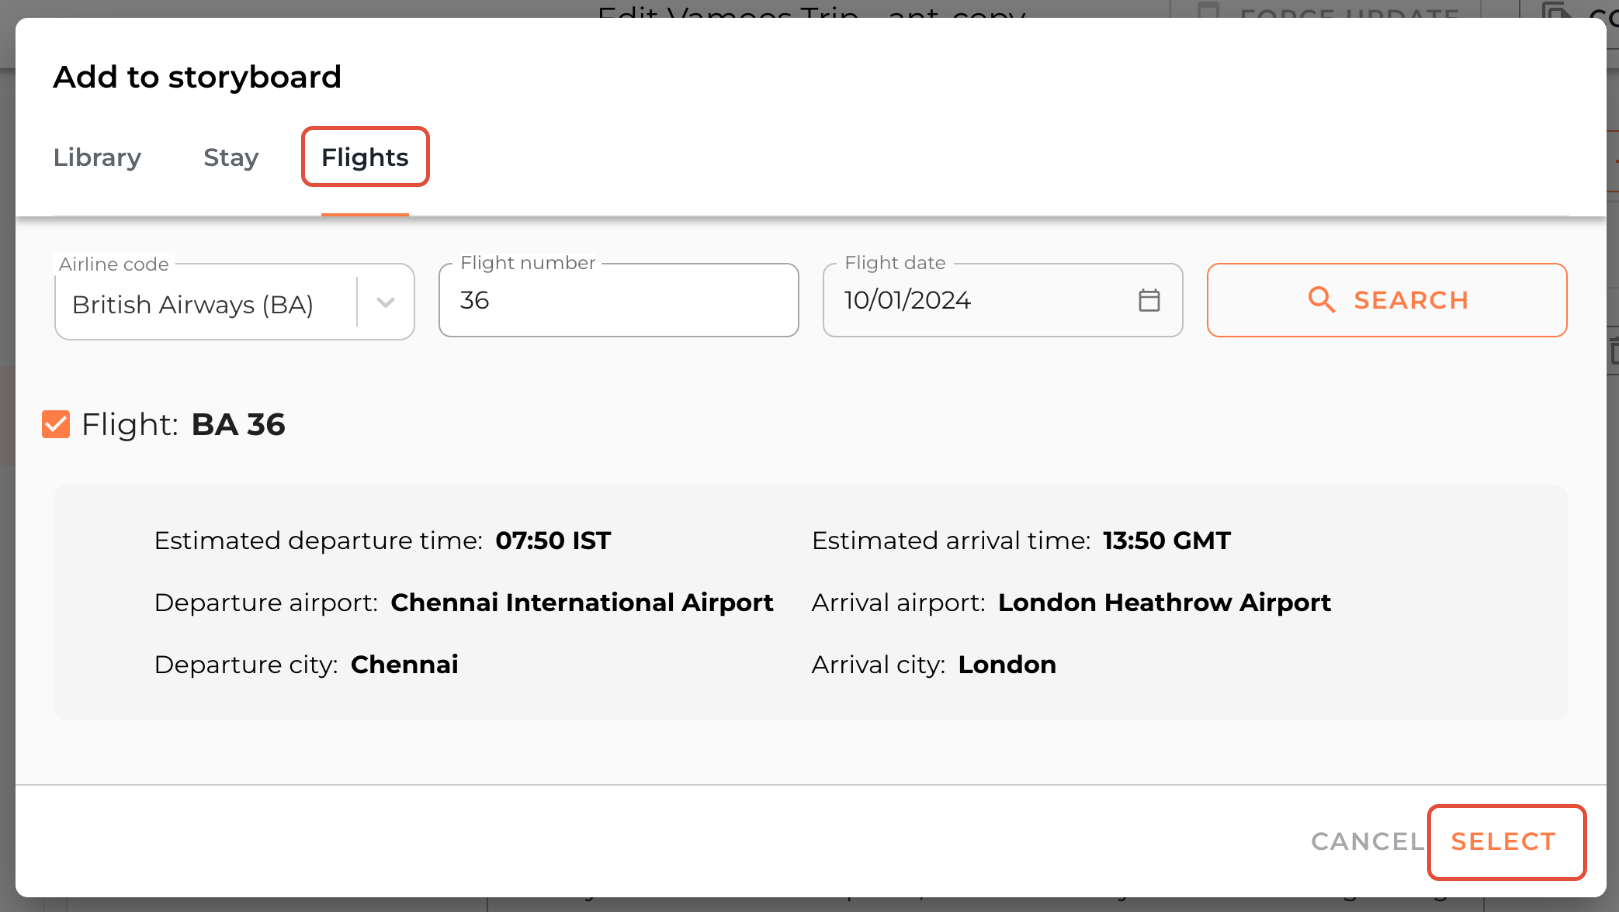
A frame with an image of flight map and details will be added. You can edit this frame and add more information if required.
Adding a Vamoos Connect property to the Storyboard
You have the option to add a Vamoos Connect property and it's content directly to a storyboard frame. Read more about Vamoos Connect here.
Click Add to Storyboard, select Stay, then search for a Vamoos property you have used, or filter by country to browse.
Select the property on the map and press Add Stay.
A new storyboard frame will be automatically generated with an image and the description of the stay, which is stored in our database.
FAQs
Q: Can I update a saved storyboard day?
A: Yes you can! Save your updated Storyboard day with the same name and it will override and update the existing one.Q: Can I add more than one frame under the same day?
A: Yes, just enter the same day number on multiple frames.Q: Can I show dates on some days but hide them on others?
A: Yes! Put a # in front of the text on the 'Day Title' section of the Storyboard frame.
If you have any further questions or need help with this, contact us at support@vamoos.com.